Общее
В этой статье я хочу рассказать о системе оркестрации и автоматизации Cloudify и привести пример установки её внутрь облака OpenStack, текущей версии IceHouse и последующего разворота тестового приложения.

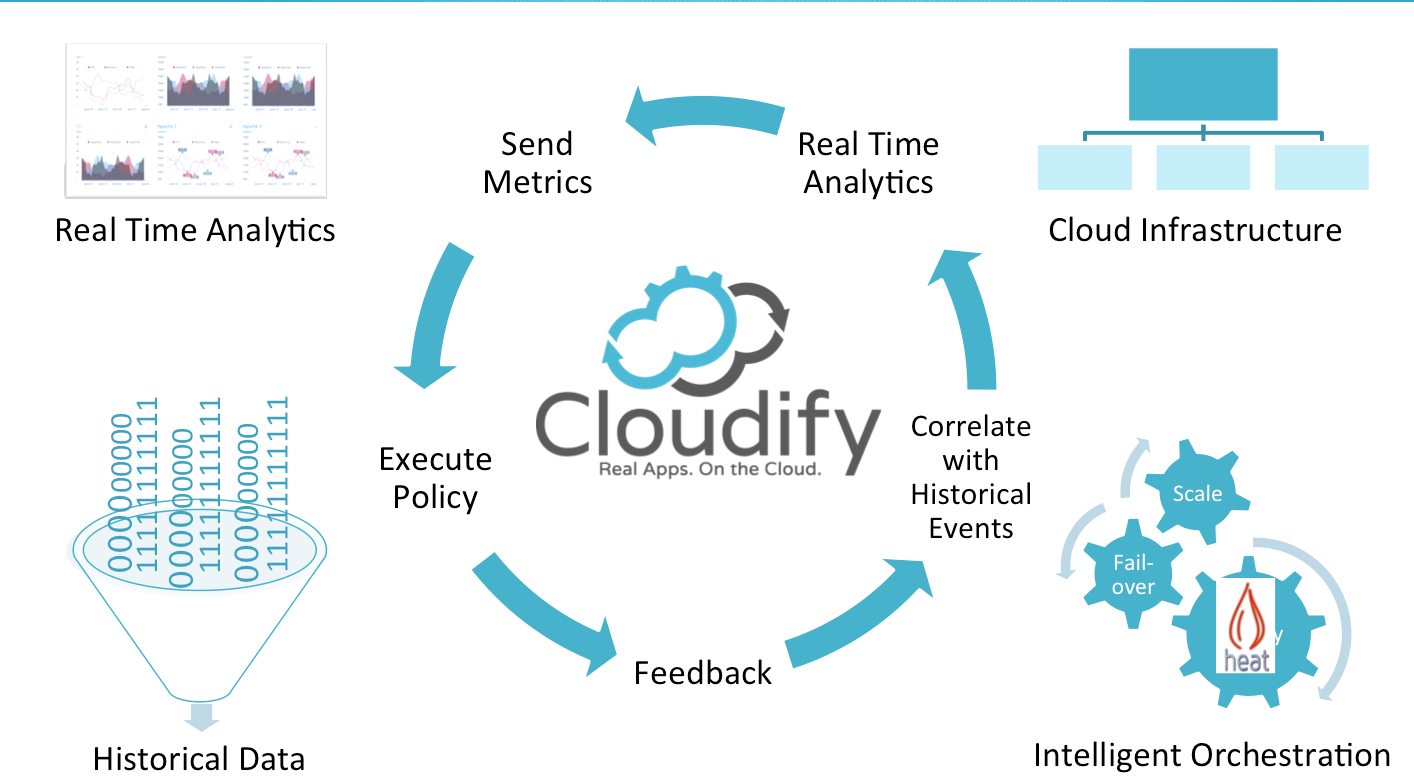
Cloudify — это система, которая позволит добиться плавного перехода к облаку и простой автоматизации даже с��мых сложных приложений на протяжении всего их жизненного цикла в ней. Организовать создание всей облачной инфраструктуры, необходимой для вашего приложения, начиная с вычислительных ресурсов, вплоть до сетей и устройств хранения блоков данных. Cloudify умеет разворачивать приложения в облако (Amazon EC2, OpenStack, VMWare Vsphere или даже на чистое железо), отображать прогресс выполнения и производить масштабирование при необходимости. Благодаря поддержке различных платформ возможно выбирать поставщика облачных услуг, имея одинаковый фронтенд. Иметь мониторинг, управлять и масштабировать приложения внутри Cloudify, независимо от стека, топологии и платформы, где они развёрнуто.

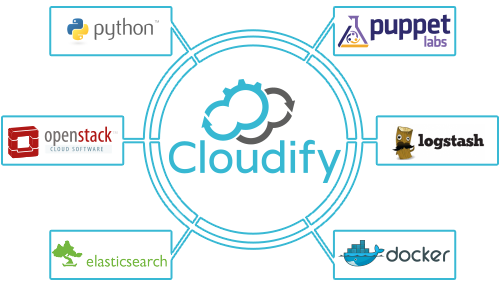
Вот это приведено в его описании, можно добавить, что поддерживаются плагины, которые позволяют работать с Bash, Chef, OpenStack, Puppet, Windows and Linux agent installer.
Текущая версия 3.0, разрабатывается 3.1. Один из ощутимых минусов — в версии 3.0 убрали расширенный функционал, который был в 2.7, и предлагают его за деньги по подписке.
В себя Cloudify включает ноду управления, гэйтвей, через который может быть осуществлён доступ к приложениям. Управления самим Cloduify также возможно через GUI, CLI и обширный REST API.
Имеющиеся пакеты предусмотрены для Debian или Ubuntu, также на Centos\ RedHat можно установить из github’a или pypi python’a. Версия используемого питона 2.7.
Установка
Моя нода, на которой развёрнут OpenStack, была под управлением RedHat. Соответственно шаги были следующими.
Установить python 2.7.
На мой взгляд самый простой путь, это взять готовые пакеты из репозитория: mirror.yandex.ru/centos/6/SCL/x86_64/python27
Питон ставится в /opt/rh/python27/root/usr/bin/python2.7

Устанавливаем pip:
wget bootstrap.pypa.io/get-pip.py

/opt/rh/python27/root/usr/bin/python2.7 /var/repo-python/get-pip.py
В принципе, можно произвести установку и из github’a, но мне кажется, что используя PyPi это более проще и быстрей.
Устанавливаем clodify:
/opt/rh/python27/root/usr/bin/pip install cloudify

/opt/rh/python27/root/usr/bin/pip install cloudify-openstack

/opt/rh/python27/root/usr/bin/pip install cloudify-openstack-provider
Не забываем указывать полный путь для питона 2.7, или можно сделать symbolic link:
ln -s /opt/rh/python27/root/usr/bin/python2.7 /usr/bin/python2.7

ln -s /opt/rh/python27/root/usr/bin/pip /usr/bin/pip2.7

ln -s /opt/rh/python27/root/usr/bin/cfy /usr/bin/cfy
Чтобы быстрей запускать команды.
Следующий шаг — это запуск management node самого cloudify внутри openstack’a. Для этого в выбранном нами каталоге (например, ~/cloudify/init1) выполняем команду:
cfy init openstackУ нас появятся два файла в этом каталоге,
.cloudify и cloudify-config.yaml.plugin.yaml — это конфиг, который нам нужно отредактировать, чтобы запустить последующий bootstrap.
Пример работающего конфигурационного файла:
keystone:
    username: admin
    password: ADMIN_PASSWORD
    tenant_name: admin
    auth_url: http://controller:5000/v2.0
networking:
    neutron_url: http://controller:9696
    int_network:
        create_if_missing: true
        name: cloudify-admin-network
    subnet:
        create_if_missing: true
        name: cloudify-admin-network-subnet
        ip_version: 4
        cidr: 10.67.79.0/24
        dns_nameservers: [‘8.8.8.8’]
    ext_network:
        name: Ext-Net
compute:
    management_server:
        user_on_management: root
        userhome_on_management: /root
        instance:
            image: 883293298-fn32u98-fnf83-fkdfs
            flavor: 102
        management_keypair:
            create_if_missing: false
            name: default_keypair
            private_key_path: ~/.ssh/default_keypair.pem
Отображены только те строки, которые потребовались в редактировании.
Автоматически Cloudify будет развёрнут только на Ubuntu \ Debian, мной была выбрана Ubuntu, причём версия 14.04 не подходит. Во время bootstrap’a, будет на неё ругаться. Поэтому выбор был установлен на версии 12.04, который поддерживается официально. Возможно в версии 3.1 это будет исправлено.
Нужно предварительно подготовить образ, а именно, установить в него три пакета: java, unzip и github.
Сам образ Ubuntu можно или сделать самому, например, в VirtualBox’e, и затем испортировать в glance, этот шаг я опущу, т.к. никакой сложности возникнуть не должно. Или можно скачать отсюда: cloud-images.ubuntu.com/releases/12.04.2/release-20120424/ubuntu-12.04-server-cloudimg-amd64-disk1.img
Вход только по ключам.
Unzip и github ставим просто: apt-get install unzip github. Java несколько трудней, качаем архив jre-7u67-linux-x64.gz или с другой версией. Распаковываем его в /opt/java/64 или выбранный другой и прописываем его в систему:
update-alternatives --install "/usr/bin/java" "java" "/opt/java/64/jre1.7.0_67/bin/java" 1
После этого считаем, что наш образ готов, делаем его snapshot и уже management node запускаем из созданного нами вновь образа.
Теперь в конфиг cloudify-config.yaml прописываем наш image id. Переходим в каталог, в котором сделали cfy init openstack и выполняем команду:
cfy bootstrapПример вывода при успешном выполнении:
cfy bootstrap
prefix for all resources: ''
bootstrapping using cloudify_openstack
validating provider resources and configuration
schema validated successfully
validating networking resources...
validating compute resources...
resources validated successfully
provider validations completed successfully
provisioning resources for management server...
attaching IP 10.10.10.227 to the instance
provisioning complete
ensuring connectivity with the management server...
connected with the management server successfully
bootstrapping the management server...
uploading keystone and neutron and files to manager
[10.10.10.227] put: /root/.ssh/cloudify-agents-kp.pem -> /root/.ssh/cloudify-agents-kp.pem
[10.10.10.227] put: /tmp/tmpel_Iyv/keystone_config.json -> /root/keystone_config.json
[10.10.10.227] put: /tmp/tmpel_Iyv/neutron_config.json -> /root/neutron_config.json
initializing manager on the machine at 10.10.10.227
downloading cloudify-components package...
downloading cloudify-core package...
downloading cloudify-ui...
unpacking cloudify-core packages...
installing cloudify on 10.10.10.227...
[10.10.10.227] out:
[10.10.10.227] out: Installing cloudify-components version 3.0.0...
[10.10.10.227] out:
[10.10.10.227] out: (by the way, you may tail /var/log/cloudify-bootstrap.log for the full installation log)
[10.10.10.227] out: NOTE: this should take approx 5 minutes on an average machine...
[10.10.10.227] out:
[10.10.10.227] out: checking whether the system meets the minimum installation requirements...
[10.10.10.227] out: the system meets the requirements necessary for Cloudify's installation
[10.10.10.227] out:
[10.10.10.227] out: checking whether openjdk-7-jdk is installed...openjdk-7-jdk is not installed, installing...
[10.10.10.227] out: checking whether openjdk-7-jdk is installed...Status: install ok installed
[10.10.10.227] out: checking whether curl is installed...Status: install ok installed
[10.10.10.227] out: curl is already installed, skipping...
[10.10.10.227] out: checking whether logstash is installed...logstash is not installed, installing...
[10.10.10.227] out: checking whether logstash is installed...Status: install ok installed
[10.10.10.227] out: checking whether elasticsearch is installed...elasticsearch is not installed, installing...
[10.10.10.227] out: checking whether elasticsearch is installed...Status: install ok installed
[10.10.10.227] out: checking whether kibana3 is installed...kibana3 is not installed, installing...
[10.10.10.227] out: checking whether kibana3 is installed...Status: install ok installed
[10.10.10.227] out: checking whether riemann is installed...riemann is not installed, installing...
[10.10.10.227] out: checking whether riemann is installed...Status: install ok installed
[10.10.10.227] out: checking whether rabbitmq-server is installed...rabbitmq-server is not installed, installing...
[10.10.10.227] out: checking whether rabbitmq-server is installed...Status: install ok installed
[10.10.10.227] out: checking whether nginx is installed...nginx is not installed, installing...
[10.10.10.227] out: checking whether virtualenv is installed...virtualenv is not installed, installing...
[10.10.10.227] out: checking whether virtualenv is installed...Status: install ok installed
[10.10.10.227] out: checking whether make is installed...make is not installed, installing...
[10.10.10.227] out: checking whether make is installed...Status: install ok installed
[10.10.10.227] out: checking whether nodejs is installed...nodejs is not installed, installing...
[10.10.10.227] out: checking whether nodejs is installed...Status: install ok installed
[10.10.10.227] out:
[10.10.10.227] out: performing post installation tests...
[10.10.10.227] out: post installation tests completed successfully.
[10.10.10.227] out:
[10.10.10.227] out: cloudify-components 3.0.0 installation completed successfully!
[10.10.10.227] out:
[10.10.10.227] out:
[10.10.10.227] out:
[10.10.10.227] out: Installing cloudify-core version 3.0.0...
[10.10.10.227] out:
[10.10.10.227] out: checking whether celery and the management plugins are installed...celery is not installed, installing...
[10.10.10.227] out: checking whether celery is installed...Status: install ok installed
[10.10.10.227] out: checking whether manager is installed...manager is not installed, installing...
[10.10.10.227] out: checking whether manager is installed...Status: install ok installed
[10.10.10.227] out:
[10.10.10.227] out: performing post installation tests...
[10.10.10.227] out: post installation tests completed successfully.
[10.10.10.227] out:
[10.10.10.227] out: cloudify-core 3.0.0 installation completed successfully!
[10.10.10.227] out:
[10.10.10.227] out:
installing cloudify-ui...
cloudify-ui installation successful.
deploying cloudify agents
cloudify agents installation successful.
bootstrapping complete
management server is up at 10.10.10.227 (is now set as the default management server)
После этого можно зайти по http на адрес 10.10.10.227.

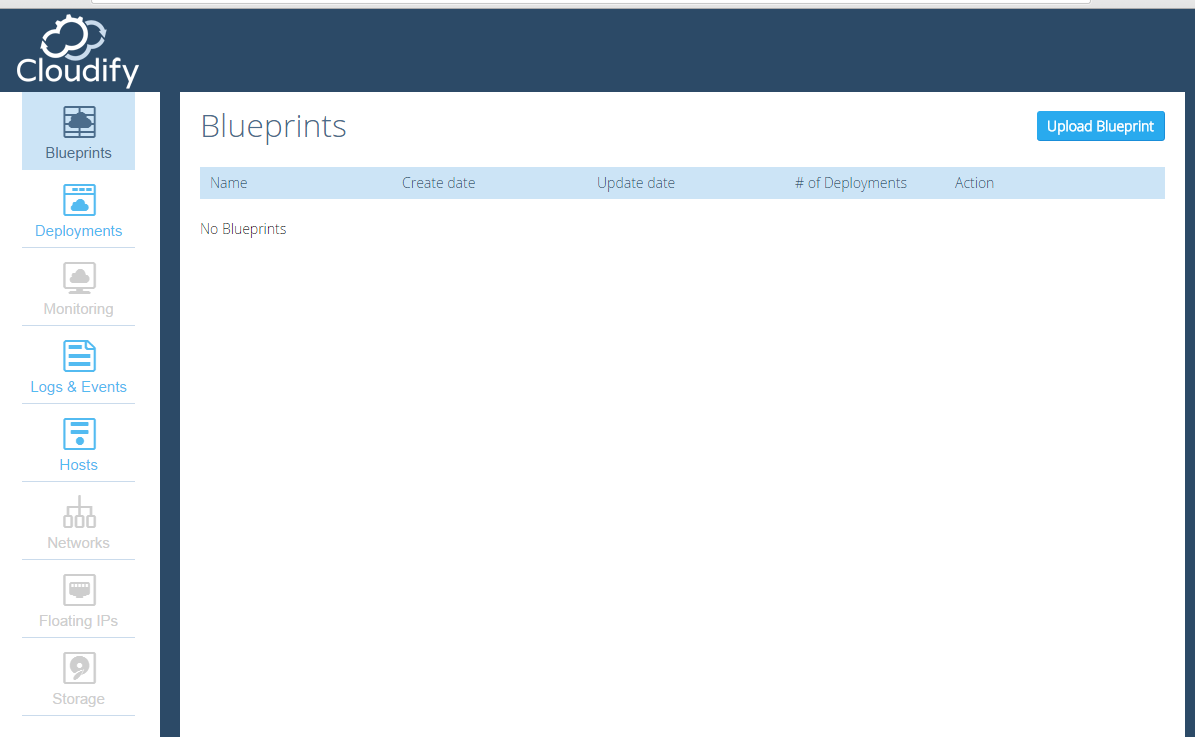
По сравнению с версией 2.7 интерфейс очень скуден в бесплатной версии и позволяет загрузить blueprint, создать deployments и запустить его, следя за логами и получая информацию из хостов:
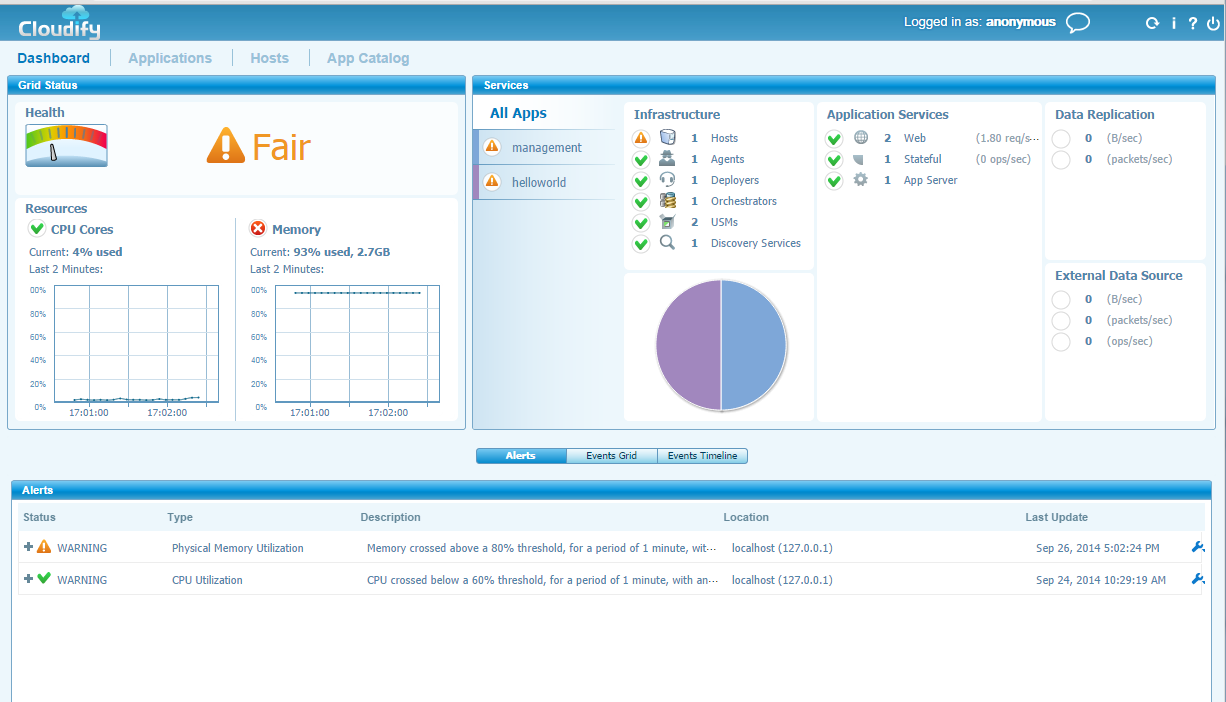
Для примера скрин из версии 2.7:

Установка приложений
Пример самих рецептов:
imports:
    - http://www.getcloudify.org/spec/bash-plugin/1.0/plugin.yaml
    - http://www.getcloudify.org/spec/openstack-plugin/1.0/plugin.yaml

plugins:
    nodecellar_config_plugin:
        derived_from: cloudify.plugins.agent_plugin
        properties:
            folder: nodecellar-config-plugin
types:
    vm_host:
        derived_from: cloudify.openstack.server
        properties:
            -   cloudify_agent:
                    user: ubuntu
            -   server:

                ### if defined, will serve as the hostname for the started instance,
                ### otherwise, the node_id will be used
                    #name: no_name            ### HOST_NAME""
                    image:      75d47d10-fef8-473b-9dd1-fe2f7649cb41   ### IMAGE_NAME
                    flavor:     101 ### FLAVOR_NAME
                    security_groups: ['node_cellar_security_group']

    mongo_database:
        derived_from: cloudify.types.bash.db_server
        properties:
            -   role
            -   port

    nodejs_server:
        derived_from: cloudify.types.bash.app_server

    nodejs_app:
        derived_from: cloudify.types.bash.app_module
        properties:
            -   app_name
            -   startup_script
            -   git_url
            -   git_branch
            -   base_port
            -   num_instances
            -   env_file_path

relationships:
    nodecellar_connected_to_mongo:
        derived_from: cloudify.relationships.connected_to
        source_interfaces:
            cloudify.interfaces.relationship_lifecycle:
                - postconfigure: nodecellar_config_plugin.tasks.get_mongo_host_and_port
blueprint:
    name: nodecellar
    nodes:

    - name: node_cellar_security_group
      type: cloudify.openstack.security_group
      properties:
        security_group:
          name: node_cellar_security_group
        rules:
          - remote_ip_prefix: 0.0.0.0/0
            port: 8080
          - remote_ip_prefix: 0.0.0.0/0
            port: 27017
          - remote_ip_prefix: 0.0.0.0/0
            port: 28017

    - name: floatingip
      type: cloudify.openstack.floatingip
      properties:
        floatingip:
          floating_network_name: Ext-Net

    - name: mongod_vm
      type: vm_host
      instances:
          deploy: 1
      relationships:
        - target: node_cellar_security_group
          type: cloudify.relationships.depends_on

    - name: nodejs_vm
      type: vm_host
      instances:
          deploy: 1
      relationships:
        - target: floatingip
          type: cloudify.openstack.server_connected_to_floating_ip
        - target: node_cellar_security_group
          type: cloudify.relationships.depends_on

    - name: mongod
      type: mongo_database
      properties:
            role: mongod
            port: 27017
            scripts:
                create: mongo-scripts/install-mongo.sh
                start: mongo-scripts/start-mongo.sh
                stop: mongo-scripts/stop-mongo.sh
      relationships:
        - target: mongod_vm
          type: cloudify.relationships.contained_in
   - name: nodejs
      type: nodejs_server
      properties:
            scripts:
                create: nodejs-scripts/install-nodejs.sh
      relationships:
        - type: cloudify.relationships.contained_in
          target: nodejs_vm

    - name: nodecellar_app
      type: nodejs_app
      properties:
            app_name: nodecellar
            startup_script: server.js
            git_url: https://github.com/cloudify-cosmo/nodecellar.git
            git_branch: master
            base_port: 8080
            num_instances: 1
            env_file_path: /tmp/mongo_host_and_port.sh
            scripts:
                create: nodejs-scripts/install-app.sh
                start: nodejs-scripts/start-app.sh
                stop: nodejs-scripts/stop-app.sh
      relationships:
        - type: cloudify.relationships.contained_in
          target: nodejs
        - type: nodecellar_connected_to_mongo
          target: mongod
Далее, мы можем произвести тестовое развёртывание приложения.
Скачиваем чертежи из гита и выбираем версию под нашу:
cd ~/simple/blueprints

git clone github.com/cloudify-cosmo/cloudify-nodecellar-singlehost.git

cd cloudify-nodecellar-singlehost/

git checkout tags/3.0

cd ~/simple
Загружаем чертежи:
cfy blueprints upload -b nodecellar1 blueprints/cloudify-nodecellar-singlehost/blueprint.yamlСоздаём деплоймент:
cfy deployments create -b nodecellar1 -d nodecellar1И запускаем установку:
cfy deployments execute -d nodecellar1 installВ логах видим:

В выводе будет url, по которому можно получить доступ к развёрнотому приложению, страничка будет выглядеть вот так:

Заключение
В этой статье были произведены подготовительные процедуры, создан образ и установлен Cloudify в OpenStack’e, также развёрнуто тестовое приложение. Сделан обзор текущей версии.
Если у кого-то есть опыт использования данного приложения, прошу отписаться в комментариях о кейсах, в которых оно использовалось и свои впечатления. Мои знания с этим продуктом ещё только ознакомительные.