Read more about this portable version of Windows: how to create and boot it. How to recover data with a Windows To Go drive, or from a drive containing the portable version of the operating system. Windows To Go is a new tool inside Windows 10 that can be used to create a portable version of the operating system on an external hard drive or a USB pen drive. Such operating system can be booted and used on any computer.
This feature is in no way a replacement for the operating system installed on the computer’s hard disk, but rather one more alternative to use workspaces.
A Windows To Go workspace operates just as any installation of Windows, but with the following exceptions:
To create a Windows To Go drive, open Control Panel and select the corresponding menu, Windows To Go.
You can see that the operating system warns you at once: Windows To Go is best used with USB 3.0 drives. If you use USB 2.0, the performance of this environment may be reduced.
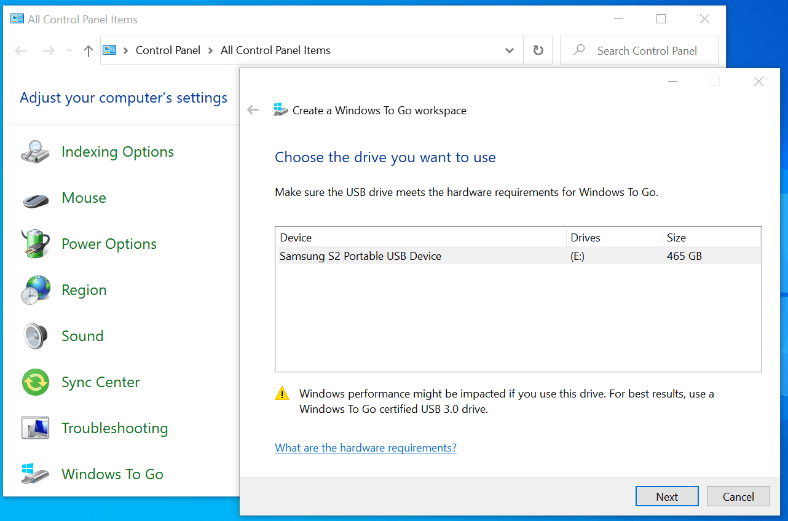
Plug into a USB port an external drive or pen drive of sufficient capacity (the optimal disk space is 32 GB) where you’d like to create a Windows To Go environment, select it and click Next.
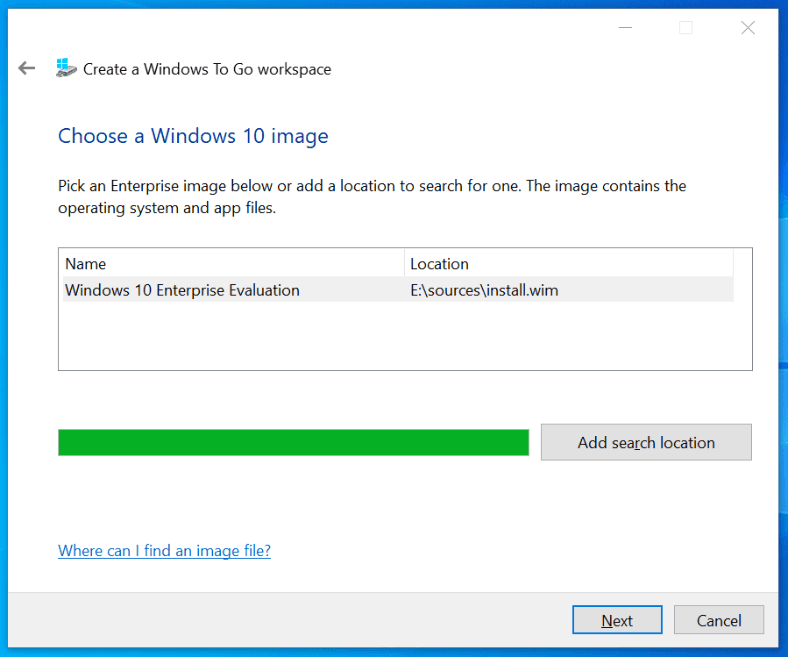
After that, you’ll be asked to choose a system image to use in creating the Windows To Go drive. Do it by clicking on the Add search location button and specify the folder containing he system image.
If you wish, your Windows To Go drive can be encrypted with BitLocker immediately.
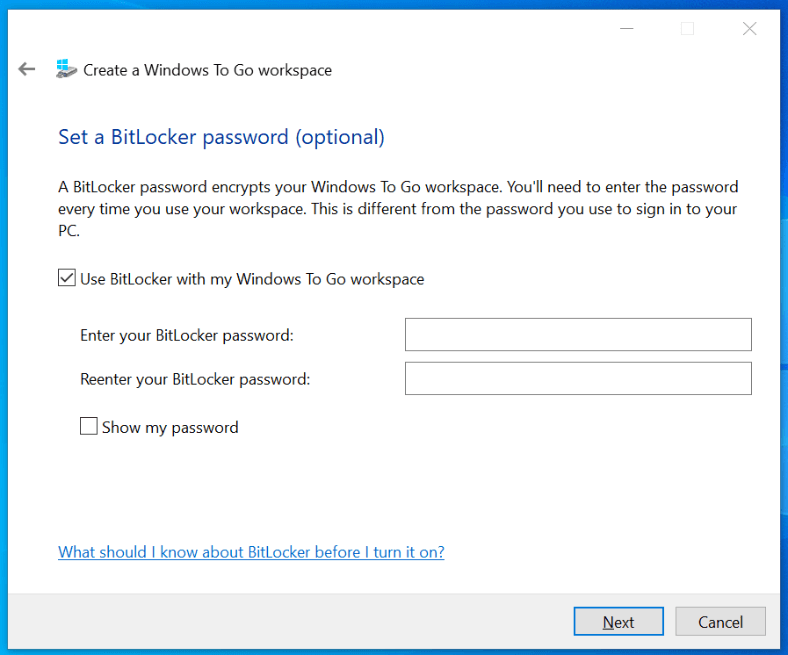
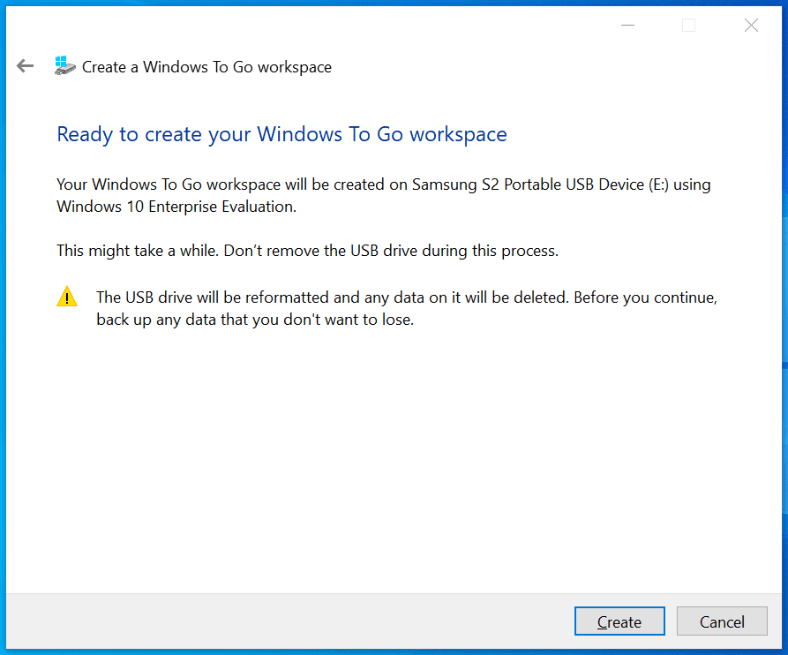
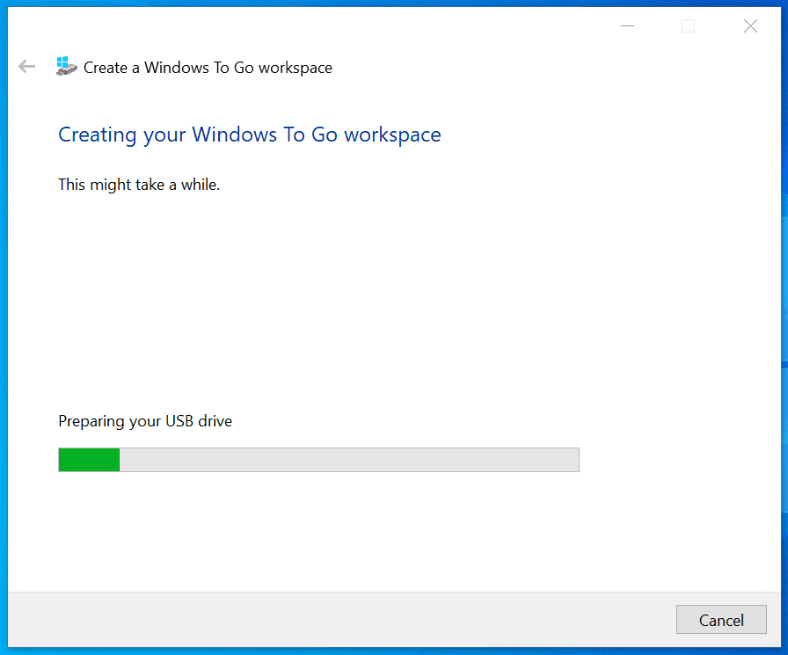
Configure drive encryption or protect access to it with a password and click Next, then confirm your intention to create a Windows To Go workspace. It can take some time.
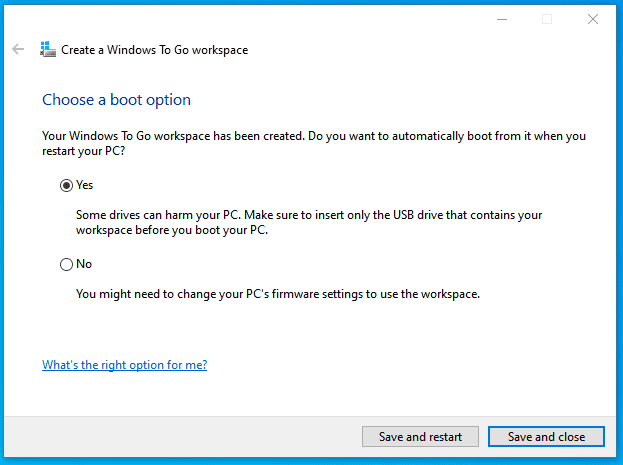
After the Windows To Go drive is ready, the operating system will suggest you to choose how it boots: automatically after you restart the computer, or manually.
Your Windows To Go drive is ready and you can start using it as a portable workspace for Windows 10.
A Windows To Go workspace can be run on any computer. This is a portable version of Windows that you can use anywhere.
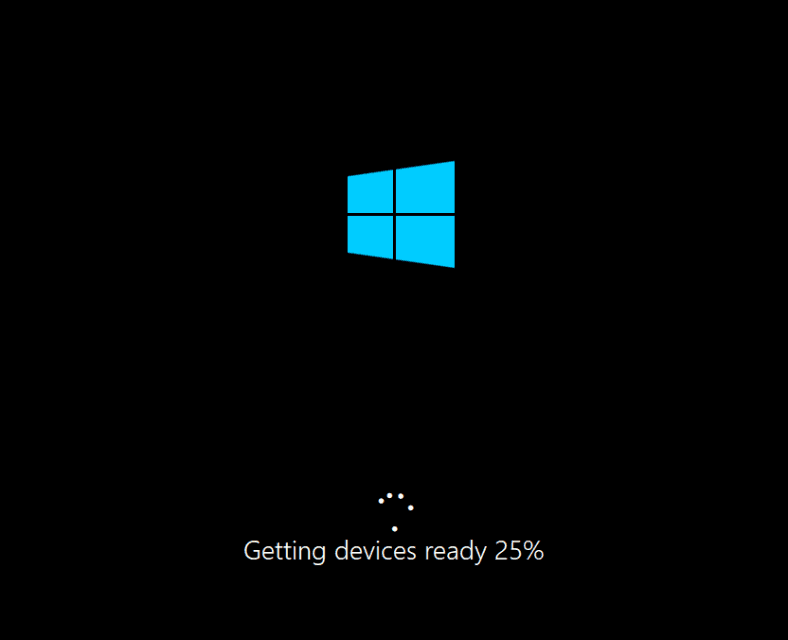
To start working with Windows To Go, connect this drive to the computer and boot from it. Starting the workspace will take a bit longer than booting the operating system from the internal hard drive, but in all other aspects it feels just the same.
When you boot Windows To Go for the first time on a certain computer, you will need to configure some things like date and time, time zone, language etc.
Recovering data with a Windows To Go drive
Let us explore a situation when the operating system of the host computer is inoperable for some reason, or it cannot be accessed. As we mentioned before, host computer drives are inaccessible for the user if the computer is booted with a Windows To Go drive. However, the host drives can be accessed with a specialized tool for recovering HDD data – Hetman Partition Recovery.
Start your Windows To Go workspace and install Hetman Partition Recovery. Start the program, and here is what you see.
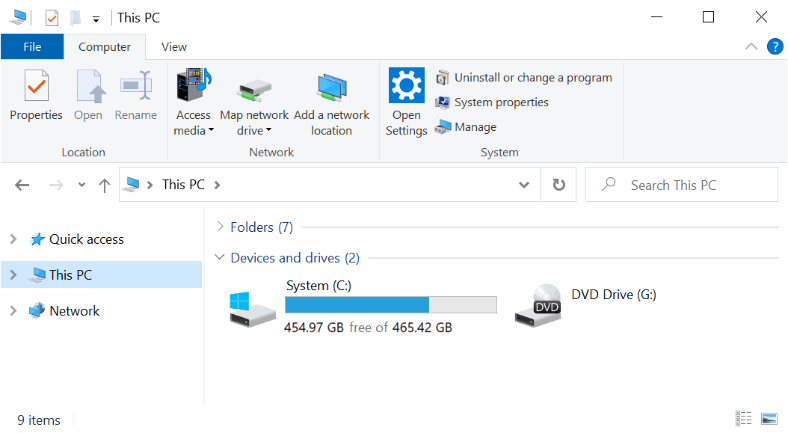
Compare the list of available drives displayed in This PC folder of your Windows To Go workspace and the drives accessible for Hetman Partition Recovery.
Windows To Go can only access the external hard drive that the workspace is booted from. It is used as the system drive and the drive to save user data and install programs to. Other disks of this computer are not available. This is not a bug – on the contrary, it’s the way that things are supposed to be.
Now look at Hetman Partition Recovery. The program is able to detect and display all physical and local disks connected to a computer, without any exceptions. If you need to recover data from the main drive of the host computer (in our case, this is a SanDisk 111 GB drive, double-click on it and run a Fast scan.
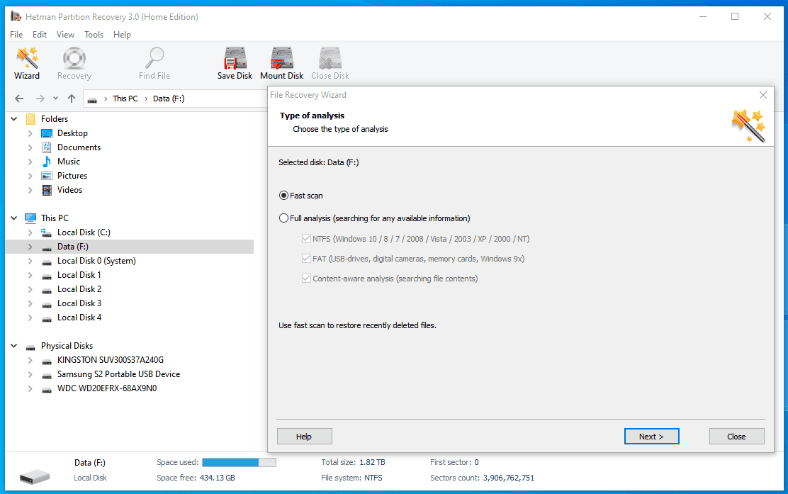
Wait for the process to be over, and the program will show you all files and folders found in the disk, with the directory tree preserved. Select the files you need to restore and drag them to the Recovery List.
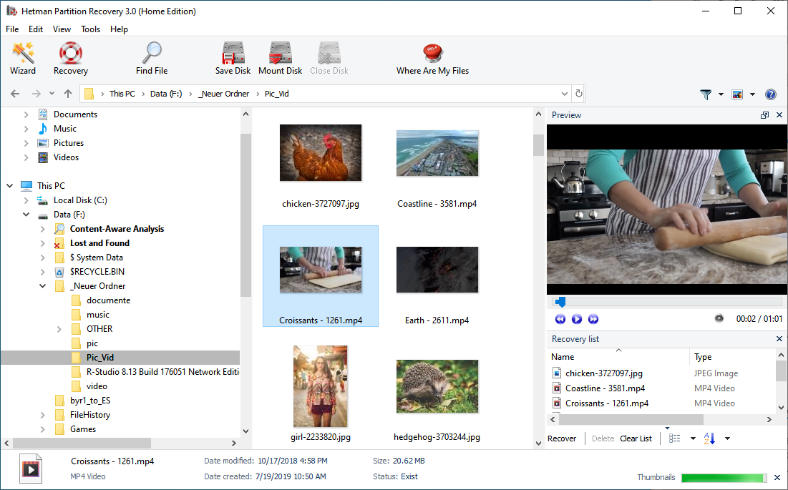
Remember that files located in the desktop of the host computer can be found following this path:
The Documents folder of the host computer can be accessed by following the path:
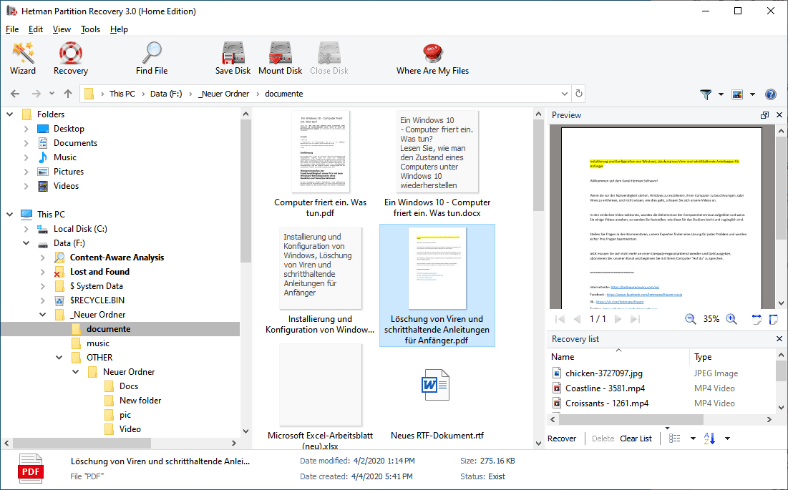
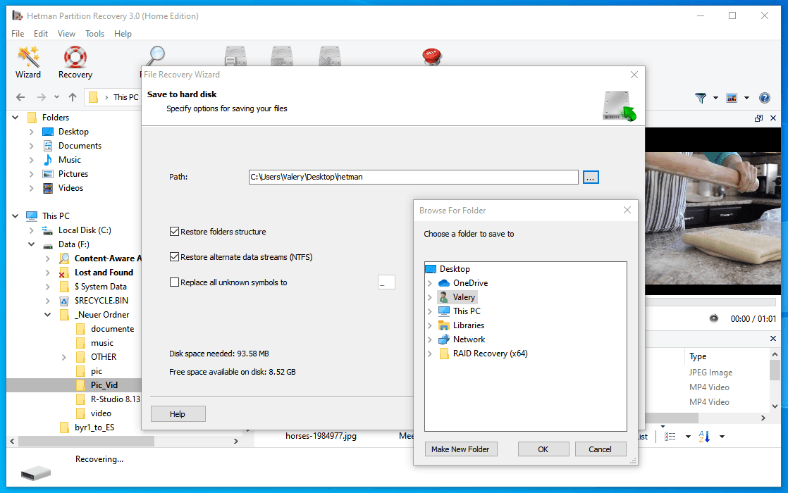
Keep in mind: it’s better to save the recovered files immediately and do it to another external storage device. If you choose to save them to the Windows To Go drive, they will be accessible only when you start the workspace again. If you don’t have another removable disk at hand, save the files to your Windows To Go drive temporarily, and then send them elsewhere at the convenient time.
Summary.
Anyone can create a portable Windows To Go drive for personal use; if the computer’s operating system fails, such drive will help you to recover valuable data from your PC. This could be one more option for cases when you may need to recover data from the computer.
See the full article with all additional video tutorials. If you still have any questions, please ask in a comments. Also visit our Youtube channel, there are over 400 video tutorials.

This feature is in no way a replacement for the operating system installed on the computer’s hard disk, but rather one more alternative to use workspaces.
Windows To Go feature
A Windows To Go workspace operates just as any installation of Windows, but with the following exceptions:
- Internal disks are offline. To ensure that data of the host computer isn’t used in an unauthorized way, its internal hard disks are offline by default when booted into a Windows To Go workspace. And vice versa, any information from a Windows To Go drive is inaccessible from the Windows installed on the host computer. It means, that Windows Explorer on the host computer won’t be able to access a Windows To Go drive, because it won’t be listed in This PC folder. In the same way, if you boot a Windows To Go workspace, its folder This PC will not show the disks of the host computer – they become sort of invisible.
- Trusted Platform Module (TPM) is not used. To ensure security when using BitLocker Drive Encryption, a pre-operating system boot password will be used rather than the TPM since the TPM is tied to a specific computer while Windows To Go drives are supposed to move between computers.
- Hibernate is disabled by default. To ensure that the Windows To Go workspace is able to move between computers easily, hibernation is disabled by default. Hibernation can be re-enabled by using Group Policy settings.
- Windows Recovery Environment is not available. In the rare case when you need to recover your Windows To Go drive, you should re-image it with a fresh image of Windows.
- Refreshing or resetting a Windows To Go workspace is not supported. Resetting to the manufacturer’s defaults for the computer doesn’t apply when running a Windows To Go workspace, so the feature was disabled.
- Microsoft Store is disabled by default. For licensing purposes, applications licensed with the Microsoft Store are linked to licensed hardware. As Windows To Go has been developed as an environment for moving between computers, access to the Microsoft store is disabled. You can allow using the store if your Windows To Go workspaces won’t be moving from one computer to another.
How to create a Windows To Go drive
To create a Windows To Go drive, open Control Panel and select the corresponding menu, Windows To Go.
You can see that the operating system warns you at once: Windows To Go is best used with USB 3.0 drives. If you use USB 2.0, the performance of this environment may be reduced.

Plug into a USB port an external drive or pen drive of sufficient capacity (the optimal disk space is 32 GB) where you’d like to create a Windows To Go environment, select it and click Next.
After that, you’ll be asked to choose a system image to use in creating the Windows To Go drive. Do it by clicking on the Add search location button and specify the folder containing he system image.

If you wish, your Windows To Go drive can be encrypted with BitLocker immediately.

Configure drive encryption or protect access to it with a password and click Next, then confirm your intention to create a Windows To Go workspace. It can take some time.


After the Windows To Go drive is ready, the operating system will suggest you to choose how it boots: automatically after you restart the computer, or manually.

Your Windows To Go drive is ready and you can start using it as a portable workspace for Windows 10.
How to boot a Windows To Go workspace
A Windows To Go workspace can be run on any computer. This is a portable version of Windows that you can use anywhere.
To start working with Windows To Go, connect this drive to the computer and boot from it. Starting the workspace will take a bit longer than booting the operating system from the internal hard drive, but in all other aspects it feels just the same.
When you boot Windows To Go for the first time on a certain computer, you will need to configure some things like date and time, time zone, language etc.

Recovering data with a Windows To Go drive
Let us explore a situation when the operating system of the host computer is inoperable for some reason, or it cannot be accessed. As we mentioned before, host computer drives are inaccessible for the user if the computer is booted with a Windows To Go drive. However, the host drives can be accessed with a specialized tool for recovering HDD data – Hetman Partition Recovery.
Start your Windows To Go workspace and install Hetman Partition Recovery. Start the program, and here is what you see.

Compare the list of available drives displayed in This PC folder of your Windows To Go workspace and the drives accessible for Hetman Partition Recovery.
Windows To Go can only access the external hard drive that the workspace is booted from. It is used as the system drive and the drive to save user data and install programs to. Other disks of this computer are not available. This is not a bug – on the contrary, it’s the way that things are supposed to be.
Now look at Hetman Partition Recovery. The program is able to detect and display all physical and local disks connected to a computer, without any exceptions. If you need to recover data from the main drive of the host computer (in our case, this is a SanDisk 111 GB drive, double-click on it and run a Fast scan.

Wait for the process to be over, and the program will show you all files and folders found in the disk, with the directory tree preserved. Select the files you need to restore and drag them to the Recovery List.

Remember that files located in the desktop of the host computer can be found following this path:
Disk\Users\Username\DesktopThe Documents folder of the host computer can be accessed by following the path:
Disk\Users\Username\Documents
Keep in mind: it’s better to save the recovered files immediately and do it to another external storage device. If you choose to save them to the Windows To Go drive, they will be accessible only when you start the workspace again. If you don’t have another removable disk at hand, save the files to your Windows To Go drive temporarily, and then send them elsewhere at the convenient time.

Summary.
Anyone can create a portable Windows To Go drive for personal use; if the computer’s operating system fails, such drive will help you to recover valuable data from your PC. This could be one more option for cases when you may need to recover data from the computer.
See the full article with all additional video tutorials. If you still have any questions, please ask in a comments. Also visit our Youtube channel, there are over 400 video tutorials.