Even the most experienced and highly qualified system administrators often have only a vague idea of what exactly happens during the server startup process. So, let's look at this process in detail.
Server startup is a long and complicated series of operations depending on hardware, software, and the enabled configuration.
Without looking at all possible scenarios, let's see what happens during server startup in the following environment:
- 64-bit Intel processor;
- Legacy startup mode;
- MBR disk format;
- GRUB2 loader.
Rise and shine!
The server startup is initiated using different methods, for example, by pressing Power On (most often). Another option is to use a network command (Wake-on-LAN) or commands from external devices (Wake-on-PCIe, Wake-on-Keyboard, Wake-on-Mouse). Commands are executed only if the corresponding parameters are enabled in BIOS Setup Utility (see below).
The BMC module, which provides advanced server control options, is considered an individual device.
The above methods are smart and require a specifically created command to be sent via data buses. A simple method is to start up when electricity becomes available in the power supply unit. In BIOS settings, this parameter is called AC Power Loss. It has three states:
- Power Off — the server remains disabled.
- Power On — the server starts up.
- Last State — the server only starts if it was on during the power supply loss.
When using these methods, the processor receives the Reset signal and begins the startup procedure.
First program loading
The first stage of the server startup is turning on the power supply unit and sending the Reset signal to the processor. If the Reset signal is available, the processor clock generator is disabled, while processor registers are reset to factory settings.
During startup, transition processes occur in the power supply unit. Because of these processes, the output voltage may go beyond acceptable levels and negatively impact the processor operation. Therefore, the Reset signal is not removed until input power is completely stabilized.
Once the voltage is stable, the power supply unit sets the Power Good signal. This signal means that the motherboard can start all the server components. Then, the chipset maps all the connected devices to the address space, including ROM (read-only memory), using the following code: Basic Input/Output System (BIOS). Then, the Reset signal is removed, and the processor clock generator is started.
BIOS is a system that provides an API for managing hardware and connected devices. An important BIOS function is equipment initialization and testing during startup.

Regardless of the number of system processes, only one core of one processor is woken up, while the other cores remain idle. This core is designated as Bootstrap Processor (BSP, aka «the processor»). Once the Reset signal is removed, the processor registers are filled so that the processor operates in a special 32-bit mode called Initial Processor Mode.
Initial Processor Mode is the operation mode reached by the 64-bit processor only after reset. In this mode, the processor can execute 32-bit commands, while the address space is 4 GiB.
Once the Reset signal is off, the processor command counter indicates the 0xFFFFFFF0 address, which is called the Reset Vector. This is the address of the first command to be decoded and executed by the processor.
Locating the first instruction at the end of the address space has a historical background. When developing the Intel 8086 processor, the reset vector was located at the beginning of the address space followed by random access memory (any size). To avoid intersections with random access memory, the first command address was positioned at the end of the address space.
Later, when Intel 80286 appeared, the reset vector could be moved to any location. Nevertheless, even modern processors start up in a mode compatible with 8086 and reset vector at 0x0.
When calling the 0xFFFFFFF0 address, the processor receives the first command from ROM. In Legacy mode, this command is a Far Jump to the memory segment with the BIOS code. Once the first far jump has been performed, the processor enters the 16-bit Real Mode and begins executing the BIOS code.
Real Mode is a mode for compatibility with legacy 16-bit processors. In this mode, only 16-bit commands are available, while the address space («low memory») is limited by 1 MiB.
As I mentioned before, the executable BIOS code is stored on an external device, which is a slow operation mode. So, first of all, BIOS initializes random access memory and copies its own ROM code to it. The BIOS remains compatible with legacy processors and performs all operations in 16-bit mode.
Power On Self-Test
Power On Self-Test (POST) is a key stage of the BIOS operation. POST can be full or partial. During full POST, all available controllers are checked and all the available RAM is tested, which may take a long time.
Partial POST makes startup faster and includes the minimum required range of operations:
- checking integrity of BIOS programs in ROM using the checksum comparison mechanism;
- detecting and initializing main controllers, system buses and connected devices;
- determining the random access size and testing the first segment (64 kilobytes);
- transferring control to the loader.
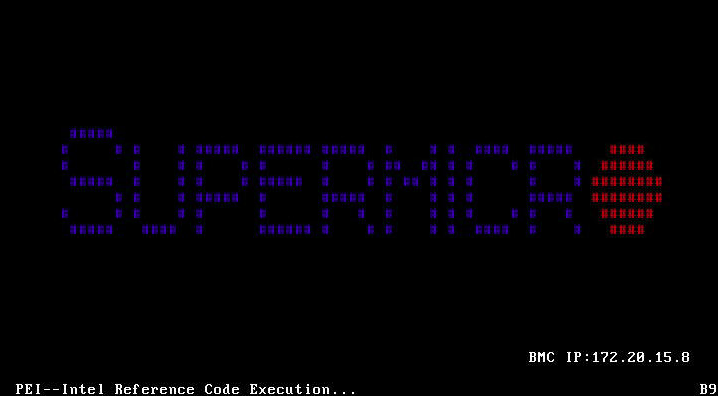
During POST, the server uses several methods to display information about passing tests. The most common are:
- displaying the test identifier, POST code on the screen or using 7-segment motherboard indicators;
- audible indication;
- light signalling using LED combinations.

Displaying the current POST code is considered the most informative method of obtaining information about potential failures. If tests are passed successfully, codes alternate quickly. In the event of a fault, however, POST will be suspended and you will be able to see the failed test identifier. Motherboard manufacturers always enclose the description of what each code means.

Modern motherboards include LED indication for detecting failed components. If the server starts successfully, a sound signal indicates that POST has been passed. The duration and number of sound signals make it possible to determine the failed component.

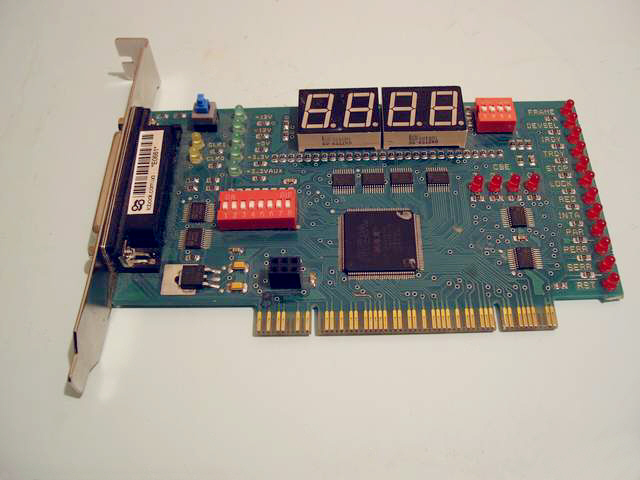
When maximum diagnostics precision is required, you can use an external device — POST card. Motherboards send POST test results via data buses, while the POST card processes this data and output it by means of available indicators.
BIOS Setup Utility
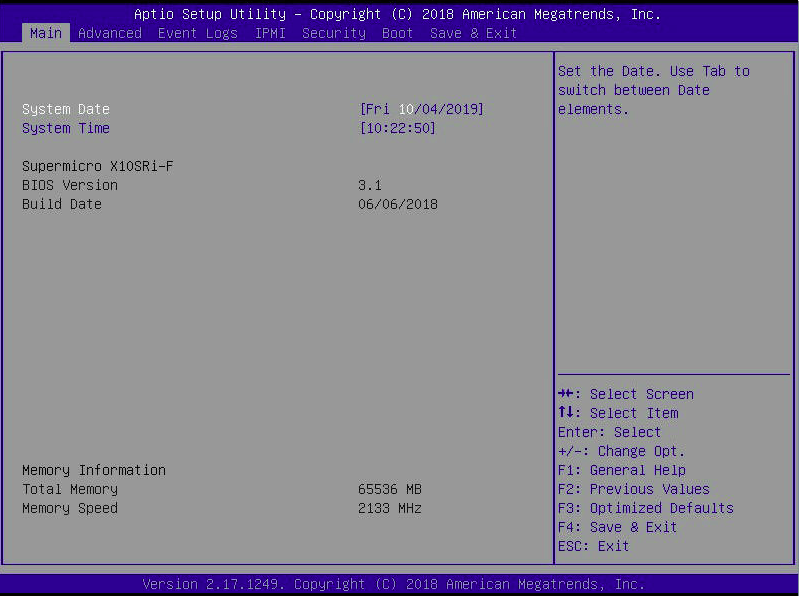
The BIOS has a special setup menu — BIOS Setup Utility. You can enter it by pressing the corresponding key during POST. BIOS entry keys are usually Del and F2. During the startup process, you can always see which key is used for opening BIOS settings.

BIOS Setup Utility provides a setup interface that can only be used with a keyboard. BIOS Setup Utility provides information about the installed hardware and makes it possible to modify motherboard and connected equipment operation parameters.
The names and options of parameters depend on many factors, such as:
- BIOS version;
- motherboard model;
- model of equipment installed in the motherboard.
We are interested in Boot Priority. Boot priority defines the order in which BIOS queries devices to find a boot area in them. As soon as BIOS finds the boot area, control is transferred to the loader, and the next stage starts.

OS loader
After completing POST, the BIOS performs a boot area search in a preset order. In Legacy mode, the boot area on the disk is called Master Boot Record (MBR). MBR is a special structure located in the first 512 bytes of the disk. These 512 bytes contain the following data:
- the first loader stage code — 0 and 445 bytes;
- partition table — between 446 and 509 bytes;
- 0xAA55 magic number — between 510 and 511 bytes.
If there is no magic number (0xAA55), MBR is considered not found on the disk, and the BIOS begins to query the next disk.
When the BIOS finds an MBR, it copies it from the disk to random access memory at the address 0x7C00 and jumps to that address. After the jump, Stage 1 of the loader operation starts. Due to size limitations, the purpose of the first stage is to load Stage 2 code to memory and transfer control to it.
Stage 2 code is stored between the MBR structure and the first disk partition. Historically, this area contains 31 kilobytes of memory and may reach 1 megabyte in present-day systems. However, for compatibility reasons, the second stage size is no more than 31 KB.
The second stage prepares the environment for starting the third stage:
- loads the required file system drivers;
- finds the third stage code in the file system;
- loads the code to RAM and transfers control to it.
Stage 3 tasks are limited to setting up the environment and the loader:
- enable the Protected Mode for the processor;
- load installed GRUB2 extensions;
- find Stage 4 in the file system and transfer control to it.
Protected Mode is a compatibility mode for x86 processors. In this mode, the processor can execute 32-bit commands, while the address space is extended to 4 GiB. The Protected Mode has been significantly upgraded, and the following elements are available now:
- page-based memory addressing;
- protection rings;
- virtual memory.
Stage 4 operates in 32-bit mode. If necessary, it loads graphical interface extensions from the disk, parses the grub.cfg file, and displays the familiar OS selection menu.

OS kernel
GRUB2 follows the Multiboot specification when loading the kernel's executable file. The loader checks the 0x1BADB002 magic number at the beginning of the kernel and verifies the checksum to make sure the kernel is compatible with the specification. If the check is passed, the kernel can be loaded to random access memory and assigned control.
According to the same specification, the loader provides system info to the kernel, such as:
- current processor operation mode;
- amount of RAM detected;
- video output mode (text or pixels);
- screen resolution.
Despite the fact that the loader used file system drivers and, possibly, graphical interface extensions, the loaded kernel will not get all the great stuff. First of all, after gaining control, the kernel «unlocks» the entire server potential and enables the Long Mode for the processor.
Long Mode is the master mode of 64-bit processors. In this mode, the processor can execute 64-bit commands and use general-purpose 64-bit registers. The address space can store 16 EiB. Long Mode deprecates the segmented memory organization of the 32-bit architecture.
Despite the huge address space, only 48 of the available 64 bits are used for addressing. As a result, the maximum RAM is reduced to 256 TiB, which is 65536 times less than the address space size. In the foreseeable future, physical addressing is expected to be extended to 57 bits.
After transition to the Long Mode, the kernel performs the minimum set of required operations:
- it sets up page-based memory addressing;
- loads drivers and initializes the required equipment;
- configures memory and process schedulers;
- finds and starts init.
It should be noted that the server had been operating using a single core (BSP) before the process scheduler was configured. Configuring the scheduler «wakes up» other cores — Application Processors (AP). Cores are not directly interconnected and communicate with each other via local interrupt controllers — Local Advanced Programmable Interrupt Controllers (LAPIC).
The operating system kernel runs in the BSP. Using ACPI tables, the kernel has obtained information about available system processors during the initialization process. Using its own LAPIC, the BSP sends the "Init — StartUp — StartUp" sequence of interrupts to wake up all APs. After startup, application processors must also be started and transferred to Long Mode. This process is now faster since this work has already been performed by the main processor.
After initializing all APs, the process scheduler starts the Idle service process. As it appears from the process name, it does not do anything and uses the processor when no other processes are running.
Once everything is set up and ready for operation, the operating system kernel starts the first process in the user space — Init. In turn, this process starts other processes in the user space. Once the init process has been started, the kernel enters standby mode and remains idle until tasks appear in the kernel space.
When all the processes are running, the server becomes available in the network and the Logon screen invitation can be seen in the console.
Conclusion
Starting the server and the operating system may seem simple and fast at a glance. In fact, it is a complicated process with a lot of peculiarities. Moving through this process is an evolution in miniature that extends performance from legacy 16-bit processors to modern 64-bit monster processors.
When 128-bit processors appear, do you think they will support 16-bit compatibility mode?
