In this article, you will find a detailed tutorial on data recovery from RAID 0, 1 or 5. The array we have been testing was built on Linux, and the methods described here will help you recover your files even if one or several disks break down.
A Linux-based hardware RAID is hardly a good example of a reliable storage system – if one of the disks within the array gets disconnected, the whole RAID can’t be mounted, and all the information becomes inaccessible in a second. In this case, you will need a special utility to rebuild the array with the remaining (healthy) drives. It will find and display the data which is still there, and restore this information.
We will perform all the tests with Hetman RAID Recovery. Its main purpose is to search and restore information from inoperable drives which used to be a part of the disk array. The program will identify automatically which controller, motherboard or software tool were used to build the array, and will rebuild the RAID with the remaining disks which are still in good condition. The final step is to find all the data you need and save it to healthy drives.
At the moment, there is no version of Hetman RAID Recovery for Linux, but running the utility on this specific operating system is still possible.
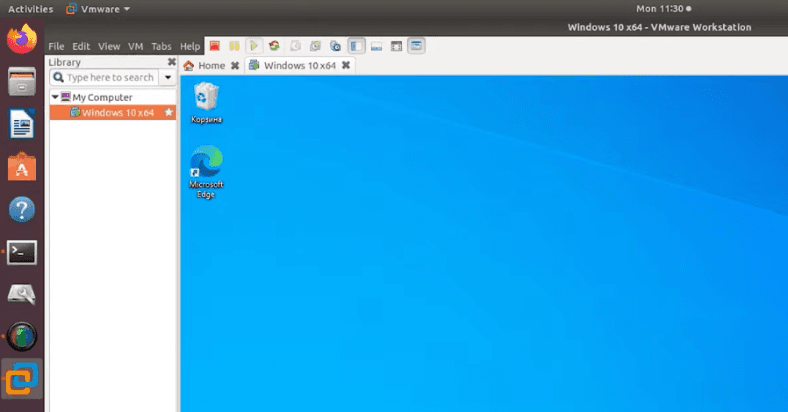
To recover information from a damaged Linux-based RAID, connect the hard disks to a Windows computer. If you don’t have access to such a computer, you can install a Windows virtual machine or install this operating system along with Linux.
First of all, let’s explore the recovery procedure for a RAID 1 device built on Linux and consisting of two hard disks of the same model.
This RAID type can use an even number of drives (at least two) which are used for ”mirroring” all the data.
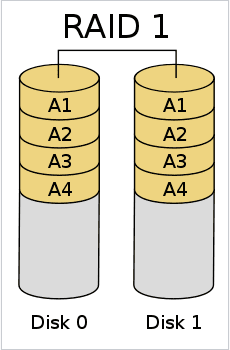
This disk array type is one of the most popular. It is characterized by high resilience: if one of the drives fails, you can replace it with the ”mirrored” copy, and then add another (new) drive, and the entire storage system will work again as if nothing happened. However, when only one HDD broke down, we couldn’t mount it properly in Linux. It is still available in the disk utility, but there is no button to mount it, and the automount feature can’t be enabled too.
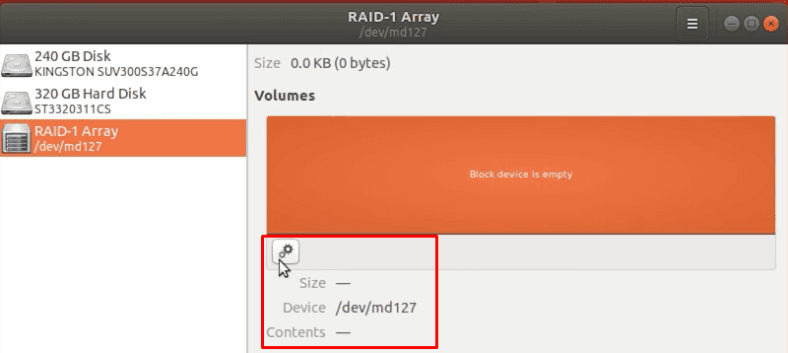
Hetman RAID Recovery managed to identify all properties at once, built and displayed the disk array automatically.
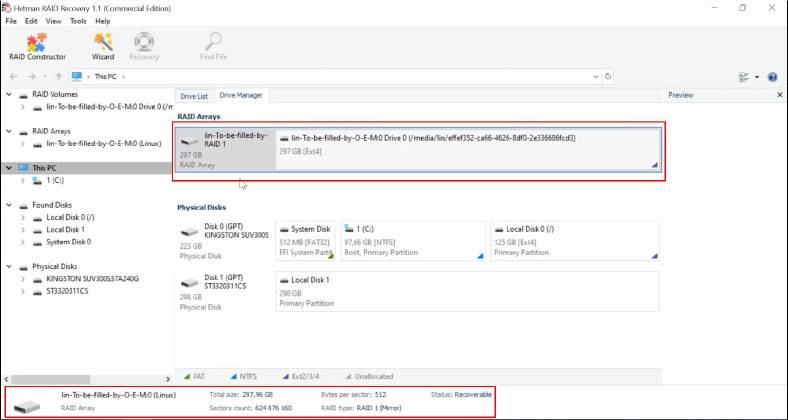
To start the scan in the Drive Manager, right-click on the device icon and open it.
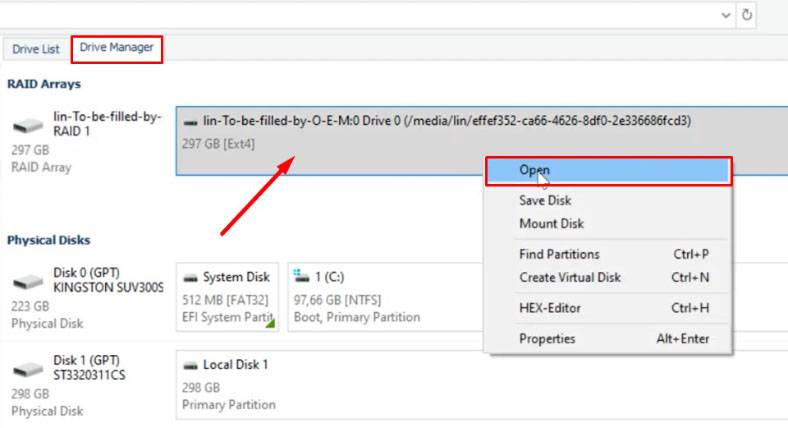
Run the Fast scan first.
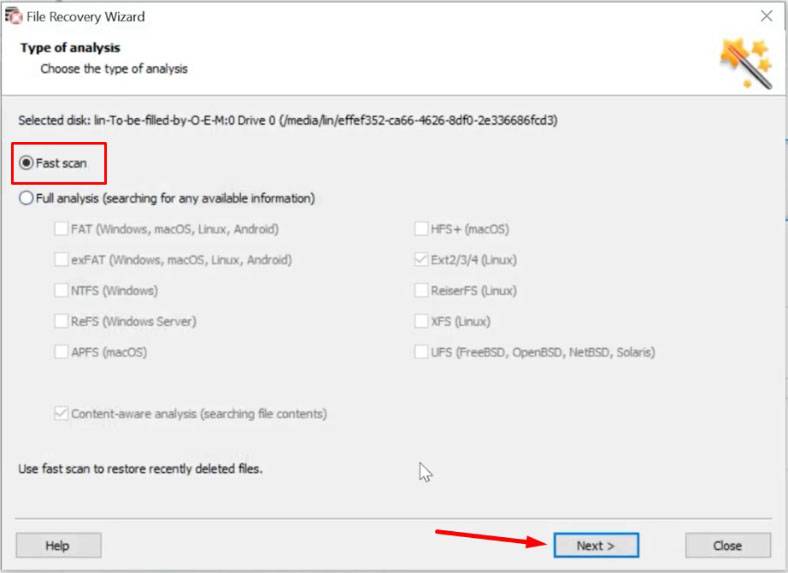
When the scan is over, the program will display the results in the right side of the window. It finds all data which is still on the disk without effort, and the contents can be previewed.
Select the files you want to restore and click Recovery.
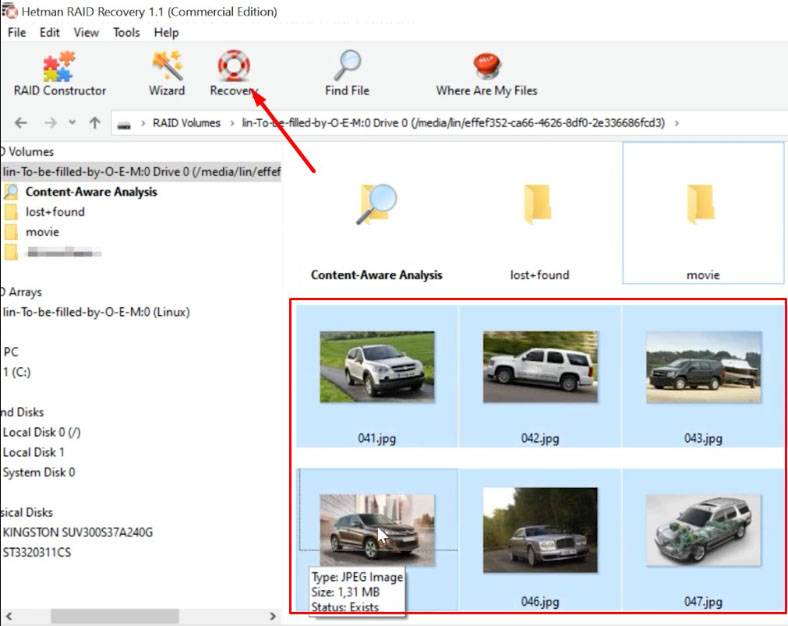
Choose where to save them, then click ”Next” and hit ”Recovery” again.
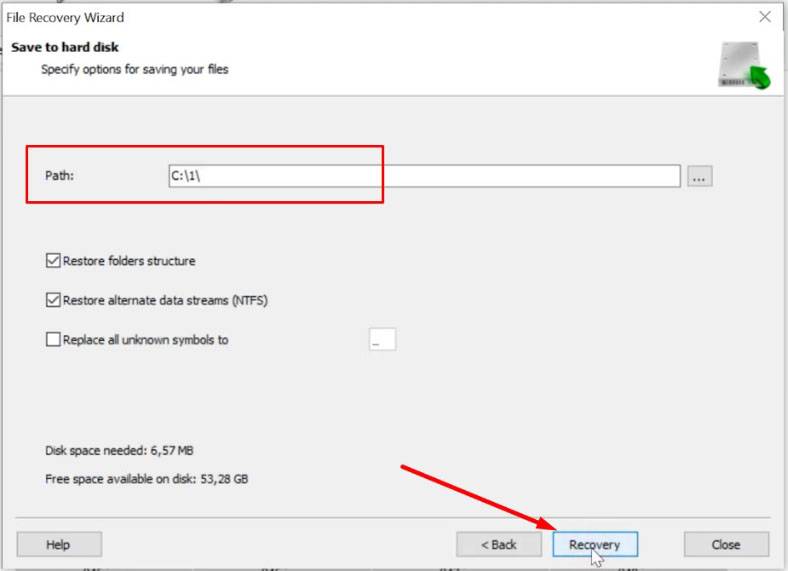
Wait until the system recovery process is complete and click ”Finish”.
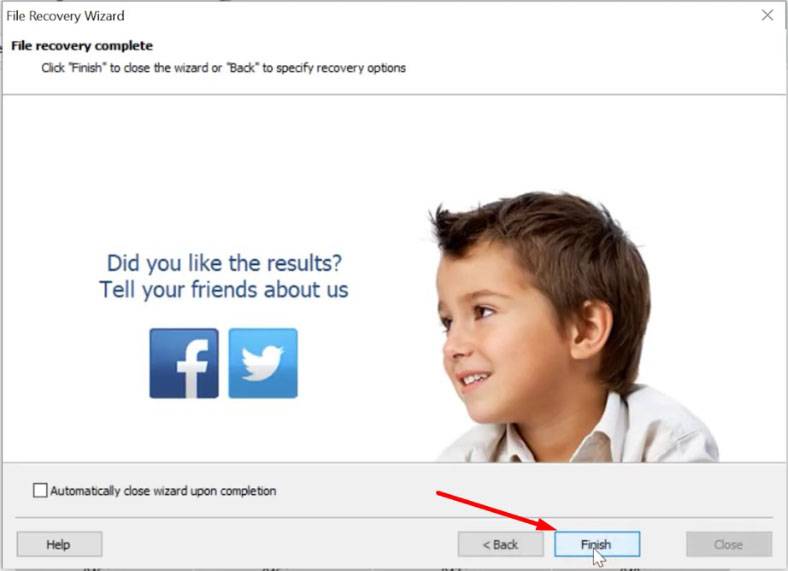
When the process is over, you will find the recovered files in the folder you have chosen.
A hardware Linux-based RAID 1 is designed in such a way that it writes service information on this array type to all of its disks (this information includes the number of disks, their serial numbers, and where each disk begins). That is why if one of the disks is missing, the program reads this data from other disks and adds the data on the missing disk when rebuilding a damaged RAID.
In some cases, this information can be damaged, and while building the array the utility can’t understand where the data on a certain disk is located, and what kind of offset is used for a specific disk. If that’s the case, the utility won’t find any data after the scan. In order to find the information which is still on the disk, you’ll have to use a special tool known as RAID Constructor.
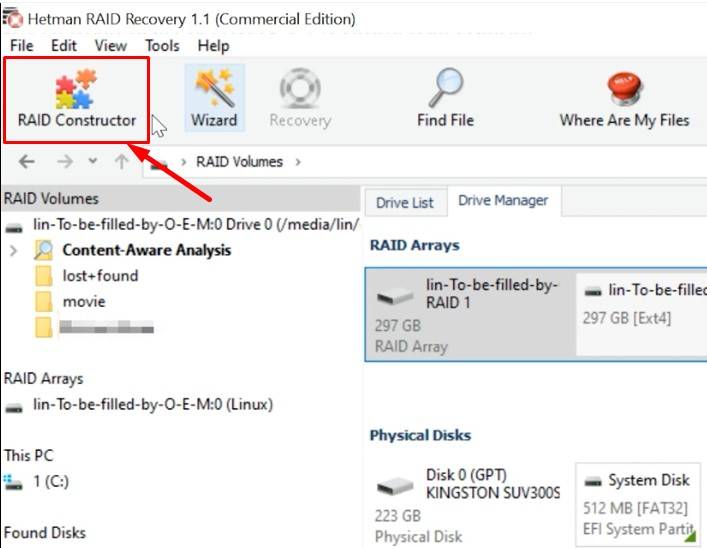
In addition to all the properties, you have to specify the offset by which you can locate the beginning of the disk.
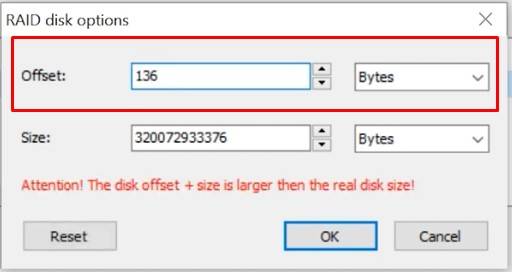
Every file system has specific signatures which help us to identify its beginning. When you specify this offset you’ll be able to rebuild the damaged RAID and extract data from there.
To find the offset, use the HEX-editor: right-click on the disk and open HEX, or press the key shortcut ”Ctrl+H”.
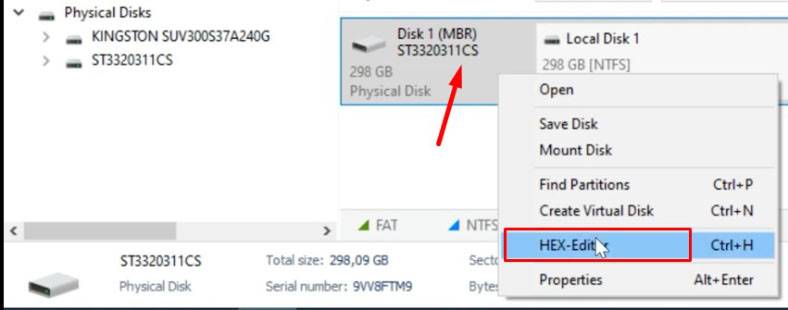
In Linux, you can find the beginning of the disk by the field with the name like ”/media/lin/”, – where lin stands for the user’s account name.
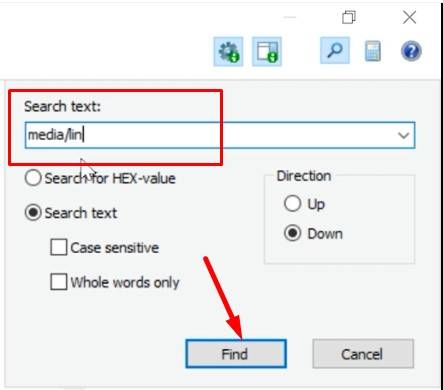
As we know, information about the beginning of the disk in this file system is written to the second sector from the beginning, so we need to go two sectors up. After that, use a calculator to convert the HEX value into the decimal system.
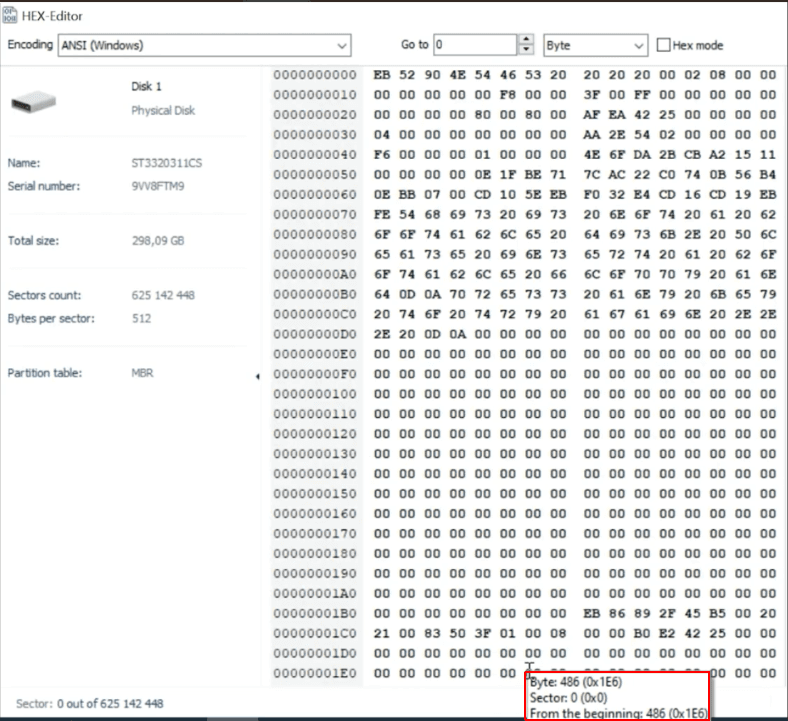
In the calculator, open the programmer mode, select HEX and enter the value (8200000). Immediately, you get the value in the decimal system (136 314 880).

Now that we know the offset, specify it in the Constructor.
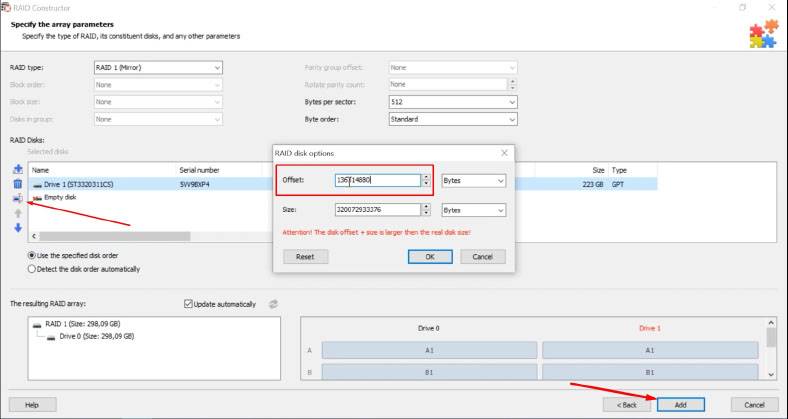
Now you should add the device, scan it and recover the found information.
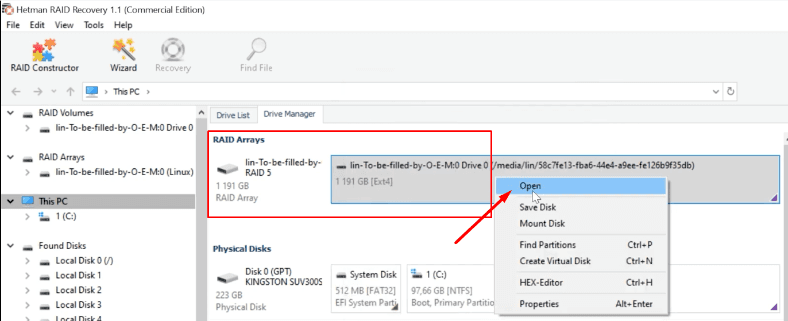
Recovering files from RAID 5
In the next example, we’ll explore the recovery procedure for RAID 5 arrays.
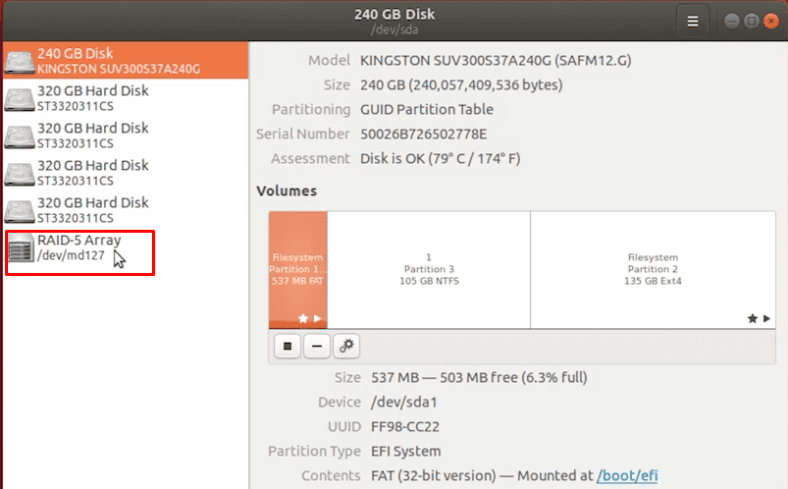
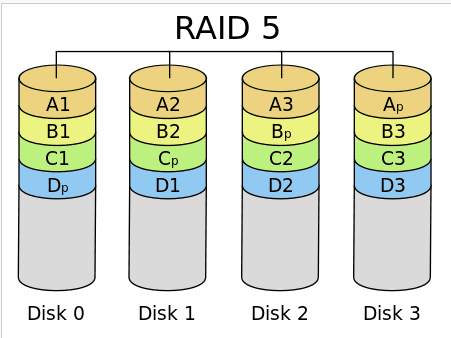
RAID-5 is a hard disk array with redundancy and striping, but without a separate parity drive.
It is designed to remain operable even if one of the disks fails. However, in practice it becomes impossible to mount RAID in Linux, when one disk breaks down. Therefore, you can’t copy any data from there. In order to restore the information, you need to connect a new disk or use additional software.

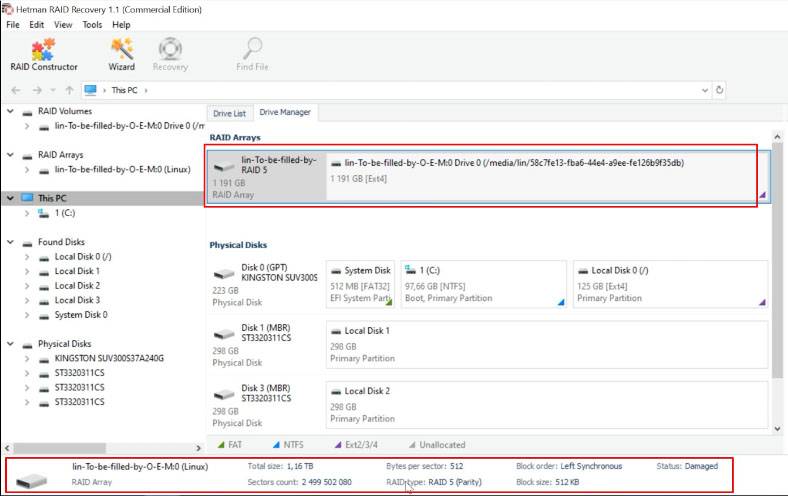
RAID 5 consists of 5 HDDs one of which is damaged. Connect the remaining hard disks to a Windows computer, or add them to a virtual machine. When the program starts, Hetman RAID Recovery identifies the array type and properties without effort.
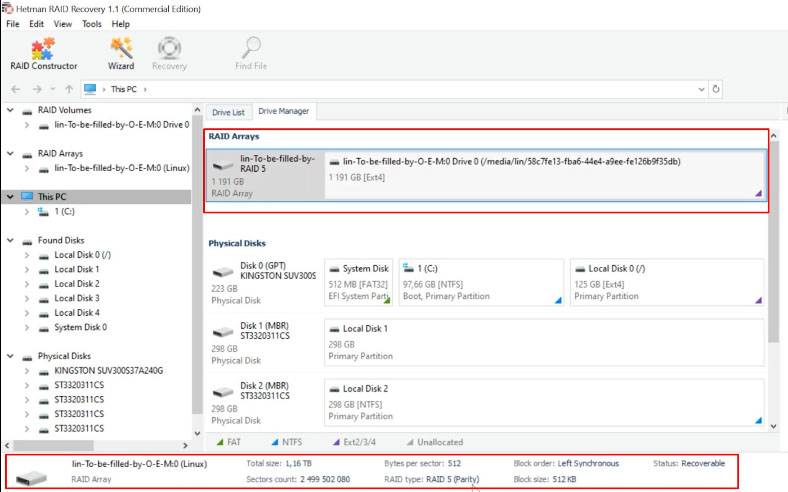
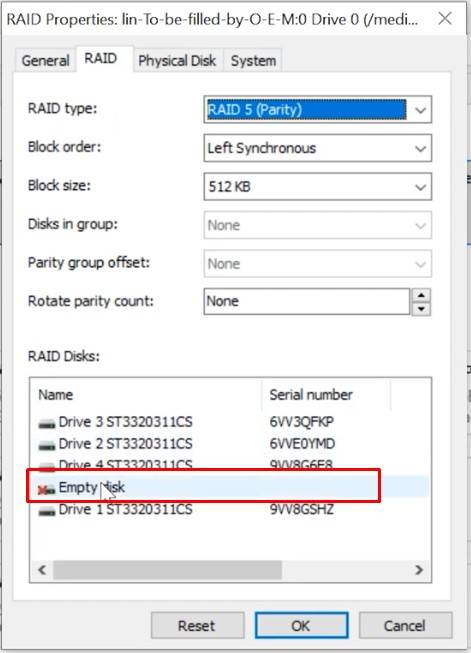
One HDD is empty. (Right-click on the array – Properties – the RAID tab)
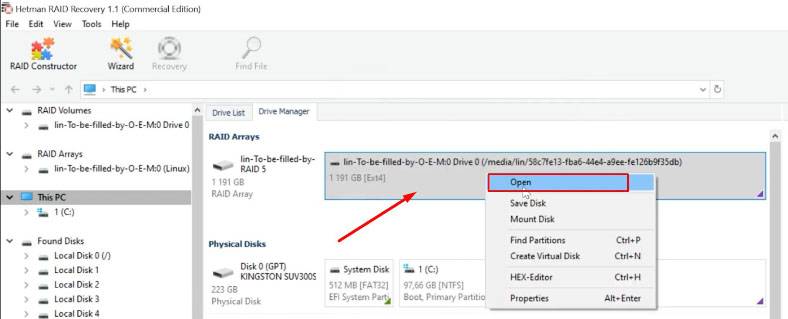
Right-click on it, then select Open.
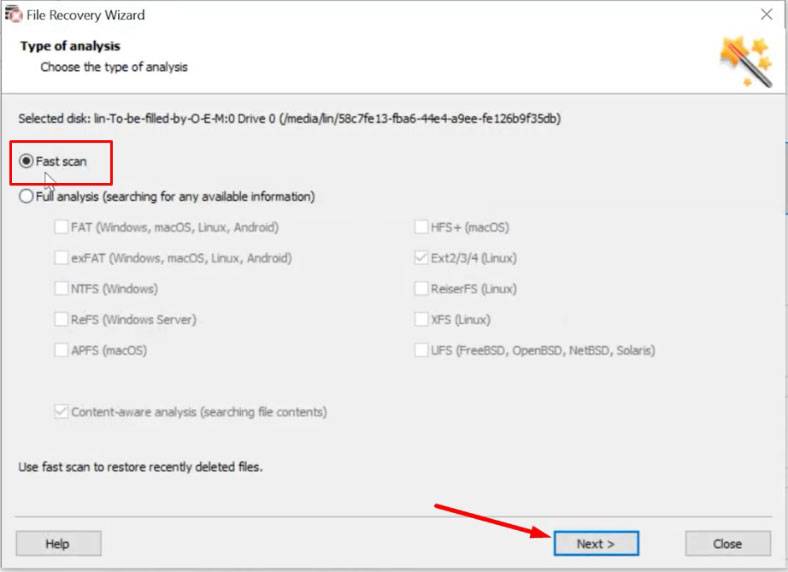
Analyze the array – select Fast scan.
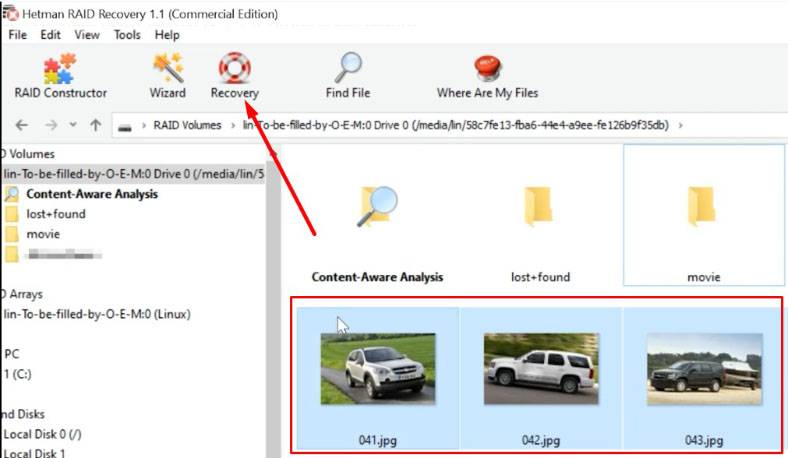
The program has found the remaining files easily. Select the ones you need and click Recovery.
Choose where to save them, then click Recovery again.
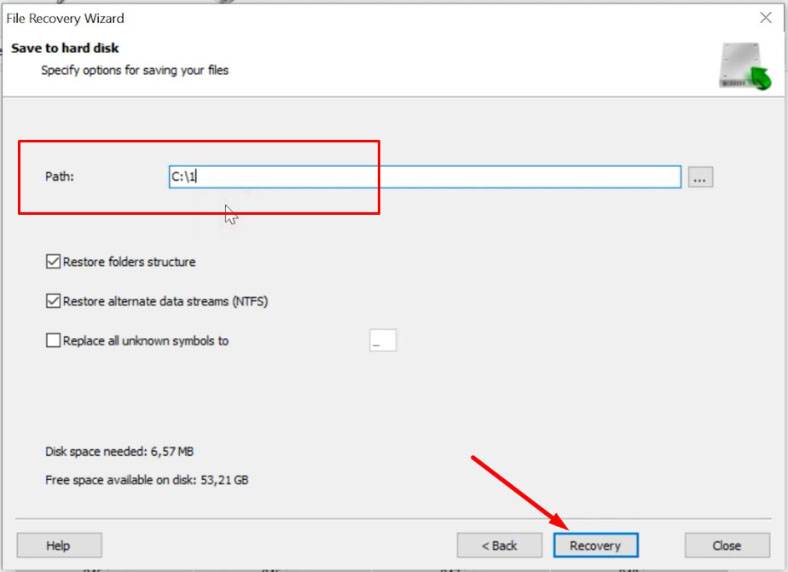
In the end, you’ll find all the information in the folder you have specified for saving.
The program will be able to identify the RAID type, all the properties and the file system even if several disks break down at the same time.
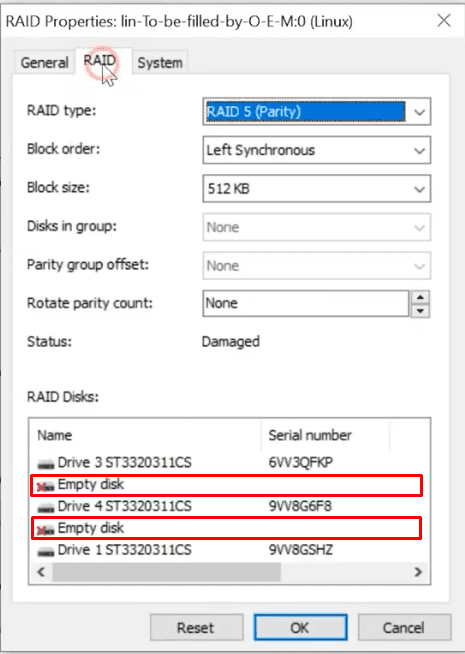
Two disks are empty (Right-click – Properties – jump to the RAID tab).
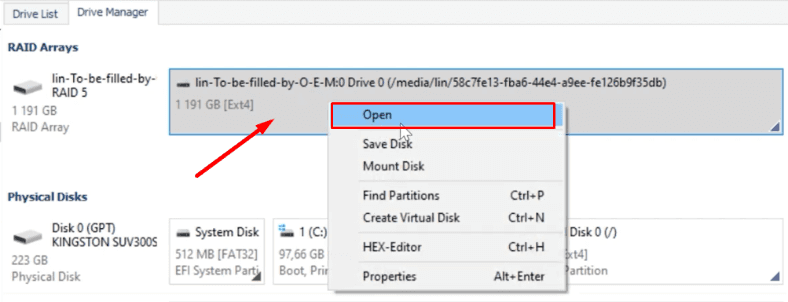
Scan the device: right-click on it and select Open.
For starters, we only run Fast scan.
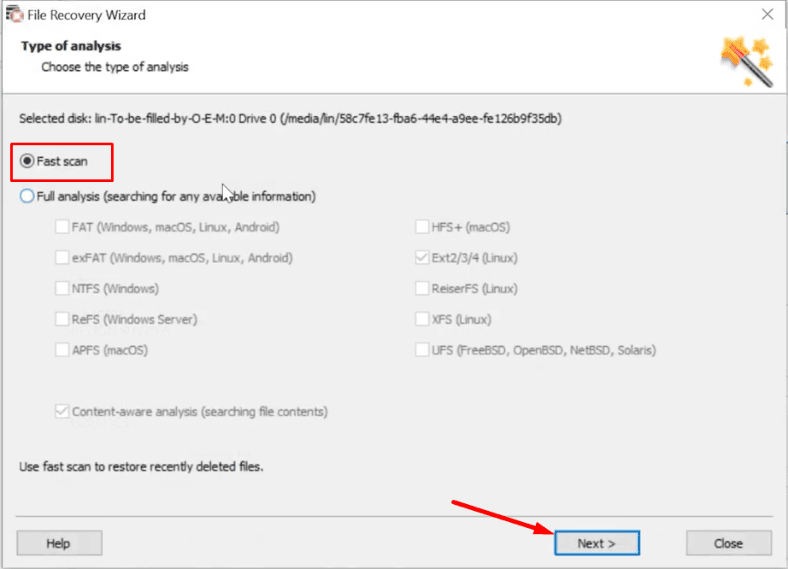
As a result, the Fast scan couldn’t find any healthy data – all the data it has identified is damaged. After that, we decided to run Full analysis.
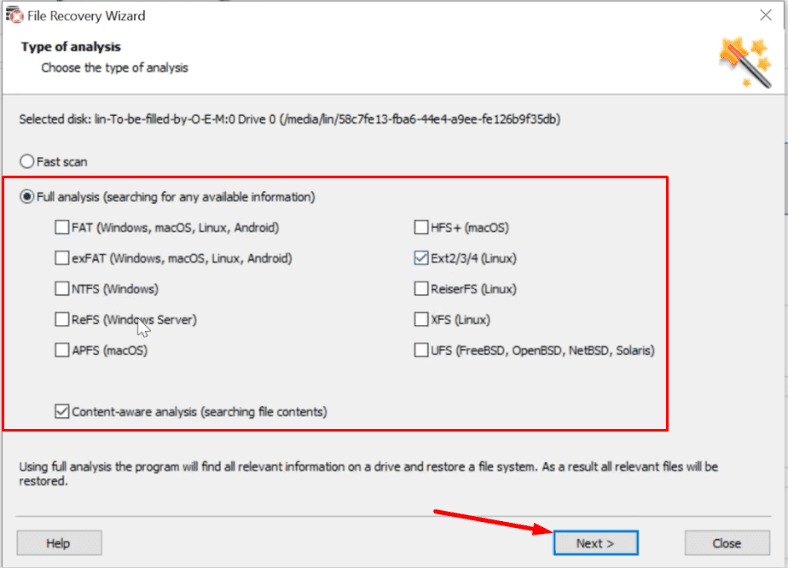
After full analysis, the utility was able to find the necessary information which remained intact, but some data is damaged.
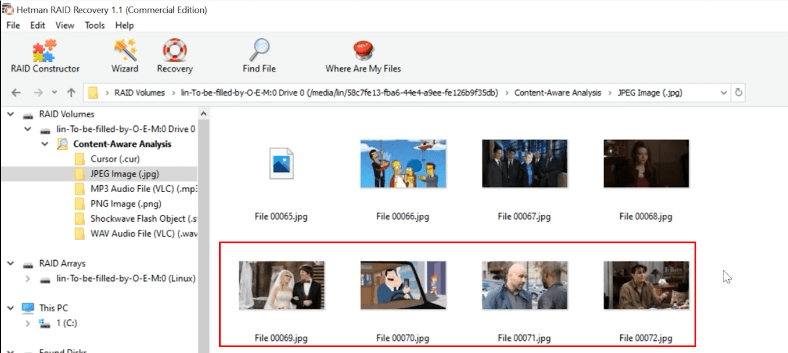
When two or more hard disks break down, this array type becomes completely inoperable and restoring information becomes a challenging task.
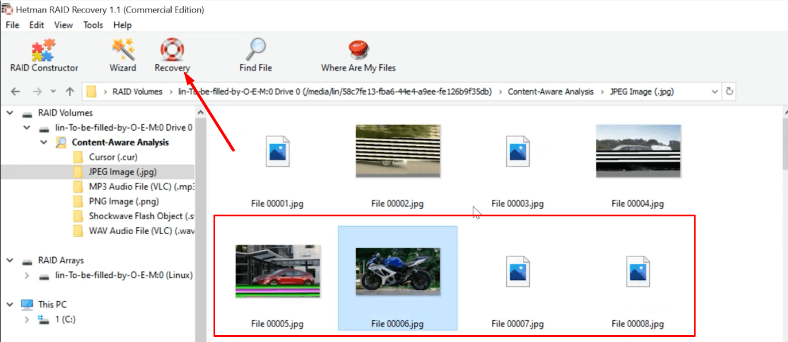
That is why such result can be considered quite good as we managed to recover a part of the remaining data. Select and recover it.
For the last test, we have built a RAID 0 consisting of five hard disks.
If one disk in this array breaks down, the whole storage system becomes inoperable and all the information is actually lost. We can’t mount it in Linuxeither – the disks won’t open.
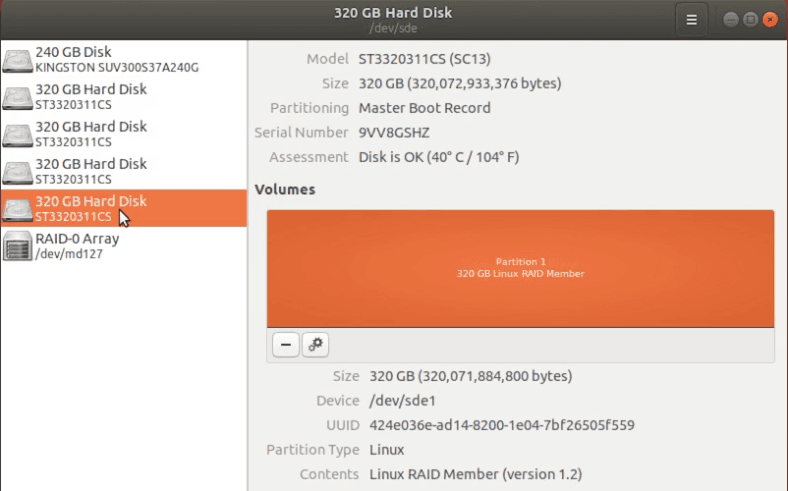
Let’s see if we can extract at least a bit of the information with the help of Hetman RAID Recovery.
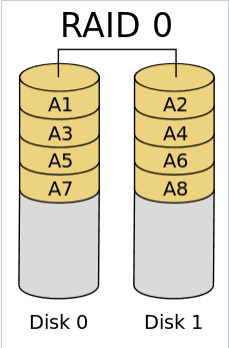
RAID-0 is a striped hard disk array with improved performance but without any fault tolerance in terms of the equipment involved. After one of the disks fails or breaks down, the entire device becomes inoperable.
As a matter of fact, RAID-0 is not a RAID array, technically, as it doesn’t provide any data redundancy. The core advantage of this system is the suggested performance boost.
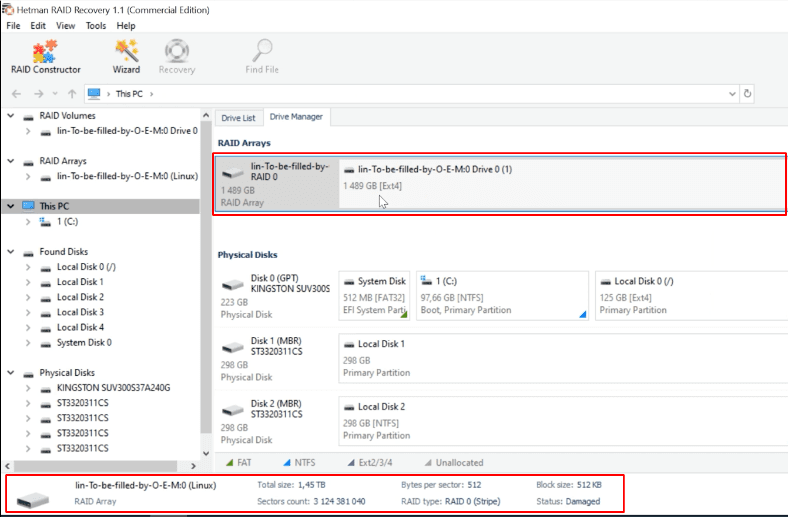
The program has identified the type and properties of the damaged device.
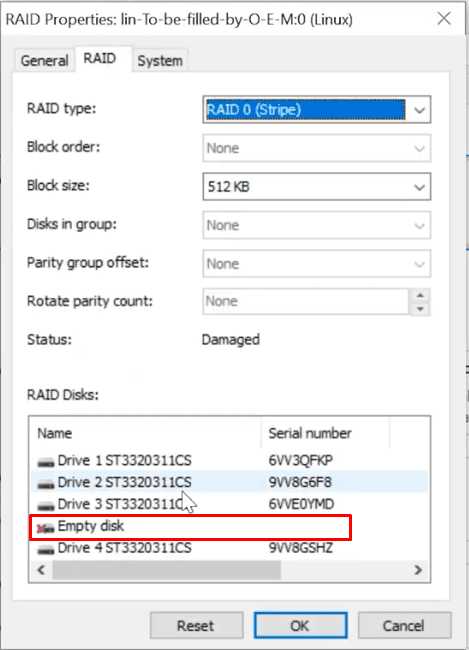
In the properties, we can see that one disk is empty. (Right-click on the array – Properties – the RAID tab).
In this case the fast scan hasn’t found anything, so we had to use an in-depth analysis.
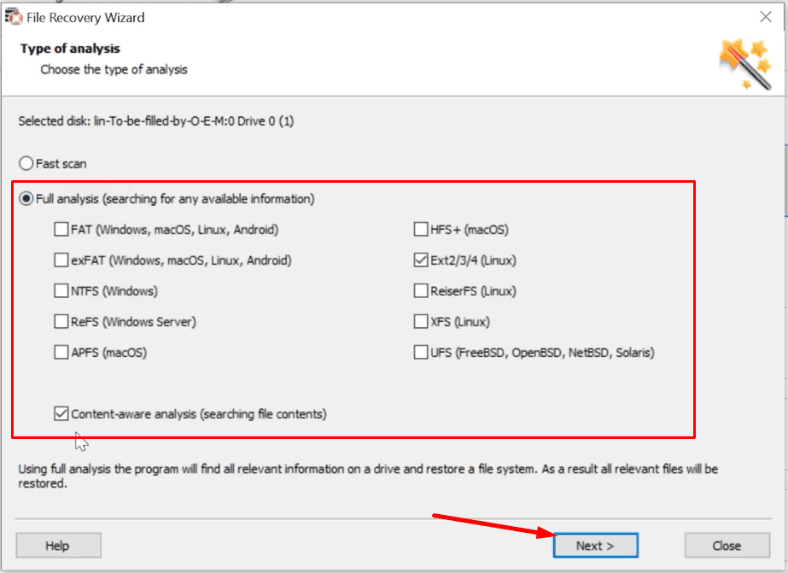
After the deep scan, the utility can find the data, but some files are damaged.
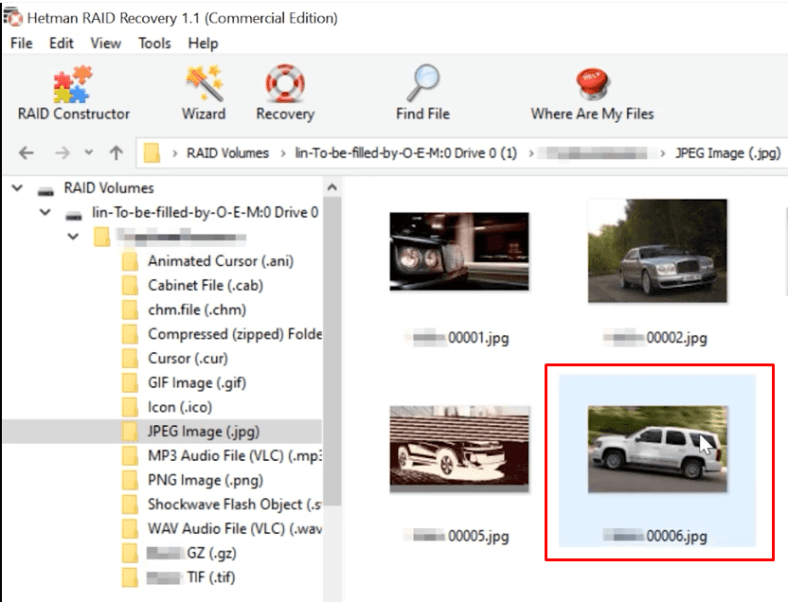
Hetman RAID Recovery managed to detect a part of the remaining information. Select the files you want to restore and click Recovery,
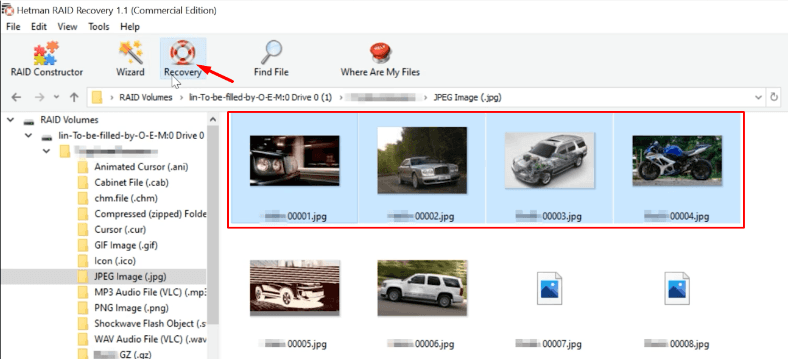
Specify where to save them, Next, and click Recovery again.
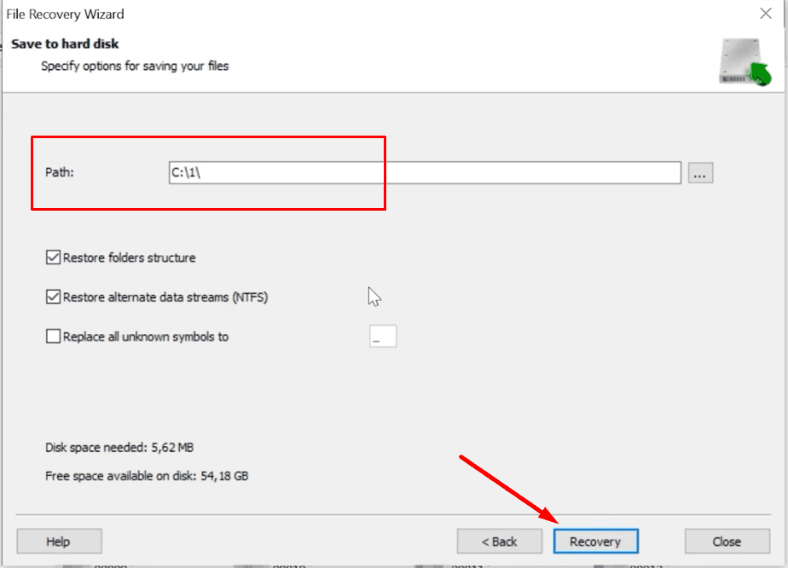
When the process is over, click Finish.
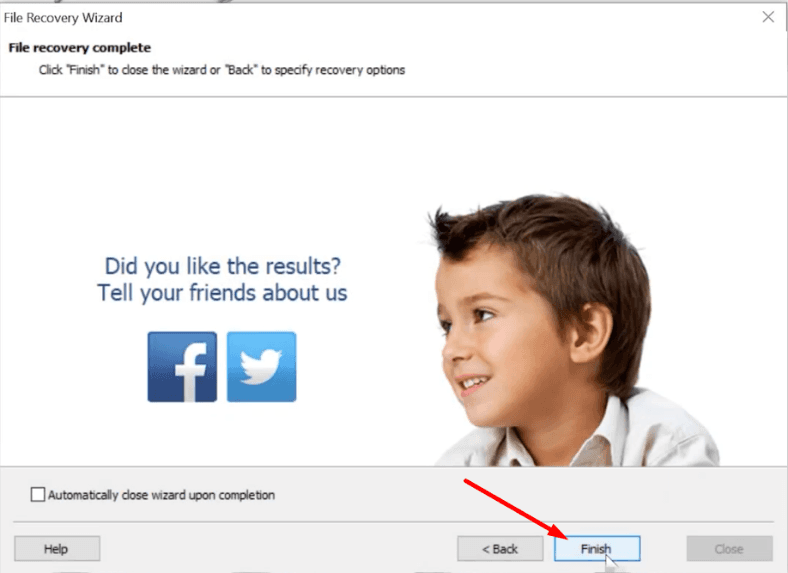
All the files will be placed to the folder you have specified.
See the full article with all additional video tutorials.

A Linux-based hardware RAID is hardly a good example of a reliable storage system – if one of the disks within the array gets disconnected, the whole RAID can’t be mounted, and all the information becomes inaccessible in a second. In this case, you will need a special utility to rebuild the array with the remaining (healthy) drives. It will find and display the data which is still there, and restore this information.
We will perform all the tests with Hetman RAID Recovery. Its main purpose is to search and restore information from inoperable drives which used to be a part of the disk array. The program will identify automatically which controller, motherboard or software tool were used to build the array, and will rebuild the RAID with the remaining disks which are still in good condition. The final step is to find all the data you need and save it to healthy drives.
At the moment, there is no version of Hetman RAID Recovery for Linux, but running the utility on this specific operating system is still possible.
To recover information from a damaged Linux-based RAID, connect the hard disks to a Windows computer. If you don’t have access to such a computer, you can install a Windows virtual machine or install this operating system along with Linux.

How to recover data from a RAID 1 system
First of all, let’s explore the recovery procedure for a RAID 1 device built on Linux and consisting of two hard disks of the same model.
This RAID type can use an even number of drives (at least two) which are used for ”mirroring” all the data.

This disk array type is one of the most popular. It is characterized by high resilience: if one of the drives fails, you can replace it with the ”mirrored” copy, and then add another (new) drive, and the entire storage system will work again as if nothing happened. However, when only one HDD broke down, we couldn’t mount it properly in Linux. It is still available in the disk utility, but there is no button to mount it, and the automount feature can’t be enabled too.

Hetman RAID Recovery managed to identify all properties at once, built and displayed the disk array automatically.

To start the scan in the Drive Manager, right-click on the device icon and open it.

Run the Fast scan first.

When the scan is over, the program will display the results in the right side of the window. It finds all data which is still on the disk without effort, and the contents can be previewed.
Select the files you want to restore and click Recovery.

Choose where to save them, then click ”Next” and hit ”Recovery” again.

Wait until the system recovery process is complete and click ”Finish”.

When the process is over, you will find the recovered files in the folder you have chosen.
A hardware Linux-based RAID 1 is designed in such a way that it writes service information on this array type to all of its disks (this information includes the number of disks, their serial numbers, and where each disk begins). That is why if one of the disks is missing, the program reads this data from other disks and adds the data on the missing disk when rebuilding a damaged RAID.
In some cases, this information can be damaged, and while building the array the utility can’t understand where the data on a certain disk is located, and what kind of offset is used for a specific disk. If that’s the case, the utility won’t find any data after the scan. In order to find the information which is still on the disk, you’ll have to use a special tool known as RAID Constructor.

In addition to all the properties, you have to specify the offset by which you can locate the beginning of the disk.

Every file system has specific signatures which help us to identify its beginning. When you specify this offset you’ll be able to rebuild the damaged RAID and extract data from there.
To find the offset, use the HEX-editor: right-click on the disk and open HEX, or press the key shortcut ”Ctrl+H”.

In Linux, you can find the beginning of the disk by the field with the name like ”/media/lin/”, – where lin stands for the user’s account name.

As we know, information about the beginning of the disk in this file system is written to the second sector from the beginning, so we need to go two sectors up. After that, use a calculator to convert the HEX value into the decimal system.

In the calculator, open the programmer mode, select HEX and enter the value (8200000). Immediately, you get the value in the decimal system (136 314 880).

Now that we know the offset, specify it in the Constructor.

Now you should add the device, scan it and recover the found information.

Recovering files from RAID 5
In the next example, we’ll explore the recovery procedure for RAID 5 arrays.

RAID-5 is a hard disk array with redundancy and striping, but without a separate parity drive.

It is designed to remain operable even if one of the disks fails. However, in practice it becomes impossible to mount RAID in Linux, when one disk breaks down. Therefore, you can’t copy any data from there. In order to restore the information, you need to connect a new disk or use additional software.

RAID 5 consists of 5 HDDs one of which is damaged. Connect the remaining hard disks to a Windows computer, or add them to a virtual machine. When the program starts, Hetman RAID Recovery identifies the array type and properties without effort.

One HDD is empty. (Right-click on the array – Properties – the RAID tab)

Right-click on it, then select Open.

Analyze the array – select Fast scan.

The program has found the remaining files easily. Select the ones you need and click Recovery.

Choose where to save them, then click Recovery again.

In the end, you’ll find all the information in the folder you have specified for saving.
The program will be able to identify the RAID type, all the properties and the file system even if several disks break down at the same time.

Two disks are empty (Right-click – Properties – jump to the RAID tab).

Scan the device: right-click on it and select Open.

For starters, we only run Fast scan.

As a result, the Fast scan couldn’t find any healthy data – all the data it has identified is damaged. After that, we decided to run Full analysis.

After full analysis, the utility was able to find the necessary information which remained intact, but some data is damaged.

When two or more hard disks break down, this array type becomes completely inoperable and restoring information becomes a challenging task.
That is why such result can be considered quite good as we managed to recover a part of the remaining data. Select and recover it.

How to recover data from RAID 0
For the last test, we have built a RAID 0 consisting of five hard disks.
If one disk in this array breaks down, the whole storage system becomes inoperable and all the information is actually lost. We can’t mount it in Linuxeither – the disks won’t open.

Let’s see if we can extract at least a bit of the information with the help of Hetman RAID Recovery.
RAID-0 is a striped hard disk array with improved performance but without any fault tolerance in terms of the equipment involved. After one of the disks fails or breaks down, the entire device becomes inoperable.
As a matter of fact, RAID-0 is not a RAID array, technically, as it doesn’t provide any data redundancy. The core advantage of this system is the suggested performance boost.

The program has identified the type and properties of the damaged device.

In the properties, we can see that one disk is empty. (Right-click on the array – Properties – the RAID tab).

In this case the fast scan hasn’t found anything, so we had to use an in-depth analysis.

After the deep scan, the utility can find the data, but some files are damaged.

Hetman RAID Recovery managed to detect a part of the remaining information. Select the files you want to restore and click Recovery,

Specify where to save them, Next, and click Recovery again.

When the process is over, click Finish.

All the files will be placed to the folder you have specified.
See the full article with all additional video tutorials.