
Hi Habrausers!
As you may know Kibana is a visualization instrument, part of ELK (Elastic, Logstash, Kibana) stack. With the help of Kibana you may analyze and visualize your data, build different charts and combine them on the dashboard to present data in the most beautiful way.
People who use Kibana in our company have different background — some of them are technical who process data, some are managers who simply want to monitor some KPIs. And all have various questions. In spite of Kibana is rather popular in IT companies, there are not many articles or courses about it. To fill the gap I have created Kibana Tips & Tricks — weekly letters with frequently asked questions or themes. Such letters help our users to become more familiar with Kibana. There are no secrets — just detailed description of how you may work with your data.I would like to share the first part of 'Kibana Tips & Tricks' with you — series of simple how-to articles for people who would like to know more about data analysis and visualization in Kibana. Today we will see how to view events in Kibana.
The simplest an quickest way to see events in Kibana is to use Discover view.
The Discover view presents all the data in your index as a table of documents and allows you to see the number of events for selected time period.
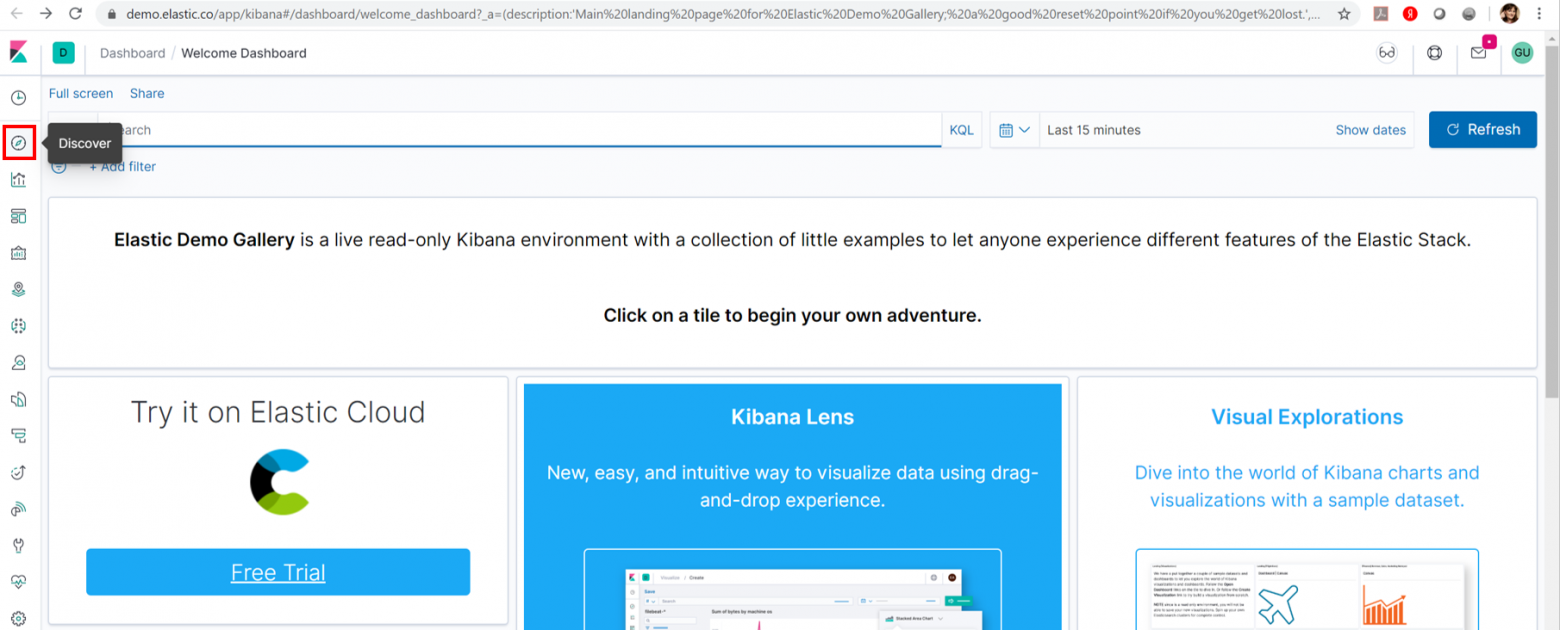
To access discover mode click on Discover on the left Kibana panel:
Discover view consists of several parts:
- Top panel with the ability to save a search or share it
- Search panel — where you may put specific filters, search for event and change the time range
- Index choice — to change the index you want to view the data from
- Index fields list which lists all available fields for this index
- Events histogram — total number of events per time bucket over a time range
- Event pane — list of individual events

Let's analyze discover view and see what we can do with specific index and event.
Top Panel
On the Top panel you see buttons: New, Save, Open, Share and Inspect.
To save the data inside discover click on the Save button on top right corner as shown below:
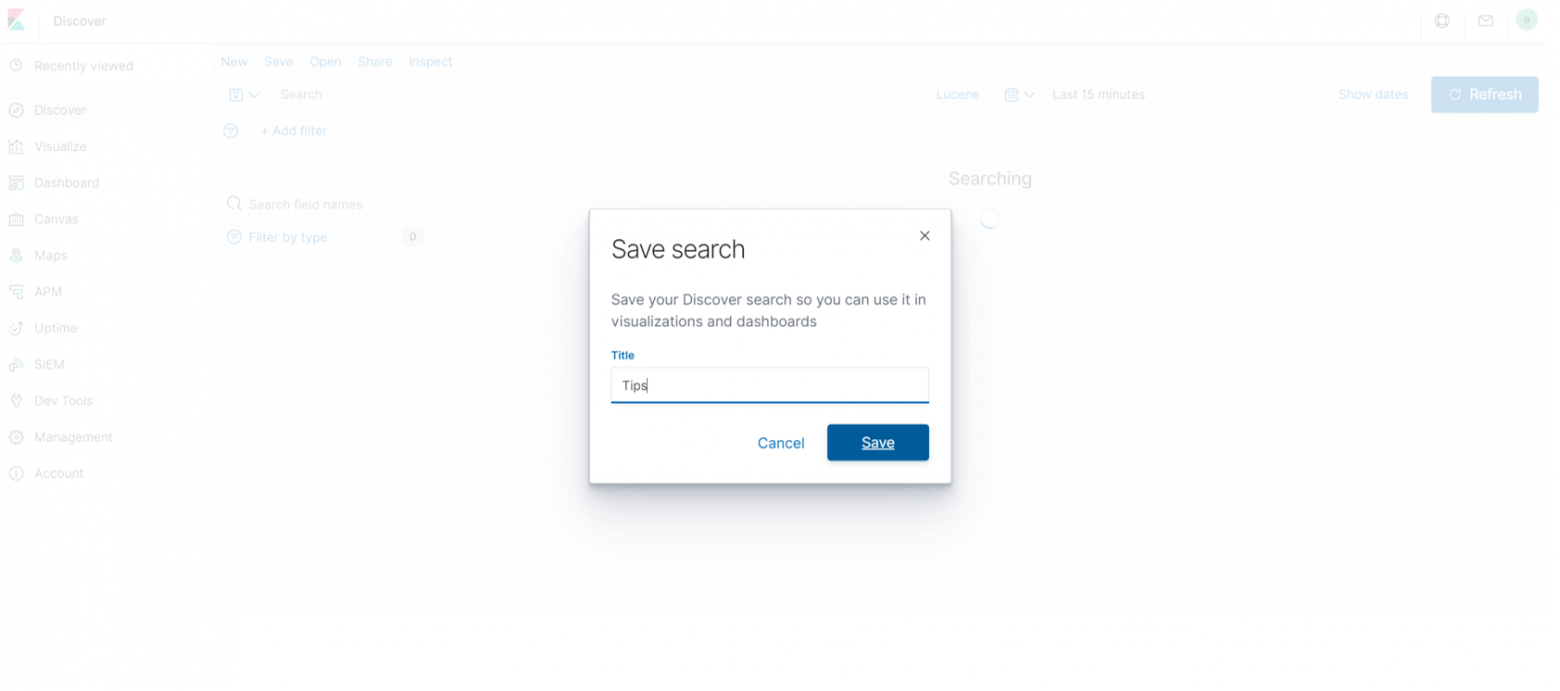
After saving you will be able to open it — just click on Open button and input your saved search name:

If you want to share the data with others use Share button:
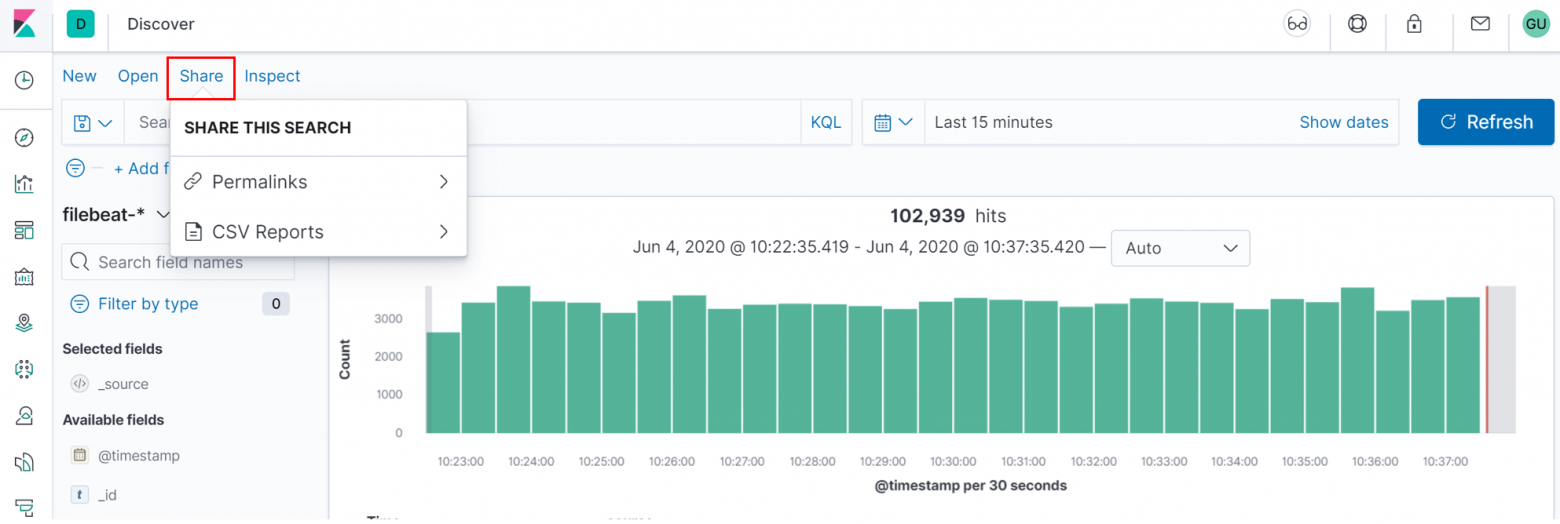
Choose Permalink.
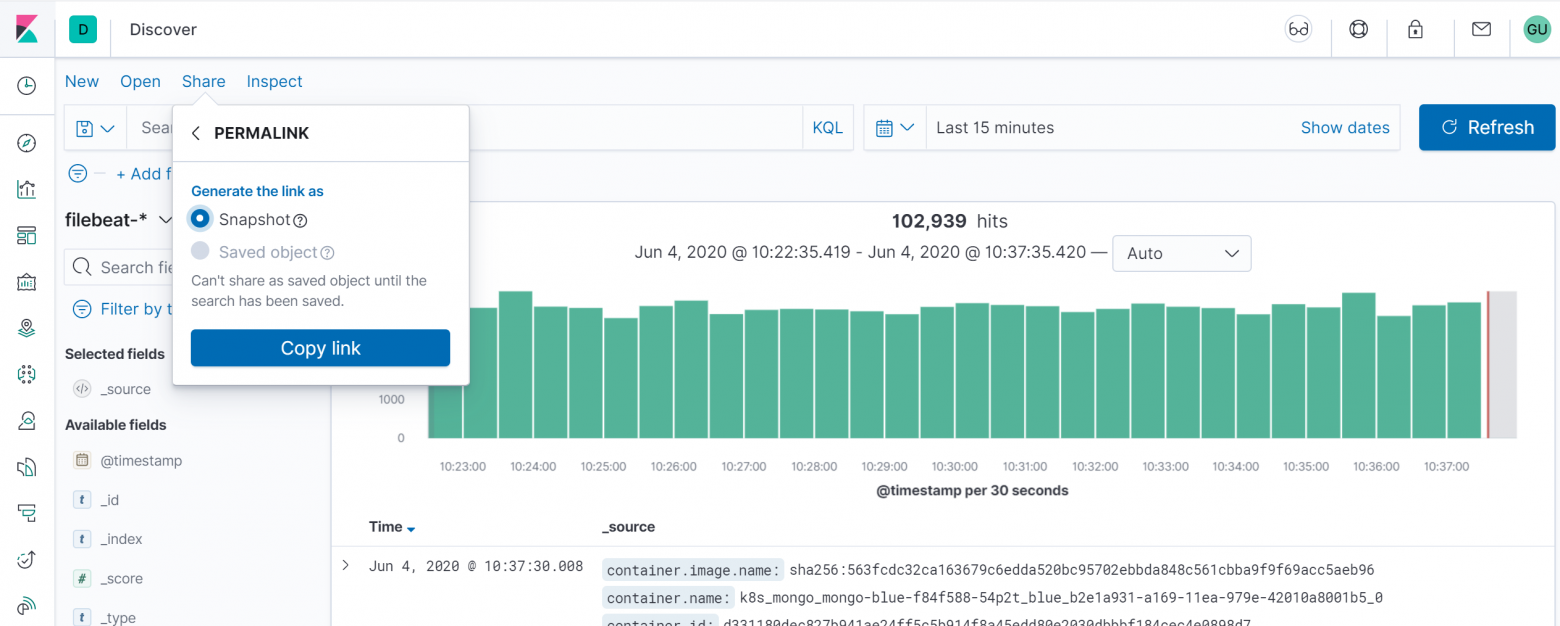
The Snapshot option will give a Kibana link which will display data available in the search currently.
The Saved object option will give a Kibana link which will display the recent data available in your search.
If you turn on Short URL option — new short url will be generated for your search (this option depends on access level).
Search Panel
You can use Search Panel to look for data inside the index. Examples are below:
To see data for specific time range you need to click on Show dates in the top right corner and than on calendar icon.
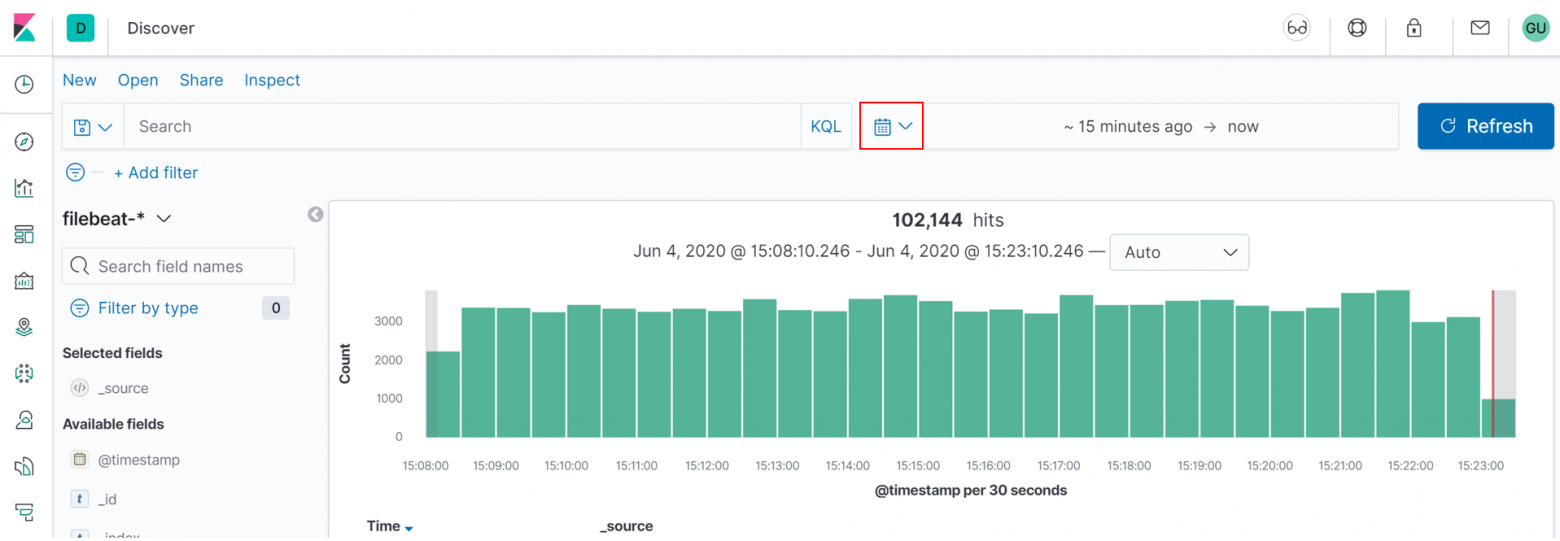
You can choose between Quick select, Commonly used, Recently used date ranges and Auto-refresh options.

With Quick select option you may choose last or future period, define seconds, minutes, hours, months or years and than put preferable range in numbers.
Commonly used allows you to choose the time range from predefined options
In Refresh every section you can set time interval in Kibana will auto-refresh the screen and get fresh data according to interval you set.
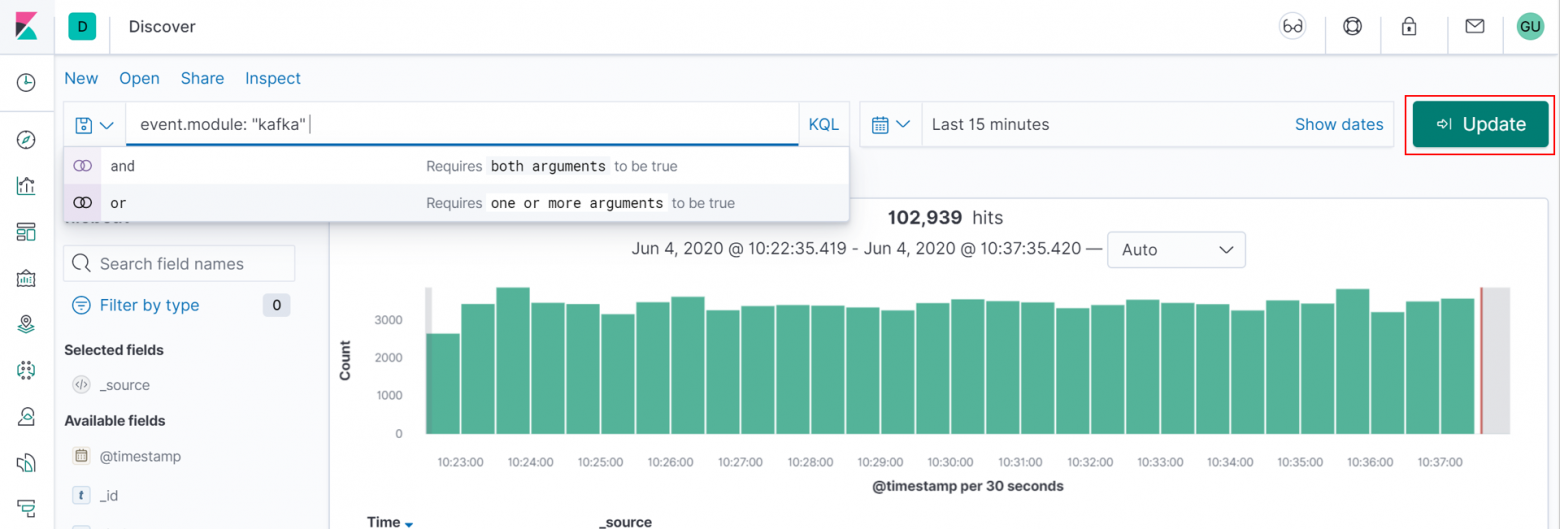
If you want to search by specific field in the list (event.module in our case), put event.module: «kafka» in the search pane end push "Update" button.
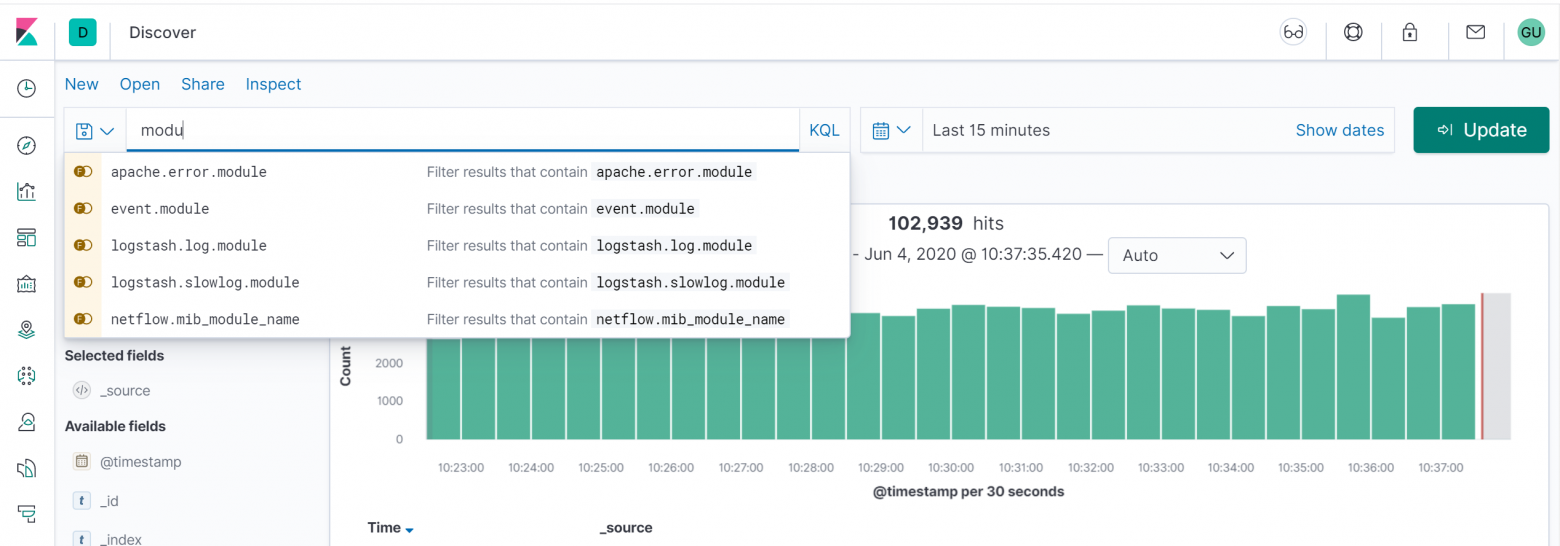
Writing search query is rather simple as it provides autocomplete — I only put «modu» and received the list of available fields to filter by:
Index select
By default for demo Kibana you will see page for filebeat-* index.
To choose another index press an arrow.

Also you may see such picture with message “No results match your search criteria”:

That means you have no events matching the defined time period or filters. Adjust filters and the time range — it should fix the problem.
Events histogram
You can see the number of events per time interval on the histogram in the center of the screen.
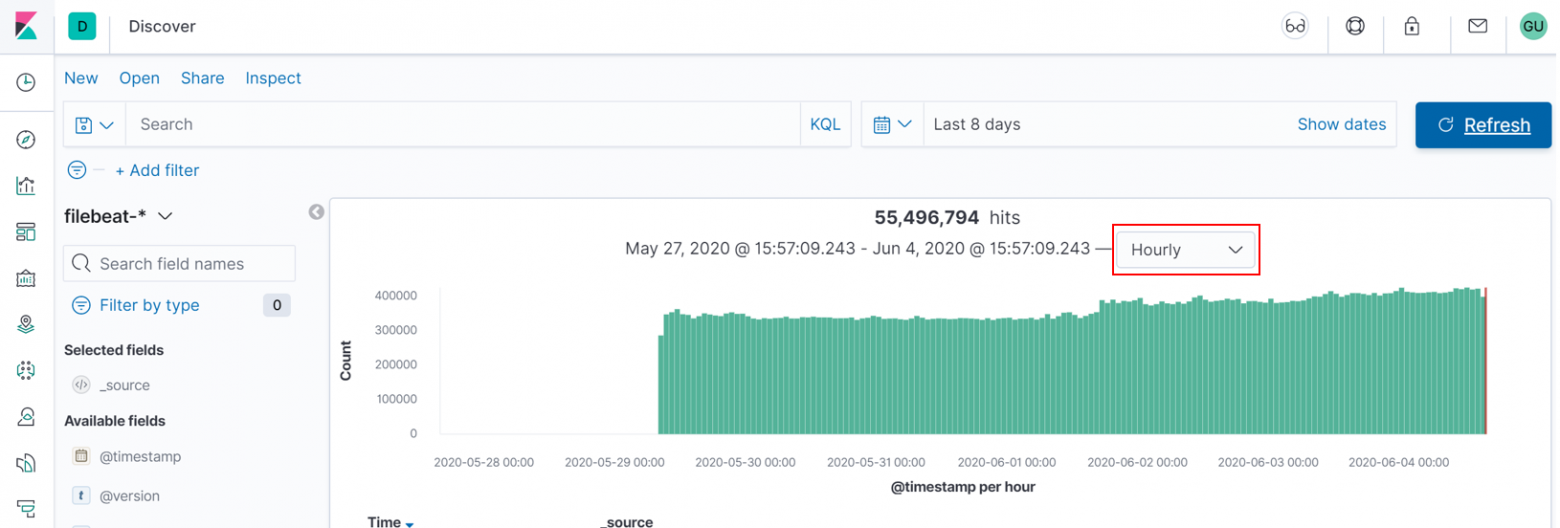
By default the number of events is shown using «auto» time granularity, but you may change it.

Hourly:
Weekly:

Index fields list
All available fields are located on the left side of the screen:

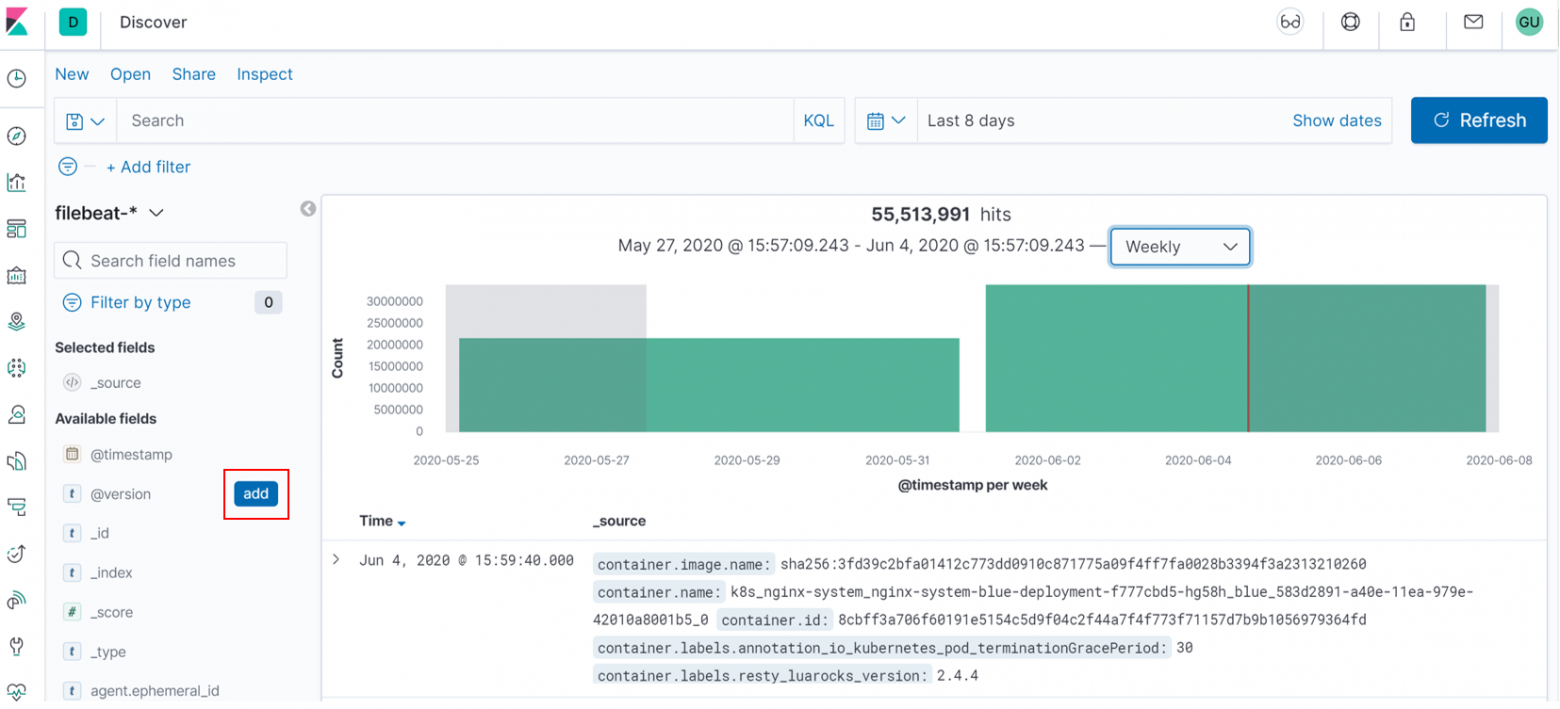
You can select the fields from available and add them to tabular mode. To do it just click on add button on the right:
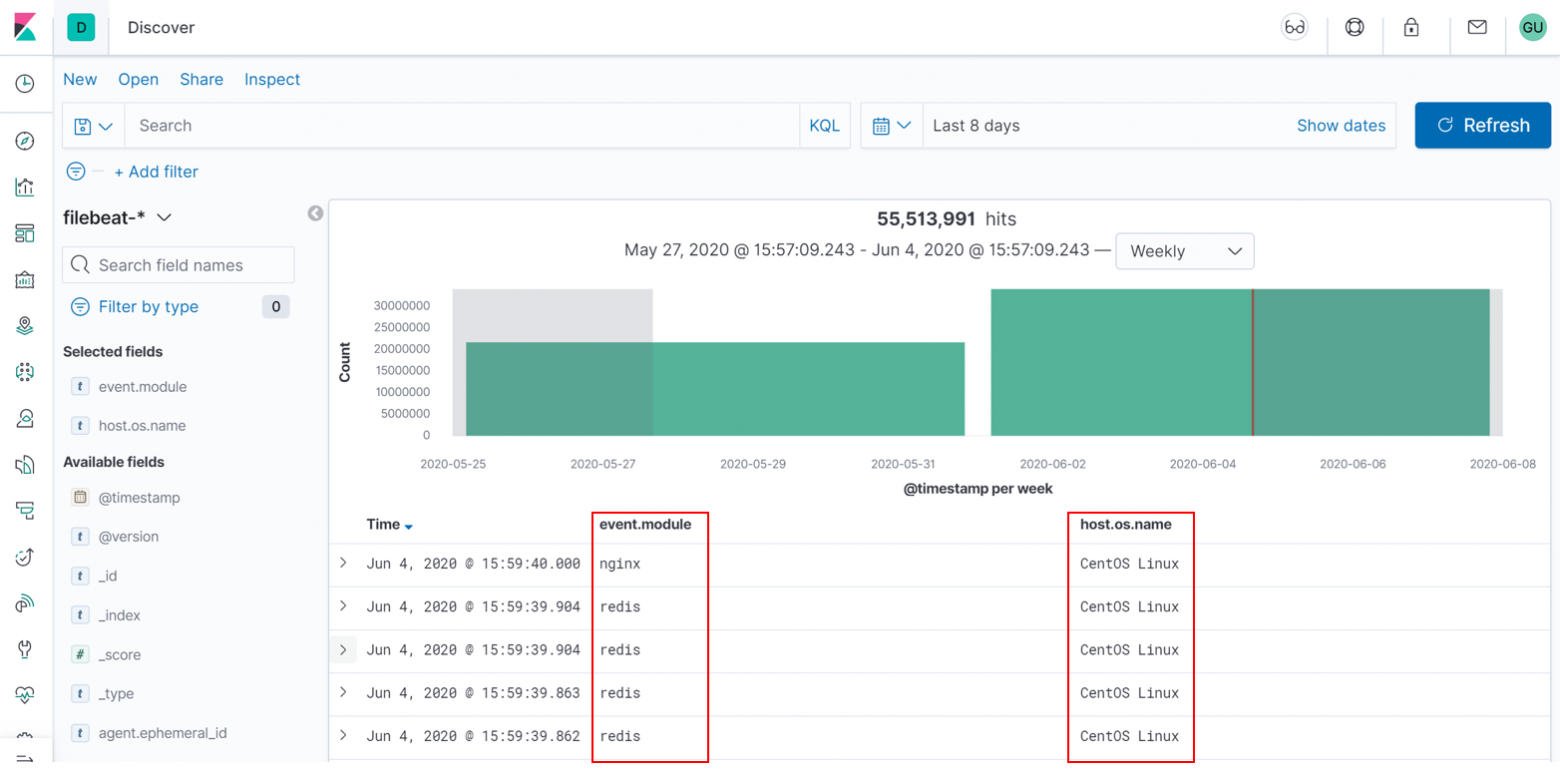
On the screenshot below 2 fields were added — event.module and host.os.name:
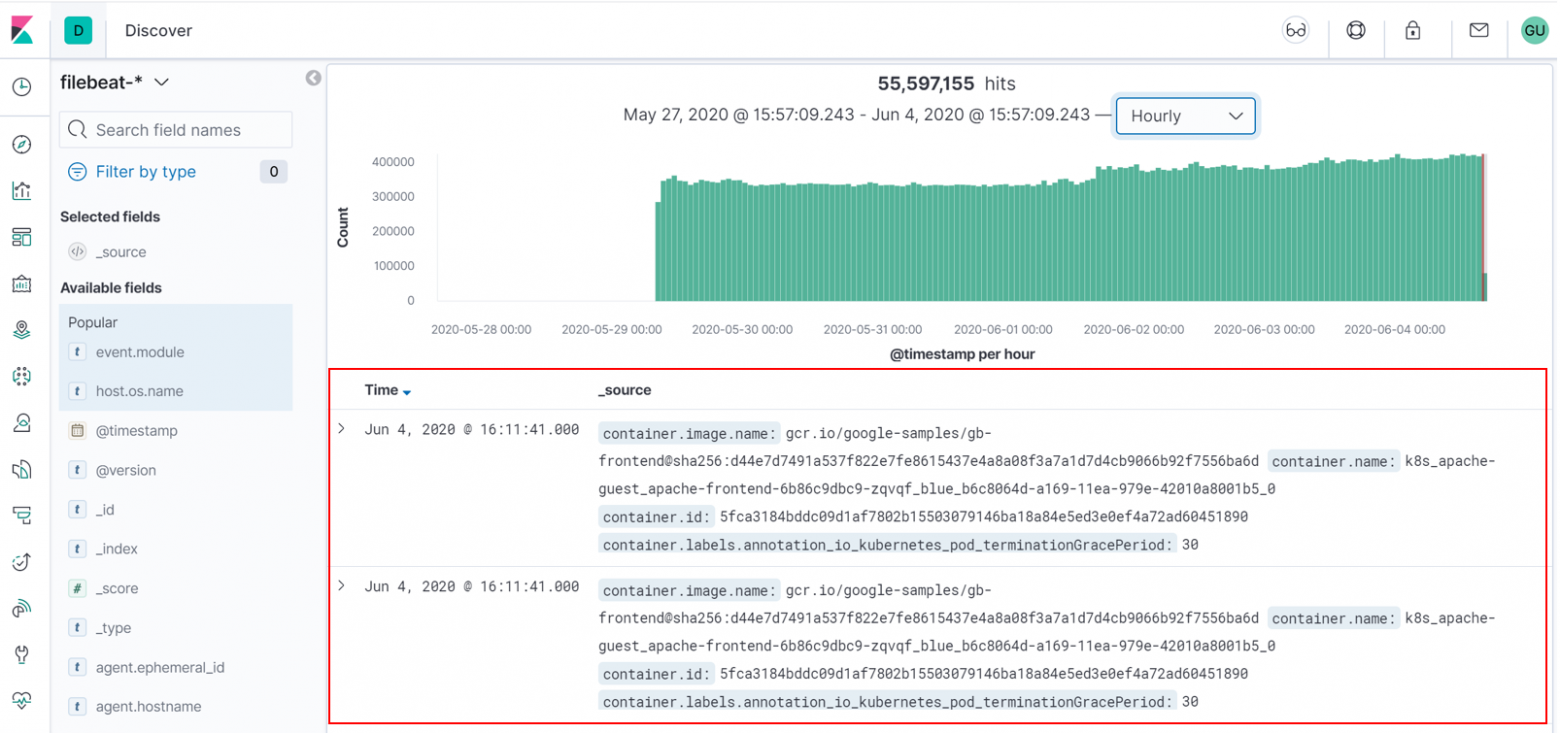
Event panel
All events are shown in row format.
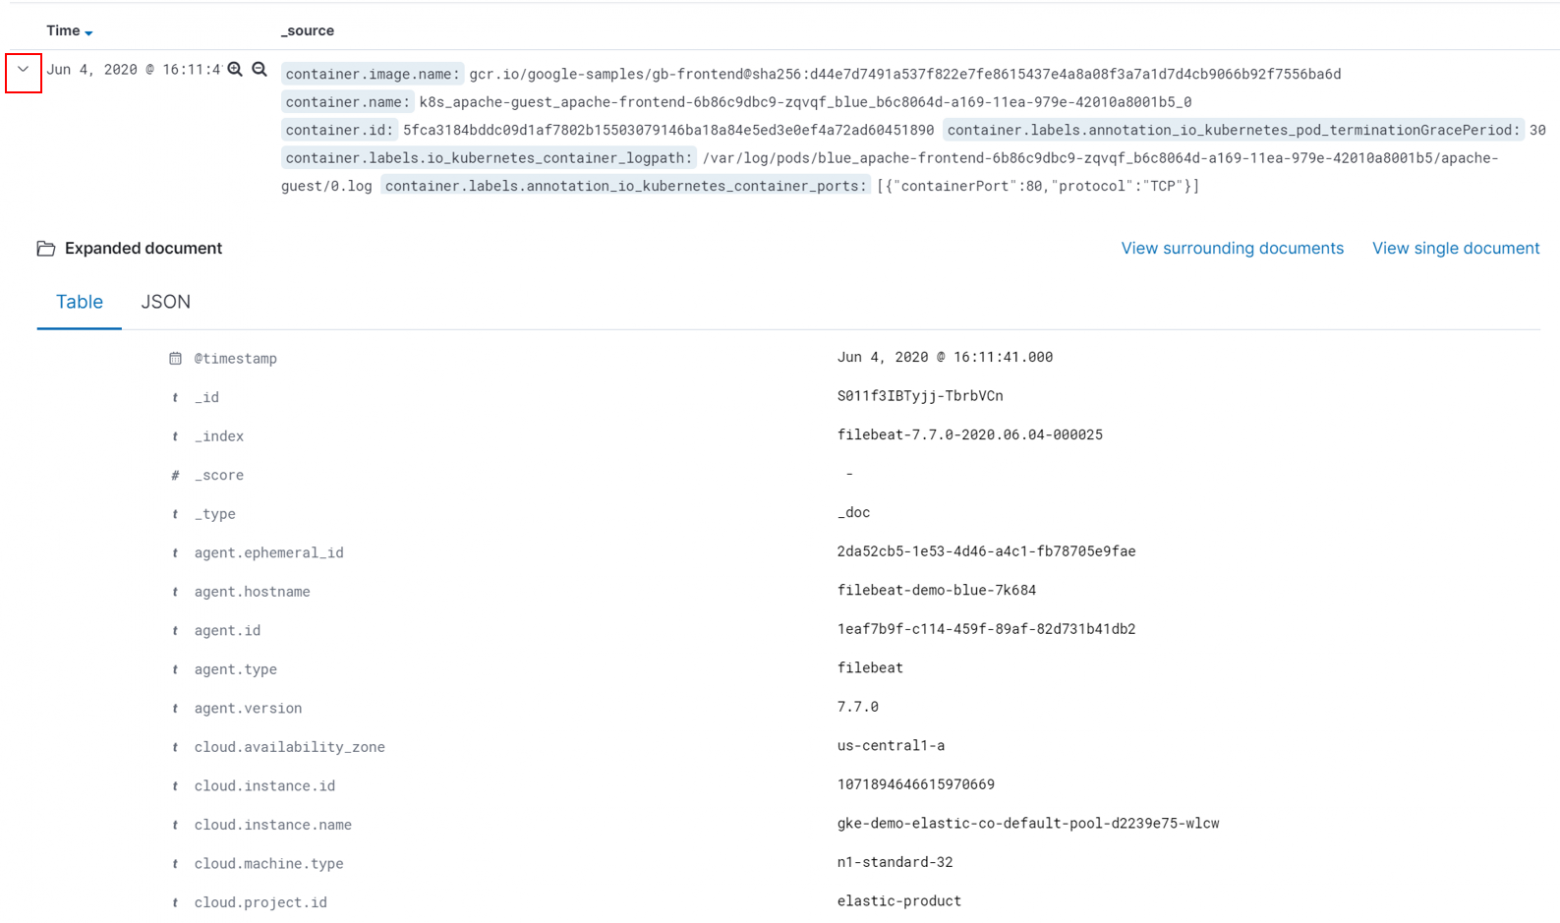
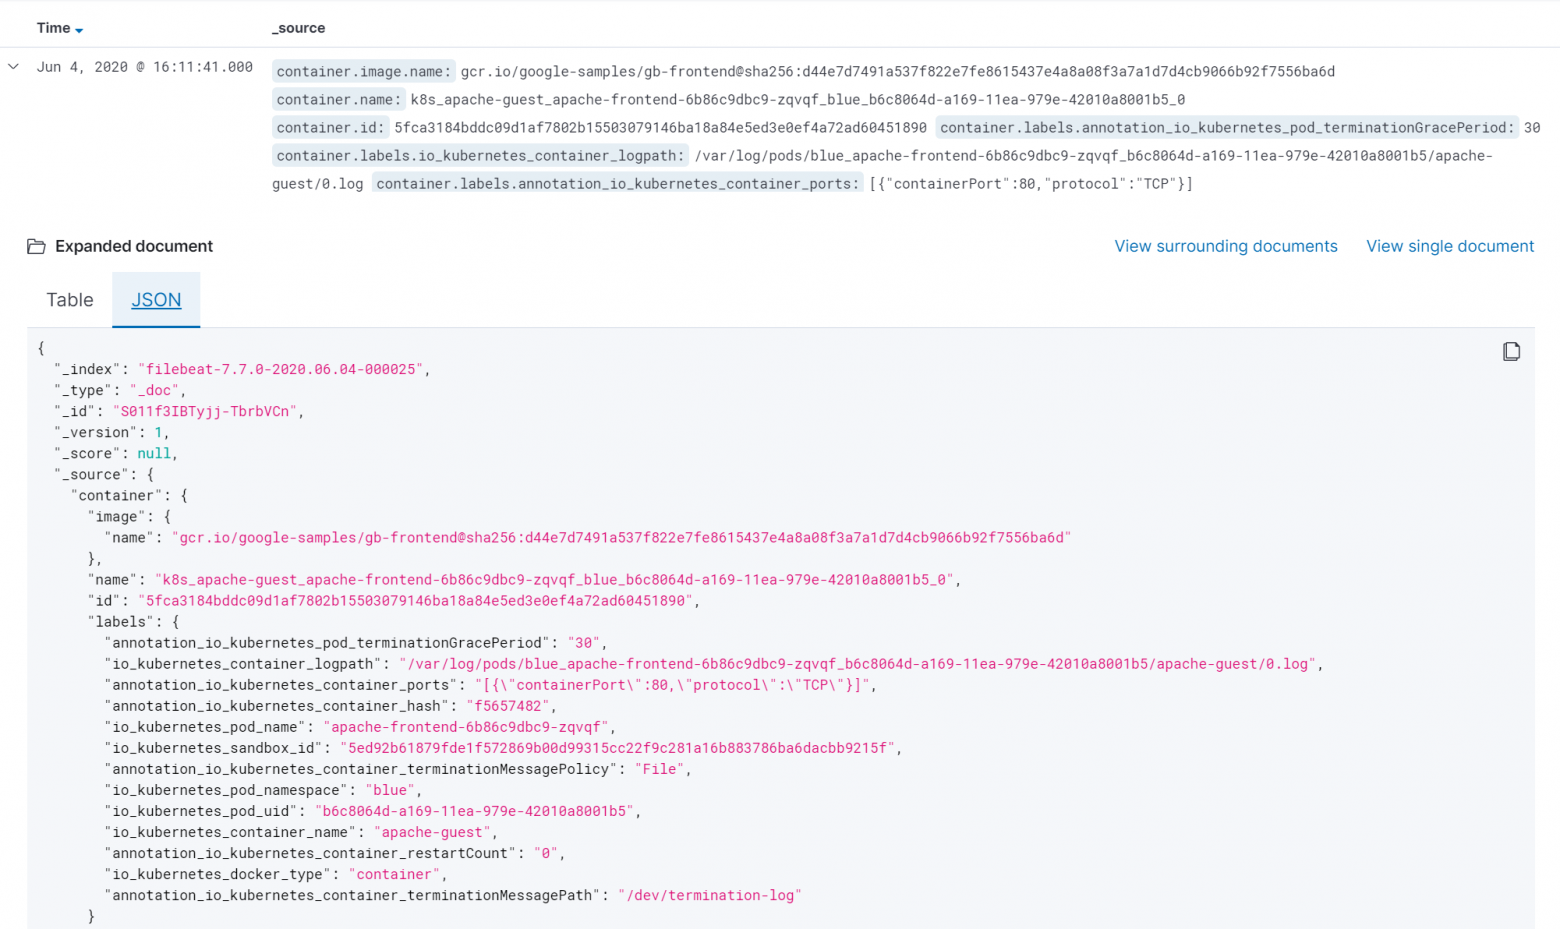
Click the arrow to expand the row and it will give you details in Table format or JSON format.
Table mode:
JSON mode:
That's all for today! I hope that you now have a basic understanding of how to use Kibana and view events in Discover mode.
If you have any questions regading Kibana that may be covered in «Tips & Tricks» feel free to share your ideas in comments.
Useful links
- For those who would like to try Kibana you may use demo here
- In case of other questions please read Kibana documentation
- Initial picture of elk was taken here
Only registered users can participate in poll. Log in, please.
Do you want to read other Kibana Tips & Ticks?
100%Yes, please share all materials you have!5
0%No, it is boring and I do not like it0
5 users voted. 2 users abstained.
