 Google loves easter eggs. It loves them so much, in fact, that you could find them in virtually every product of theirs. The tradition of Android easter eggs began in the very earliest versions of the OS (I think everyone there knows what happens when you go into the general settings and tap the version number a few times).
But sometimes you can find an easter egg in the most unlikely of places. There’s even an urban legend that one day, a programmer Googled “mutex lock”, but instead of search results landed on foo.bar, solved all tasks and landed a job at Google.
Reconstruction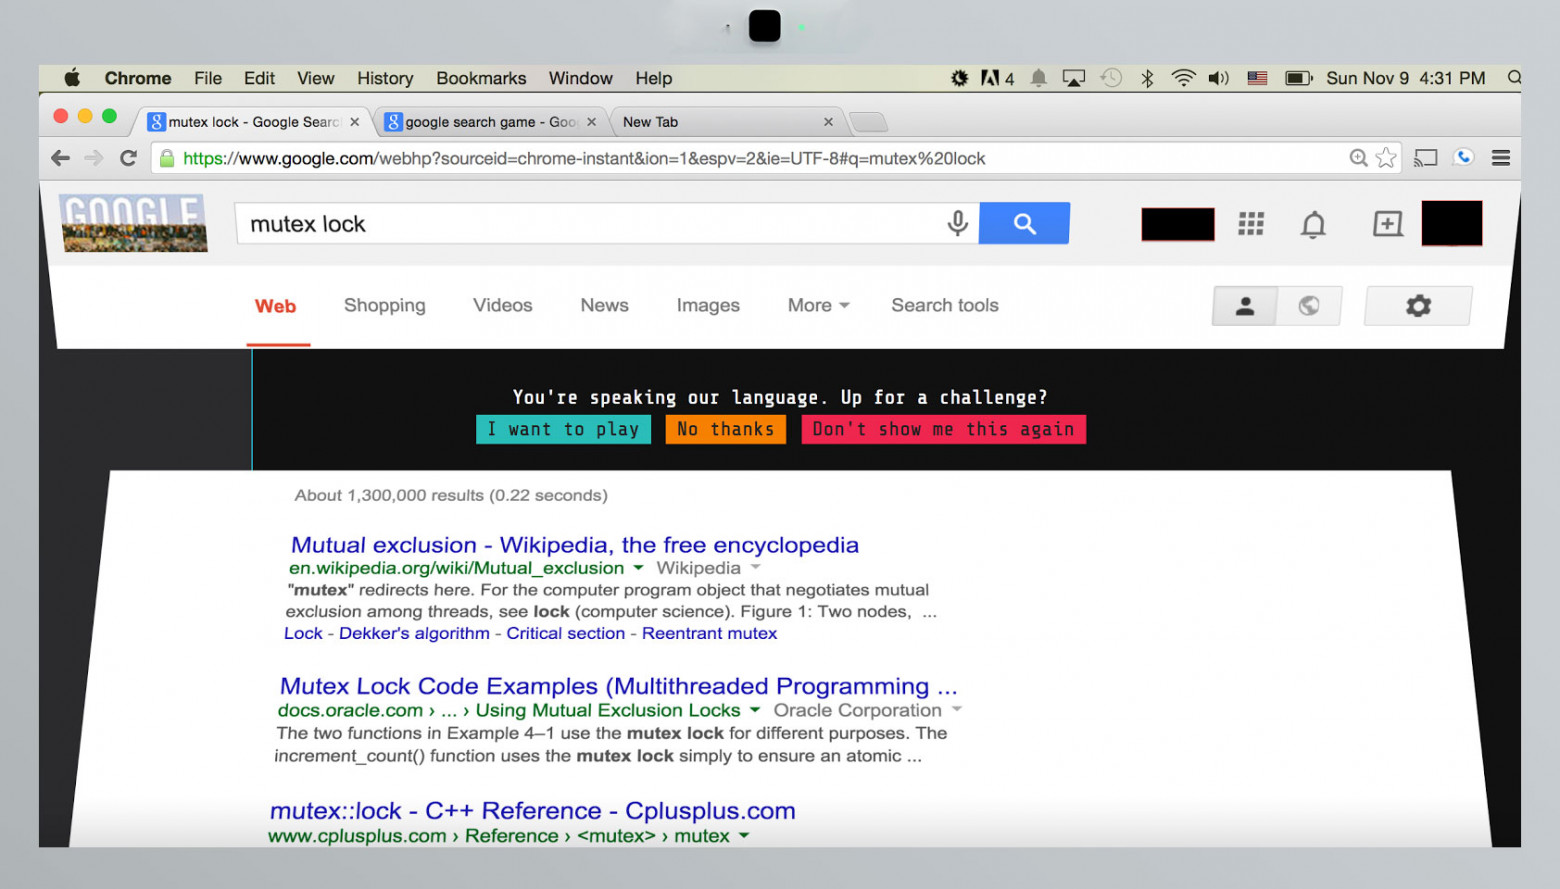

The same thing (except without the happy ending) happened to me. Hidden messages where there definitely couldn’t be any, reversing Java code and its native libraries, a secret VM, a Google interview — all of that is below.
DroidGuard
One boring night I factory-reset my phone and got to setting it up again. First things first, a fresh Android install asked me to log into the Google account. And I wondered: how does the process of logging into Android even work? And the night suddenly became less boring.
I use PortSwigger’s Burp Suite to intercept and analyze network traffic. The free Community version is enough for our purposes. To see the https requests we first need to install PortSwigger’s certificate onto the device. As a testing device I picked an 8-year-old Samsung Galaxy S with Android 4.4. Anything newer than that and you might have issues with certificate pinning and stuff.
In all honesty, there’s nothing particularly special with Google API requests. The device sends out information about itself and gets tokens in response… The only curious step is a POST request to the anti-abuse service.
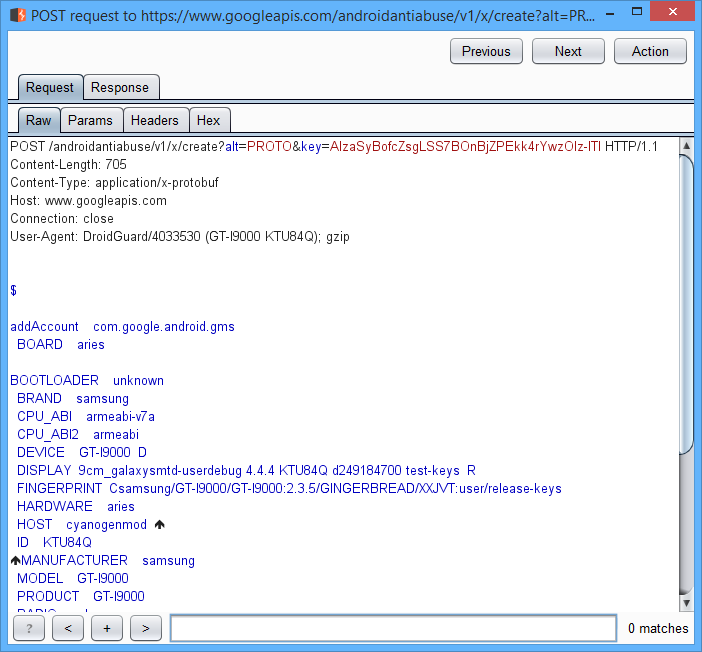
After the request is made, among numerous very normal parameters there appears an interesting one, named droidguard_result. It’s a very long Base64 string:
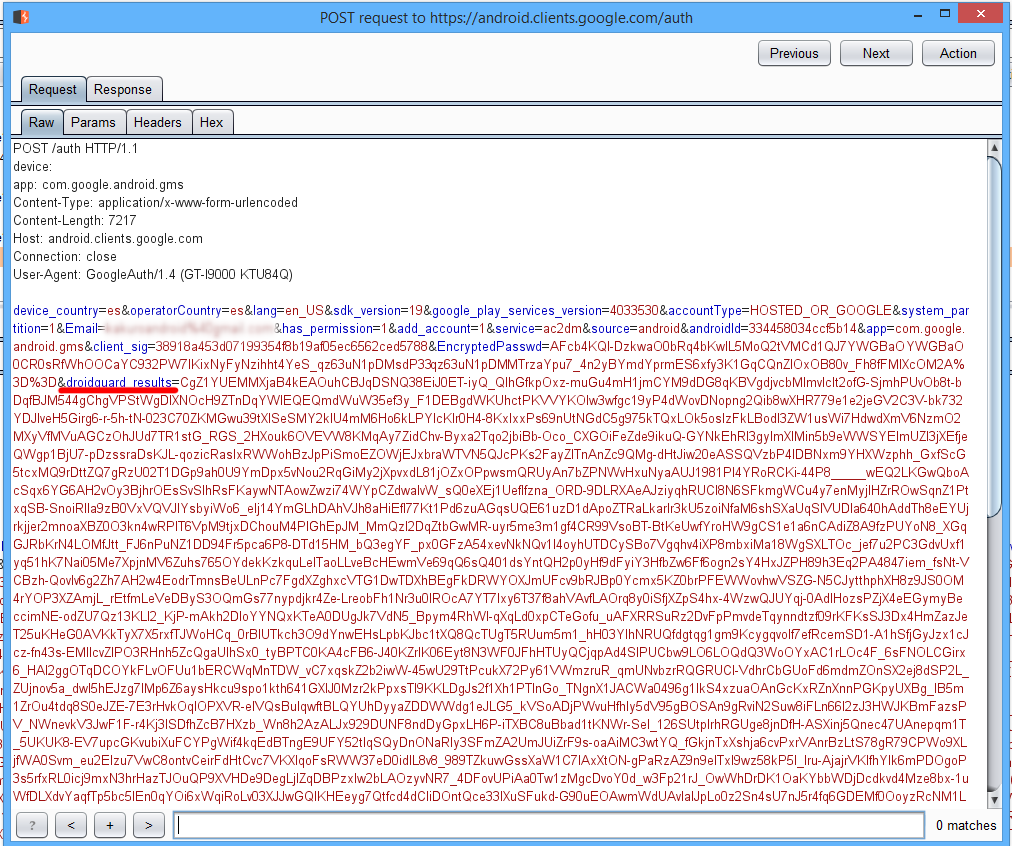
DroidGuard is Google’s mechanism for detecting bots and emulators among real devices. SafetyNet, for example, also uses DroidGuard’s data. Google has a similar thing for browsers, too — Botguard.
But what’s that data? Let’s find out.
Protocol Buffers
What generates that link (www.googleapis.com/androidantiabuse/v1/x/create?alt=PROTO&key=AIzaSyBofcZsgLSS7BOnBjZPEkk4rYwzOIz-lTI) and what inside Android makes this request? After a short investigation, it turned out that the link, in this exact form, is located inside one of Google Play Services’ obfuscated classes:
public bdd(Context var1, bdh var2) {
  this(var1, "https://www.googleapis.com/androidantiabuse/v1/x/create?alt=PROTO&key=AIzaSyBofcZsgLSS7BOnBjZPEkk4rYwzOIz-lTI", var2);
}
As we’ve already seen in Burp, POST requests on this link have Content-Type — application/x-protobuf (Google Protocol Buffers, Google’s protocol for binary serialization). It’s not json, though — it’s difficult to uncover what exactly is being sent.
Protocol buffers work like this:
- First we describe the structure of the message in a special format and save it into a .proto file;
- Then we compile .proto files, and the protoc compiler generates source code in a chosen language (in Android’s case it’s Java);
- Finally, we use the generated classes in our project.
We have two ways to decode protobuf messages. The first one is to use a protobuf analyzer and try to recreate the original description of .proto files. The second is to rip out the protoc-generated classes out of Google Play Services, which is what I decided to do.
We take Google Play Services’ .apk file of the same version that’s installed on the device (or, if the device is rooted, just take the file straight from there). Using dex2jar we convert the .dex file back into .jar and open in a decompiler of choice. I personally like JetBrains’ Fernflower. It works as a plugin to IntelliJ IDEA (or Android Studio), so we simply launch Android Studio and open the file with the link we’re trying to analyze. If proguard wasn’t trying too hard, the decompiled Java code for creating protobuf messages could just be copy-pasted into your project.
Looking at the decompiled code, we see that Build.* constants are being sent inside the protobuf message. (okay, that wasn’t too hard to guess).
...
var3.a("4.0.33 (910055-30)");
a(var3, "BOARD", Build.BOARD);
a(var3, "BOOTLOADER", Build.BOOTLOADER);
a(var3, "BRAND", Build.BRAND);
a(var3, "CPU_ABI", Build.CPU_ABI);
a(var3, "CPU_ABI2", Build.CPU_ABI2);
a(var3, "DEVICE", Build.DEVICE);
...
But unfortunately, in the server’s reply all protobuf fields turned into alphabet soup after obfuscation. But we can discover what’s in there using an error handler. Here’s how data coming from the server is checked:
if (!var7.d()) {
    throw new bdf("byteCode");
}
if (!var7.f()) {
    throw new bdf("vmUrl");
}
if (!var7.h()) {
    throw new bdf("vmChecksum");
}
if (!var7.j()) {
	throw new bdf("expiryTimeSecs");
}
Apparently, that’s how fields were called before obfuscation: byteCode, vmUrl, vmChecksum and expiryTimeSecs. This naming scheme already gives us some ideas.
We combine all the decompiled classes from Google Play Services into a test project, rename them, generate test Build.* commands and launch (imitating any device we want). If someone wants to do it himself, here’s the link to my GitHub.
If the request is correct, the server returns this:
00:06:26.761 [main] INFO d.a.response.AntiabuseResponse — byteCode size: 34446
00:06:26.761 [main] INFO d.a.response.AntiabuseResponse — vmChecksum: C15E93CCFD9EF178293A2334A1C9F9B08F115993
00:06:26.761 [main] INFO d.a.response.AntiabuseResponse — vmUrl: www.gstatic.com/droidguard/C15E93CCFD9EF178293A2334A1C9F9B08F115993
00:06:26.761 [main] INFO d.a.response.AntiabuseResponse — expiryTimeSecs: 10
Step 1 complete. Now let’s see what’s hidden behind the vmUrl link.
Secret APK
The link leads us directly to an .apk file, named after its own SHA-1 hash. It’s rather tiny — only 150KB. And it’s quite justified: if it’s downloaded by every single one of the 2 billion Android devices, that’s 270TB of traffic on Google’s services.

DroidGuardService class, being part of Google Play Services, downloads the file onto the device, unpacks it, extracts .dex and uses the com.google.ccc.abuse.droidguard.DroidGuard class through reflection. If there’s an error, then DroidGuardService switches from DroidGuard back to Droidguasso. But that’s another story entirely.Essentially,
DroidGuard class is a simple JNI wrapper around the native .so library. The native library's ABI matches what we sent in the CPU_ABI field in the protobuf request: we can ask for armeabi, x86 or even MIPS.The
DroidGuardService service itself doesn’t contain any interesting logic for working with the DroidGuard class. It simply creates a new instance of DroidGuard, sends it the byteCode from the protobuf message, calls a public method, which returns a byte array. This array is then sent to the server inside the droidguard_result parameter.To get a rough idea of what’s going on inside
DroidGuard we can repeat the logic of DroidGuardService (but without downloading the .apk, since we already have the native library). We can take a .dex file from the secret APK, convert it into .jar and then use in our project. The only issue is how the DroidGuard class loads the native library. The static initialization block calls the loadDroidGuardLibrary() method:static
{
try
{
loadDroidGuardLibrary();
}
catch (Exception ex)
{
throw new RuntimeException(ex);
}
}
Then the
loadDroidGuardLibrary() method reads library.txt (located in the root of the .apk file) and loads the library with that name though the System.load(String filename) call. Not very convenient for us, since we’d need to build the .apk in a very specific way to put library.txt and the .so file into its root. It would be much more convenient to keep the .so file in the lib folder and load that through System.loadLibrary(String libname). It’s not hard to do. We’ll use smali/baksmali — assembler/disassembler for .dex files. After using it, classes.dex turns into a bunch of .smali files. The
com.google.ccc.abuse.droidguard.DroidGuard class should be modified, so that the static initialization block calls the System.loadLibrary("droidguard") method instead of loadDroidGuardLibrary(). Smali’s syntax is pretty simple, the new initialization block looks like this:.method static constructor <clinit>()V
.locals 1
const-string v0, "droidguard"
invoke-static {v0}, Ljava/lang/System;->loadLibrary(Ljava/lang/String;)V
return-void
.end method
Then we use backsmali to build it all back into .dex, and then we convert it into .jar. At the end we get a .jar file that we can use in our project — here it is, by the way.
The entire DroidGuard-related section is a couple of strings long. The most important part is to download the byte array we got in the previous step after addressing the anti-abuse service and hand it off to the
DroidGuard constructor:private fun runDroidguard() {
var byteCode: ByteArray? = loadBytecode("bytecode.base64");
byteCode?.let {
val droidguard = DroidGuard(applicationContext, "addAccount", it)
val params = mapOf("dg_email" to "test@gmail.com", "dg_gmsCoreVersion" to "910055-30",
"dg_package" to "com.google.android.gms", "dg_androidId" to UUID.randomUUID().toString())
droidguard.init()
val result = droidguard.ss(params)
droidguard.close()
}
}
Now we can use Android Studio’s profiler and see what happens during DroidGuard’s work:
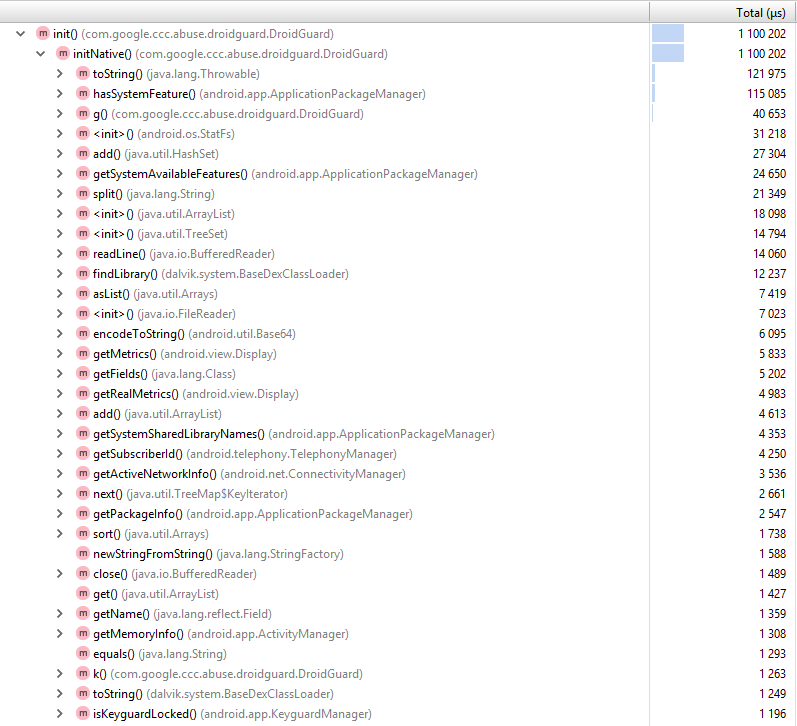
The initNative() native method collects data about the device and calls Java methods
hasSystemFeature(), getMemoryInfo(), getPackageInfo()… that’s something, but I still don’t see any solid logic. Well, all that remains is to disassemble the .so file.libdroidguard.so
Fortunately, analyzing the native library isn’t any more difficult that doing it with .dex and .jar files. We’d need an app similar to Hex-Rays IDA and some knowledge of either x86 or ARM assembler code. I chose ARM, since I had a rooted device lying around to debug on. If you don’t have one, you could take an x86 library and debug using an emulator.
An app similar to Hex-Rays IDA decompiles the binary into something resembling C code. If we open the
Java_com_google_ccc_abuse_droidguard_DroidGuard_ssNative method, we’ll see something like this:__int64 __fastcall Java_com_google_ccc_abuse_droidguard_DroidGuard_initNative(int a1, int a2, int a3, int a4, int a5, int a6, int a7, int a8, int a9)
...
v14 = (*(_DWORD *)v9 + 684))(v9, a5);
v15 = (*(_DWORD *)v9 + 736))(v9, a5, 0);
...
Doesn’t look too promising. First we need to make a couple of preliminary steps to transform that into something more useful. The decompiler doesn’t know anything about JNI, so we install Android NDK and import the jni.h file. As we know, the first two parameters of a JNI method are
JNIEnv* and jobject (this). We can find out the types of other parameters from DroidGuard’s Java code. After assigning the correct types, meaningless offsets turn into JNI method calls:__int64 __fastcall Java_com_google_ccc_abuse_droidguard_DroidGuard_initNative(_JNIEnv *env, jobject thiz, jobject context, jstring flow, jbyteArray byteCode, jobject runtimeApi, jobject extras, jint loggingFd, int runningInAppSide)
{
...
programLength = _env->functions->GetArrayLength)(_env, byteCode);
programBytes = (jbyte *)_env->functions->GetByteArrayElements)(_env, byteCode, 0);
...
If we have enough patience to trace the byte array received from the anti-abuse server, we’ll be… disappointed. Unfortunately, there’s no simple answer to “what’s happening here?”. It’s pure, distilled byte code, and the native library is a virtual machine. Some AES encryption sprinkled on top and then the VM reads the byte code, byte by byte, and executes commands. Every byte is a command followed by operands. There aren’t many commands, only around 70: read int, read byte, read string, call Java method, multiply two numbers, if-goto etc.
Wake up, Neo
I decided to go even further and figure out the structure of the byte code for this VM. There’s another problem with the calls: sometimes (once every couple weeks) there’s a new version of the native library where byte-command pairs are scrambled. It didn’t stop me and I decided to recreate the VM using Java.
What the byte code does is do all the routine work on collecting info about the device. For example, it loads a string with the name of a method, gets its address through dlsym and executes. In my Java version of the VM I recreated only 5 or so methods and learned to interpret the first 25 commands of the anti-abuse service’s byte code. On the 26th command the VM read another encrypted string from the byte code. It suddenly turned out that it’s not a name of another method. Far from it.
Virtual Machine command #26That’s strange. A virtual machine have never talked to me before. I thought that if you start to see secret messages directed to you, you’re going crazy. Just to make sure I was still sane, I ran a couple hundred of different answers from the anti-abuse service through my VM. Literally every 25-30 commands there was a message hidden within the byte code. They often repeated, but below are some unique ones. I edited the email addresses, though: each message had a different address, something like «droidguard+tag@google.com», with the tag being unique for each one.
Method invocation vm->vm_method_table[2 * 0x77]
Method vmMethod_readString
index is 0x9d
string length is 0x0066
(new key is generated)
encoded string bytes are EB 4E E6 DC 34 13 35 4A DD 55 B3 91 33 05 61 04 C0 54 FD 95 2F 18 72 04 C1 55 E1 92 28 11 66 04 DD 4F B3 94 33 04 35 0A C1 4E B2 DB 12 17 79 4F 92 55 FC DB 33 05 35 45 C6 01 F7 89 29 1F 71 43 C7 40 E1 9F 6B 1E 70 48 DE 4E B8 CD 75 44 23 14 85 14 A7 C2 7F 40 26 42 84 17 A2 BB 21 19 7A 43 DE 44 BD 98 29 1B
decoded string bytes are 59 6F 75 27 72 65 20 6E 6F 74 20 6A 75 73 74 20 72 75 6E 6E 69 6E 67 20 73 74 72 69 6E 67 73 20 6F 6E 20 6F 75 72 20 2E 73 6F 21 20 54 61 6C 6B 20 74 6F 20 75 73 20 61 74 20 64 72 6F 69 64 67 75 61 72 64 2D 68 65 6C 6C 6F 2B 36 33 32 36 30 37 35 34 39 39 36 33 66 36 36 31 40 67 6F 6F 67 6C 65 2E 63 6F 6D
decoded string value is (You're not just running strings on our .so! Talk to us at droidguard@google.com)
droidguard@google.com: Don't be a stranger!Am I the Chosen One? I thought that it was time to stop messing with DroidGuard and talk to Google, since they asked me so.
You got in! Talk to us at droidguard@google.com
Greetings from droidguard@google.com intrepid traveller! Say hi!
Was it easy to find this? droidguard@google.com would like to know
The folks at droidguard@google.com would appreciate hearing from you!
What's all this gobbledygook? Ask droidguard@google.com… they'd know!
Hey! Fancy seeing you here. Have you spoken to droidguard@google.com yet?
You're not just running strings on our .so! Talk to us at droidguard@google.com
Your call is very important to us
I told my findings on the email I found. To make results a little more impressive, I automated the analysis process a little bit. The thing is, strings and byte arrays are stored in the byte code encrypted. The VM decodes them using constants inlined by the compiler. Using an app similar to Hex-Rays IDA you could extract them pretty easily. But with every new version constants change and it’s fairly inconvenient to always extract them manually.
But Java-parsing the native library proved surprisingly simple. Using jelf (a library for parsing ELF files) we find the offset of the
Java_com_google_ccc_abuse_droidguard_DroidGuard_initNative method in the binary, and then using Capstone (a disassembling framework with bindings for various languages, including Java) we get assembler code and search it for loading constants into registries.In the end I got an app that emulated the entire DroidGuard process: makes a request to the anti-abuse service, downloads the .apk, unpacks it, parses the native library, extracts the required constants, picks out the mapping of VM commands and interprets the byte code. I compiled it all and sent it off to Google. While I was at it, I started preparing for a move and searched Glassdoor for an average salary at Google. I decided to not agree to anything less than six figures.
The answer didn’t take long. An email from a member of the DroidGuard team simply read: “Why are you even doing this?”

“Because I can” — I answered. A Google employee explained to me that DroidGuard is supposed to protect Android from hackers (you don’t say!) and it would be wise to keep the source code of my DroidGuard VM to myself. Our conversation ended there.
Interview
A month later I received another email. The DroidGuard team in Zurich needed a new employee. Was I interested in joining? Of course!
There are no shortcuts to get into Google. All my contact could do was forward my CV to the HR department. After that I had to go through the usual bureaucratic rigmarole and a series of interviews.
There’s a lot of stories out there about Google interviews. Algorithms, Olympiad tasks and Google Docs programming aren’t my thing, so I started my preparations. I read through the “Algorithms” course of Coursera dozens of times, solved hundreds of tasks on Hackerrank and learned to get around a graph in both dimensions with my eyes closed.
Two months went by. To say I felt prepared would be an understatement. Google Docs became my favorite IDE. I felt like I knew everything there is to know about algorithms. Of course, I knew my weaknesses and realized I probably wouldn’t pass the series of 5 interviews in Zurich, but going to the programmer’s Disneyland for free was a reward in and of itself. The first step was a phone interview to weed out the weakest of candidates and not waste times of Zurich developers on in-person meetings. The day was set, the phone rang…
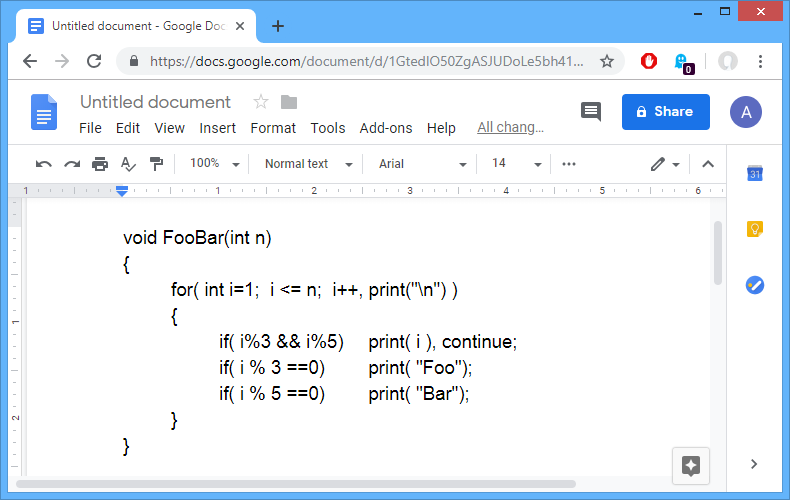
… and I immediately failed my first test. I got lucky — they asked a question I’ve seen on the internet before and have already solved. It was about serializing a string array. I offered to code strings in Base64 and save them through a divider. The interviewer asked me to develop a Base64 algorithm. After that the interview turned into sort of a monologue, where the interviewed explained to me how Base64 works and I tried to remember bit operations in Java.
If anyone at Google is reading this
Guys, you’re bloody geniuses if you got there! Seriously. I can’t imagine how one can clear all the obstacles they put in front of you.
3 days after the call I got an email saying they don’t want to interview me further. And that’s how my communication with Google ended.
Why there are messages in DroidGuard asking to chat, I still have no idea. Probably just for stats. The guy I wrote to in the first place told me that people actually write there, but the frequency varies: sometimes they get 3 replies in a week, sometimes 1 a year.
I believe there are easier ways to get an interview at Google. After all, you could just ask any of the 100,000 employees (though not all of them are developers, admittedly). But it was a fun experience nonetheless.
