This tutorial will guide you step by step in building an Android chat app in Kotlin with the help of third-party messaging SDKs. The reason I chose Kotlin for this tutorial is that - it is a lightweight programming language suggested by Google for building apps that work on Android devices.
In the steps ahead, I’ll show you how to develop an app in Android Studio, with messaging features that can integrate using SDKs. I use MirrorFly’s chat SDKs throughout this tutorial.
Step 1: Start a New Project in Android Studio
As a long-term developer, I prefer to build my Android apps in the Android Studio IDE, due to its ease of use and generous updates. If you do not have it already on your device, you can download the latest version from their Official Website.
Launch the IDE after the installation completes. You will now be taken to the Welcome to Android Studio window.
This is where the project begins:
Create a New Project by choosing a template from the many options available.
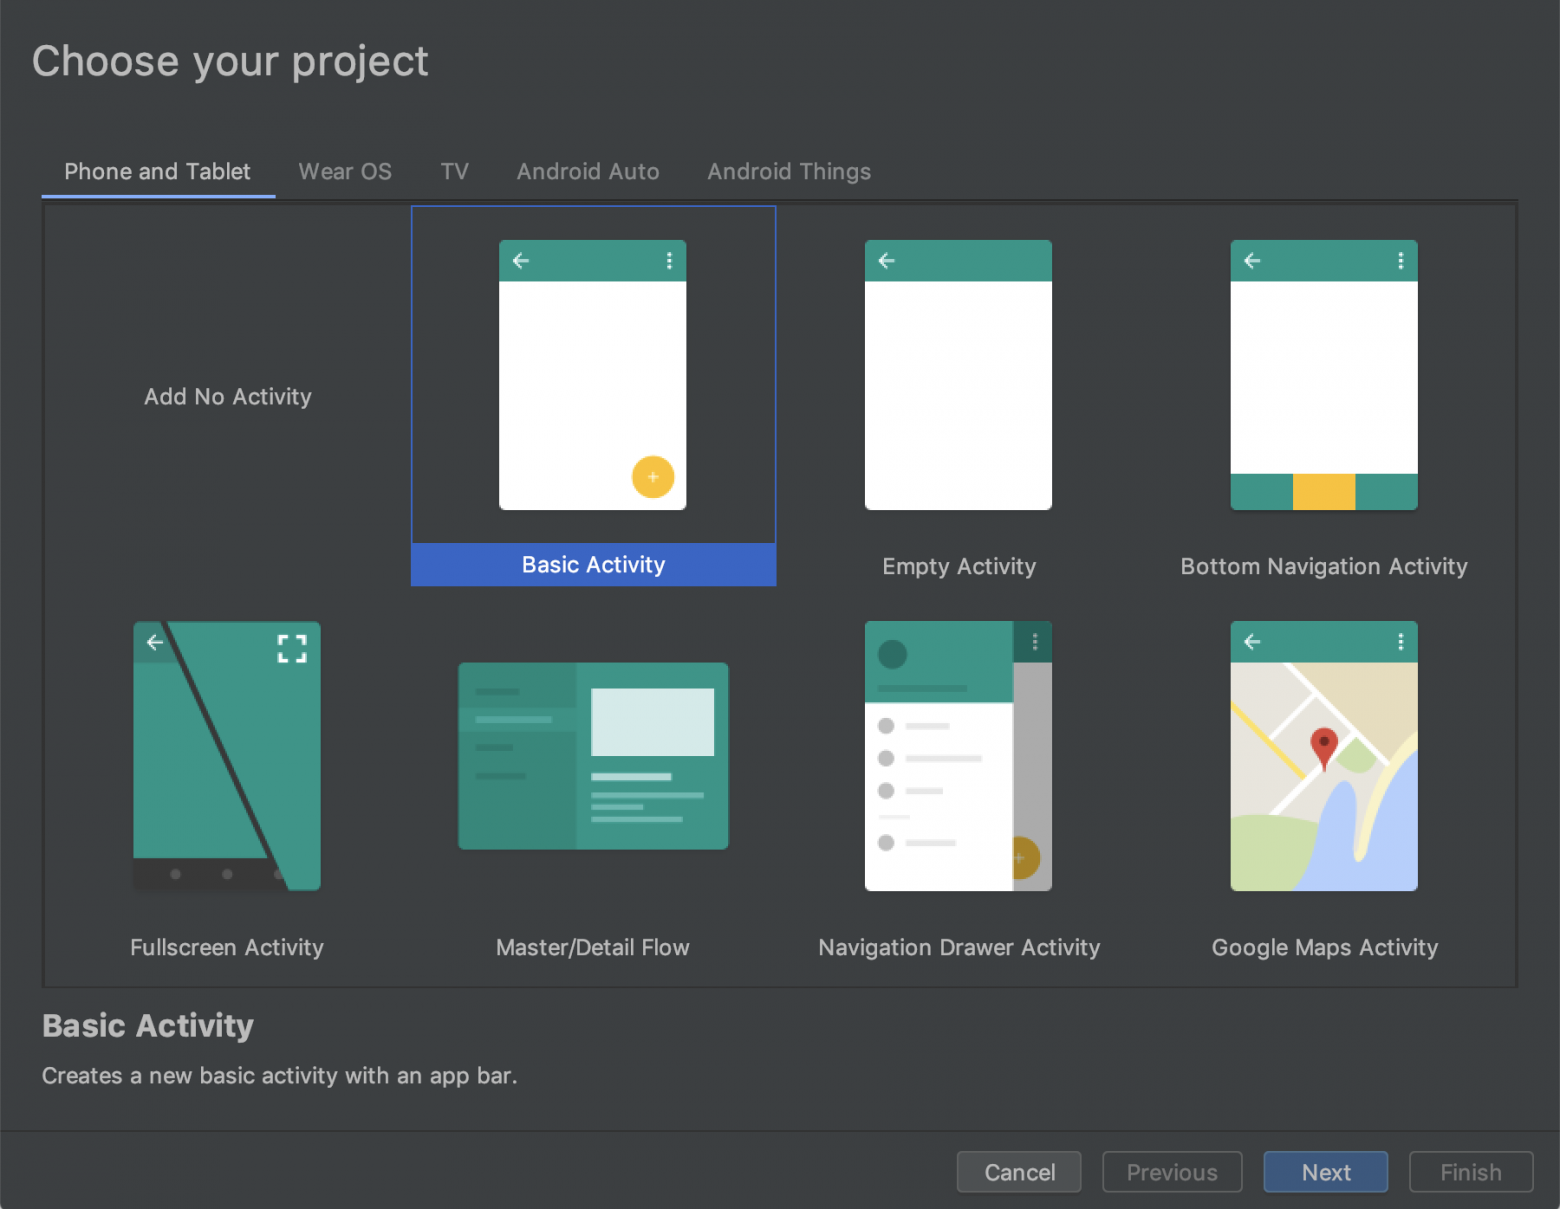
For our project, I’ll choose Empty Activity and click on Next.
Now we’ll end up in the Configuration Window, where we need to fill in the details of our project.

First, I’ll enter the app’s name
Next, I’ll decide on the save location of this project
From the dropdown menu, I’ll choose Kotlin, as we will be building the app using this language.
And finally, choose Android 5.0 (Lollipop) as the minimum requirement to use this app and click on Finish.
Step 2: Preparing the Project Library
Once you land on the project page, we will be able to find many folders on the left pane. Here, we will have to navigate to the App’s main folder > App > Libs. This is where we will be adding the dependency files of the chat SDKs.
Note: If you’ll need help with the extraction of the dependency files, check out this guide.

I can either drag and drop your downloaded files or upload them to the library folder under App. Let me go with the upload option in this scenario.
Next, we need to configure the compile, kotlin, and packaging options
plugins {
	...
	id 'kotlin-android'
	id 'kotlin-kapt'
}

android {
	compileOptions {
    	sourceCompatibility JavaVersion.VERSION_1_8
    	targetCompatibility JavaVersion.VERSION_1_8
	}

	kotlinOptions {
    	jvmTarget = '1.8'
	}

	packagingOptions {
    	exclude 'META-INF/AL2.0'
    	exclude 'META-INF/DEPENDENCIES'
    	exclude 'META-INF/LICENSE'
    	exclude 'META-INF/LICENSE.txt'
    	exclude 'META-INF/license.txt'
    	exclude 'META-INF/NOTICE'
    	exclude 'META-INF/NOTICE.txt'
    	exclude 'META-INF/notice.txt'
    	exclude 'META-INF/ASL2.0'
    	exclude 'META-INF/LGPL2.1'
    	exclude("META-INF/*.kotlin_module")
	}

}
In the app/build.gradle, add the following dependencies as shown below
dependencies {

 	... // your app dependencies

 	implementation files('libs/appbase.aar')
 	implementation files('libs/flycommons.aar')
 	implementation files('libs/flynetwork.aar')
 	implementation files('libs/flydatabase.aar')
 	implementation files('libs/videocompression.aar')
 	implementation files('libs/xmpp.aar')

 }
Call the following classes, need for the SDK integration
 dependencies {

 	... // your app dependencies

 	configurations {
     	all {
         	exclude group: 'org.json', module: 'json'
         	exclude group: 'xpp3', module: 'xpp3'
     	}
 	}

 	//For lifecycle listener
 	implementation 'android.arch.lifecycle:extensions:1.1.1'
 	annotationProcessor 'android.arch.lifecycle:compiler:1.1.1'

 	//For GreenDao
 	implementation 'de.greenrobot:greendao:2.1.0'

 	//For gson parsing
 	implementation 'com.google.code.gson:gson:2.8.1'

 	//for smack implementation
 	implementation 'org.igniterealtime.smack:smack-android:4.4.4'
 	implementation 'org.igniterealtime.smack:smack-tcp:4.4.4'
 	implementation 'org.igniterealtime.smack:smack-im:4.4.4'
 	implementation 'org.igniterealtime.smack:smack-extensions:4.4.4'
 	implementation 'org.igniterealtime.smack:smack-sasl-provided:4.4.4'

 	implementation 'androidx.localbroadcastmanager:localbroadcastmanager:1.0.0'
 	implementation 'androidx.multidex:multidex:2.0.1'
 	implementation 'com.google.android.gms:play-services-location:17.0.0'

 	//Dagger Dependencies
 	api 'com.google.dagger:dagger:2.40.5'
 	kapt 'com.google.dagger:dagger-compiler:2.40.5'
 	api 'com.google.dagger:dagger-android:2.40.5'
 	api 'com.google.dagger:dagger-android-support:2.40.5'
 	kapt 'com.google.dagger:dagger-android-processor:2.40.5'

 	//coroutines
 	implementation 'org.jetbrains.kotlinx:kotlinx-coroutines-android:1.3.8'
 	implementation 'org.jetbrains.kotlinx:kotlinx-coroutines-test:1.3.8'

 	//apicalls
 	implementation 'com.squareup.retrofit2:retrofit:2.6.1'
 	implementation 'com.squareup.retrofit2:converter-gson:2.6.1'
 	implementation 'com.squareup.okhttp3:okhttp:4.2.0'
 	implementation 'com.jakewharton.retrofit:retrofit2-kotlin-coroutines-adapter:0.9.2'

 	//stetho interceptor
 	implementation 'com.facebook.stetho:stetho-okhttp3:1.3.1'

 	//okhttp interceptor
 	implementation 'com.squareup.okhttp3:logging-interceptor:3.14.3'

 	//shared preference encryption
 	implementation 'androidx.security:security-crypto:1.1.0-alpha03'

 }
Step 3: Configure the Manifest
This step defines every component of our app. When we configure the manifest, it will hold all the details of each element we are using in this project.
Since we deal with a good number of files, add the following code to the gradle.properties file so that we can restrain the execution of the app without any library conflict.
android.enableJetifier=true
Locate the manifest under the App folder and choose AndroidManifest.xml. Then, add the following code.
<uses-permission android:name="android.permission.INTERNET" />
<uses-permission android:name="android.permission.ACCESS_NETWORK_STATE" />
Step 4: Configure the Builder
In this step, we will need to update the license key acquired from the third-party SDK provider account.
Here, I have one from my MirrorFly account. Update it in the below code.
buildTypes {
  debug {
	buildConfigField 'String', 'SDK_BASE_URL', '"https://api-preprod-sandbox.mirrorfly.com/api/v1/"'
	buildConfigField 'String', 'LICENSE', '"xxxxxxxxxxxxxxxxxxxxxxxxx"'
	buildConfigField 'String', 'WEB_CHAT_LOGIN', '"https://webchat-preprod-sandbox.mirrorfly.com/"'
	buildConfigField "String", "SUPPORT_MAIL", '"contussupport@gmail.com"'
  }
}
To make this work, we need to perform the gradle sync operation.
First, locate the gradle sync icon.
This button disappeared from a new 3.1 version of AS Toolbar. Before it showed as:

Now it's missing:

Otherwise, click on File and choose the option Sync Project with Gradle Files
Note: In order to see this change take effect, we need to restart the Android Studio IDE
Step 5: Start the Chat SDKs
The next important step is that we need to initialize the chat SDKs
To do this,
Call the onCreate() method in the Application Class as shown below:

And we’ll need to continue adding the following code
//For chat logging
LogMessage.enableDebugLogging(BuildConfig.DEBUG)

ChatSDK.Builder()
	.setDomainBaseUrl(BuildConfig.SDK_BASE_URL)
	.setLicenseKey(BuildConfig.LICENSE)
	.setIsTrialLicenceKey(true)
	.build()
Step 6: Registering a User
We will use the following code to register a user in the sandbox live mode
  FlyCore.registerUser(USER_IDENTIFIER) { isSuccess, throwable, data ->
    	if(isSuccess) {
        	val responseObject = data.get("data") as JSONObject
        	// Get Username and password from the object
    	} else {
        	// Register user failed print throwable to find the exception details.
    	}
 	}
Step 7: Making a viable connection to the Chat Server
Now that we’ve configured the app, we need a central server to connect our apps across devices to make communication possible. Hence, we add the following code:
	ChatManager.connect(object : ChatConnectionListener {
      	override fun onConnected() {
           	// Write your success logic here to navigate Profile Page or
           	// To Start your one-one chat with your friends
      	}

      	override fun onDisconnected() {
          	// Connection disconnected
          	//No need implementations
     	}

    	override fun onConnectionNotAuthorized() {
         	// Connection Not authorized
         	//No need implementations
   	}
   })
Step 8: Send a Text Message
So, yes we are giving the app the capability to send text messages
Let’s add the below code
 FlyMessenger.sendTextMessage(TO_JID, TEXT, listener = object : SendMessageListener {
    	override fun onResponse(isSuccess: Boolean, chatMessage: ChatMessage?) {
       	// you will get the message sent success response
    	}
})
Step 9: Receive a Text Message
And next, we add the capability of receiving messages, using the following code.
  @Override
	public void onMessageReceived(@NonNull ChatMessage message) {
    	super.onMessageReceived(message);
    	// received message object
	}
Step 10: Submit your app to Playstore
Finally, we can debug and run the app in the sandbox live mode on the Android Studio IDE to spot any errors or bugs. Once our testing is done, it is time we submit our app to the Playstore.
Note: This app is created only with the basic functionality of sending/ receiving messages. However, if you would like to add more features to your app, explore them here and configure them as instructed
Conclusion
Kudos, we’ve made it! We’ve built a chat app in less than 30 minutes with the help of Android Studio and MirrorFly In-app Chat SDKs. While this is a start of an app-building journey, we’d like to introduce you to many more insights you’d be interested in. Post in your needs and our team will work it out and bring you yet another useful article in a while. Until then, we bid you our bye!
