As many times before, I keep writing cheat sheets after the tasks which made me search a lot and glue things together before I found a solution. Long story short, this time I was asked to set up Google SSO for Kibana without switching from a basic license to a paid one. Kibana, by the moment, already had authentication set up and the customer wanted to log in there with the use of Google Workspace user accounts. Along with that, the customer wanted to keep user account which was already there, in Kibana. There was no need for role mapping or other advanced features, just plain SSO and that's all. As you probably know Elastic provides SSO feature only on paid license, so I have had no other way to get it working except for using 3rd party software. But first things first, let's list the steps we should go over:
Create credentials for the application in GCP Console
Install and set up oauth2-proxy
Set up Nginx
Now let's dig into the details.
Presumptions
Kibana's url: https://kibana.example.com
Username for logging into Kibana: kibana
Password for user
kibana: $3cuRep@sSW0rdNginx is set up and used for reverse-proxying Kibana
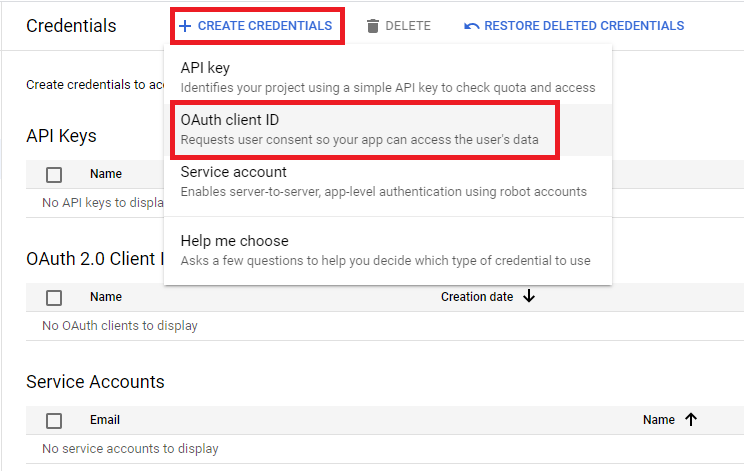
Getting credentials for authentication at GCP
Navigate to https://console.cloud.google.com/apis/credentials
If you don't have any GCP project yet, you should create one
You can refer to the documentation on the topic https://cloud.google.com/resource-manager/docs/creating-managing-projects
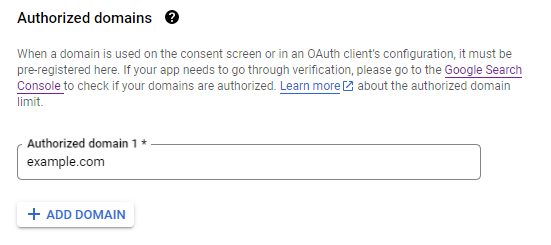
Don't forget to add authorized email domains which users will be allowed to log into Kibana.


On the next page select Application type as Web application, Name could be any of your preferences, then put URLs of your Kibana as follows:
Base URL of your Kibana for
Authorized JavaScript origins: https://kibana.example.comRoute to Kibana's oauth2 callbacks for
Authorized redirect URIs: https://kibana.example.com/oauth2/callback
Click Create and take a note on the contents of the pop-up window after. Copy and save
Client IDandClient secretas we will need them a bit later.
Setting up oauth2-proxy
Since ELK is running in Docker containers on the customer's side, I decided to use oauth2-proxy in the container too. But before we run oauth2-proxy we need to generate value for OAUTH2_PROXY_COOKIE_SECRET parameter.
Execute the command:
python -c 'import os,base64; print(base64.urlsafe_b64encode(os.urandom(32)).decode())'Save the resulting value, for example we will take this one HUK59dRK_CDMJkYFdmQUlTllqr_j4UTq__2F-v3WWws=
Now we are good to go. There are a number of ways to configure oauth2-proxy and I choose to do that over environmental variables. Run the container and pass variables and its values with use of -e parameter:
docker run -d --name oauth2-proxy -p 1080:1080 -p 1443:1443 \
       -e "OAUTH2_PROXY_COOKIE_SECRET=HUK59dRK_CDMJkYFdmQUlTllqr_j4UTq__2F-v3WWws=" \
       -e "OAUTH2_PROXY_PROVIDER=google" \
       -e "OAUTH2_PROXY_EMAIL_DOMAINS=*" \
       -e "OAUTH2_PROXY_CLIENT_ID=848148116345-nphihtsirct0807h85fen01b69si3s9v.apps.googleusercontent.com" \
       -e "OAUTH2_PROXY_CLIENT_SECRET=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" \
       -e "OAUTH2_PROXY_HTTP_ADDRESS=0.0.0.0:1080" \
       -e "OAUTH2_PROXY_UPSTREAMS=https://kibana.example.com" \
       quay.io/oauth2-proxy/oauth2-proxy:v7.4.0-amd64
Don't forget to put actual values for
secretsandClient IDyou got yourself on previous steps instead of the ones I used for writing the examples!
Check if container's status is Up by executing the command:
docker psIf you prefer docker compose you can use the following yaml:
version: "3.2"
services:
  oauth2-proxy:
    container_name: oauth2-proxy
    image: quay.io/oauth2-proxy/oauth2-proxy:v7.4.0-amd64
    ports:
      - "1080:1080"
      - "1443:1443"
    environment:
      OAUTH2_PROXY_COOKIE_SECRET: " HUK59dRK_CDMJkYFdmQUlTllqr_j4UTq__2F-v3WWws="
      OAUTH2_PROXY_PROVIDER: "google"
      OAUTH2_PROXY_EMAIL_DOMAINS: "*"
      OAUTH2_PROXY_CLIENT_ID: " 848148116345-nphihtsirct0807h85fen01b69si3s9v.apps.googleusercontent.com  "
      OAUTH2_PROXY_CLIENT_SECRET: " 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  "
      OAUTH2_PROXY_HTTP_ADDRESS: "0.0.0.0:1080"
      OAUTH2_PROXY_UPSTREAMS: " https://kibana.example.com"
As for me, all the parameters are self-explanatory but you can refer to the official docs at any time: https://oauth2-proxy.github.io/oauth2-proxy/docs/configuration/overview/
Check if newly created container is up and oauth2-proxy is running and returns html on requests:
curl localhost:1080If you get something like that then we are good to go to the next step:

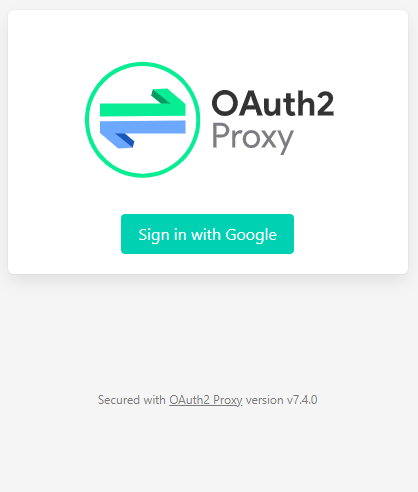
You can navigate to http://localhost:1080 in a browser of your choice as well and check if loaded page looks like that:

Modifying Nginx's config
As we assumed before, we use Nginx as a reverse-proxy for Kibana. It means that a minimal configuration of / location is set up and now it's time to add a couple of new lines there, which will provide necessary conduct for a new authentication process.
Before we continue we need to get base64-encoded credentials for the user kibana with password $3cuRep@sSW0rd which will be used after successful SSO login.
Execute the command:
echo -n 'kibana:$3cuRep@sSW0rd' | base64Resulting string: a2liYW5hOiQzY3VSZXBAc1NXMHJk
Now we are ready to bake the config. Modify config for location / as follows:
  location / {
    auth_request /oauth2/auth;
    error_page 401 = /oauth2/sign_in;
    auth_request_set $user $upstream_http_x_auth_request_user;
    auth_request_set $email $upstream_http_x_auth_request_email;
    proxy_set_header X-User $user;
    proxy_set_header X-Email $email;
    proxy_set_header Host $host;
    proxy_set_header X-Real-IP $remote_addr;
    proxy_set_header X-Forwarded-For $proxy_add_x_forwarded_for;
    proxy_pass_header Server;
    proxy_connect_timeout 3s;
    proxy_read_timeout 10s;
    auth_request_set $auth_cookie $upstream_http_set_cookie;
    add_header Set-Cookie $auth_cookie;
    proxy_set_header Authorization "Basic a2liYW5hOiQzY3VSZXBAc1NXMHJk";
    proxy_pass http://localhost:5601;
  }
We need configuration for /oauth2 endpoint as well:
  location /oauth2 {
    proxy_pass http://localhost:1080;
    proxy_set_header Host $host;
    proxy_set_header X-Real-IP $remote_addr;
    proxy_set_header X-Scheme $scheme;
    proxy_set_header X-Auth-Request-Redirect $request_uri;
  }
You can copy and paste the full listing of the config file, just don't forget to change paths to SSL certificate and private key:
server
{
  listen 443 ssl http2 ;
  listen [::]:443 ssl http2 ;
  ssl_certificate /etc/letsencrypt/live/kibana.example.com/fullchain.pem;
  ssl_certificate_key /etc/letsencrypt/live/kibana.example.com/privkey.pem;
  ssl_protocols TLSv1 TLSv1.1 TLSv1.2;
  ssl_ecdh_curve secp384r1;
  ssl_session_cache shared:SSL:10m;
  ssl_session_tickets off;
  ssl_stapling on;
  ssl_stapling_verify on;
  add_header Strict-Transport-Security "max-age=63072000; includeSubdomains; preload";
  add_header X-Content-Type-Options nosniff;
  client_max_body_size 1000M;
  proxy_connect_timeout 600;
  proxy_send_timeout 600;
  proxy_read_timeout 600;
  send_timeout 600;

  location / {
    auth_request /oauth2/auth;
    error_page 401 = /oauth2/sign_in;
    auth_request_set $user $upstream_http_x_auth_request_user;
    auth_request_set $email $upstream_http_x_auth_request_email;
    proxy_set_header X-User $user;
    proxy_set_header X-Email $email;
    proxy_set_header Host $host;
    proxy_set_header X-Real-IP $remote_addr;
    proxy_set_header X-Forwarded-For $proxy_add_x_forwarded_for;
    proxy_pass_header Server;
    proxy_connect_timeout 3s;
    proxy_read_timeout 10s;
    auth_request_set $auth_cookie $upstream_http_set_cookie;
    add_header Set-Cookie $auth_cookie;
    proxy_set_header Authorization "Basic a2liYW5hOiQzY3VSZXBAc1NXMHJk";
    proxy_pass http://localhost:5601;
  }

  location /oauth2 {
    proxy_pass http://localhost:1080;
    proxy_set_header Host $host;
    proxy_set_header X-Real-IP $remote_addr;
    proxy_set_header X-Scheme $scheme;
    proxy_set_header X-Auth-Request-Redirect $request_uri;
  }
}
Save the changes and exit the text editor. Check new config for validity:
nginx -tYou should get something like:
nginx: the configuration file /etc/nginx/nginx.conf syntax is ok
nginx: configuration file /etc/nginx/nginx.conf test is successful
Now you're ready to restart Nginx:
nginx -s reloadNow you can navigate to your Kibana URL and check if everything work as expected.
