
StarCraft: Brood War. This game means so much to me! And to many of you, I guess. So much, that I wonder if I should even give a link to its page on Wikipedia or not.
Once Halt sent me PM and offered to learn Rust. Like any ordinary people, we decided to start with hello world writing a dynamic library for Windows that could be loaded into StarCraft's address space and manage units.
The following article will describe the process of finding solutions and using technologies and techniques that will allow you to learn new things about Rust and its ecosystem. You may also be inspired to implement a bot using your favorite language, whether it be C, C++, Ruby, Python, etc.
It is definitely worth listening to the hymn of South Korea while reading this article:
BWAPI
This game is almost 20 years old. And it is still popular; championships attracted crowds of people in the USA even in 2017 where the battle of grand masters Jaedong vs Bisu took place. In addition to human players, soulless machines also take part in SC battles! And this is possible because of BWAPI. More useful links.
For over a decade now, there has been a community of bot developers around this game. Enthusiasts create bots and participate in various championships. Many of them study AI and machine learning. BWAPI is used by universities to train their students. There is even a twitch channel broadcasting such matches.
So, a fan team reversed the Starcraft back-end several years ago and developed an API in C++, which allows you to create bots, make injections in the game process and dominate miserable humans.
As it often happens, before building a house, it is necessary to mine ore, forge tools creating a bot, you need to implement an API. What does Rust have to offer?
FFI
It is quite simple to work with other languages from Rust. There is an FFI for this. Let me give you a short excerpt from the documentation.
Imagine we have a snappy library, that has a header file snappy-c.h, which contains function declarations.
Let's create a project using cargo.
$ cargo new --bin snappy
     Created binary (application) `snappy` project
$ cd snappy
snappy$ tree
.
├── Cargo.toml
└── src
    └── main.rs

1 directory, 2 files
Cargo has created a standard file structure for the project.
In Cargo.toml we specify dependency to libc:
[dependencies]
libc = "0.2"
The src/main.rs file will look like this:
extern crate libc; // To import C types, in our case for size_t
use libc::size_t;

#[link(name = "snappy")] // Specify the name of the library for linking the function
extern {
    // We write the declaration of the function which we want to import
    // in C the declaration looks like this:
    // size_t snappy_max_compressed_length(size_t source_length);
    fn snappy_max_compressed_length(source_length: size_t) -> size_t;
}

fn main() {
    let x = unsafe { snappy_max_compressed_length(100) };
    println!("max compressed length of a 100 byte buffer: {}", x);
}
Let's build and run the project:
snappy$ cargo build
...
snappy$ cargo run
    Finished dev [unoptimized + debuginfo] target(s) in 0.02s
     Running `target/debug/snappy`
max compressed length of a 100 byte buffer: 148
You can call cargo run only, which calls cargo build before the run. Other option is to build the project and call the binary directly:
snappy$ ./target/debug/snappy
max compressed length of a 100 byte buffer: 148
If the snappy library is installed the code will be compiled (for Ubuntu you should install libsnappy-dev package).
snappy$ ldd target/debug/snappy
    ...
    libsnappy.so.1 => /usr/lib/x86_64-linux-gnu/libsnappy.so.1 (0x00007f8de07cf000)
As you can see, our binary is linked to the libsnappy shared library. And a call to snappy_max_compressed_length in our code is a function call from this library.
rust-bindgen
It would be nice if we could automatically generate our FFI. Fortunately, there is a utility called rust-bindgen in a Rust addict's toolbox. It is able to generate FFI bindings to C (and some C++) libraries.
Installation:
$ cargo install bindgen
What does rust-bindgen look like? We take the C/C++ header files, we point the bindgen utility at them, and the output we get is generated Rust code with the proper declarations to let us use C structures and functions. Here's what bindgen generates for snappy:
$ bindgen /usr/include/snappy-c.h | grep -C 1 snappy_max_compressed_length
extern "C" {
    pub fn snappy_max_compressed_length(source_length: usize) -> usize;
}
It turns out that bindgen can't cope with BWAPI headers, generating tons of non-usable code (because of virtual member functions, std::string in a public API, etc.). The thing is that BWAPI is written in C++. C++ is generally difficult to use even from C++ projects. Once the library is assembled, it's better to link it with the same linker (same version), header files should be parsed with the same compiler (same version). All these factors may affect the result. Mangling for example, which still can not be implemented without errors in GNU GCC. These factors are so significant that even gtest could not overcome it. And in the documentation it says: you'd better build gtest as a part of the project by the same compiler and the same linker.
BWAPI-C
C is the lingua franca of software engineering. If rust-bindgen works well for the C language, why not implement BWAPI for C, and then use its API? Good idea!
Yes, it's a good idea until you look into the insides of BWAPI and see the number of classes and methods that you should implement. Especially all these memory layouts, asm codes, memory patching and other "horrors" that we do not have time for. It is necessary to use the existing solution completely.
But we need somehow to beat the mangling, C++ code, inheritance and virtual member functions.
In C++, there are two powerful tools that we will use to solve our problem: opaque pointers and extern "C".
extern "C" {} allows C++ code to "mask" itself under C. It makes it possible to generate function names without mangling.
Opaque pointers allow us to clear the type and create a pointer to "some type" without providing its implementation. Since this is only a declaration of some type, it is impossible to use this type by value, you can use it only by pointer.
Let's imagine that we have this C++ code:
namespace cpp {

struct Foo {
    int bar;

    virtual int get_bar() {
        return this->bar;
    }
};

} // namespace cpp
We can turn it into a C header:
extern "C" {

typedef struct Foo_ Foo; // Opaque pointer to Foo

// call cpp::Foo::get_bar
int Foo_get_bar(Foo* self);

}
And here is the C++ part that will be the link between the C header and the C++ implementation:
int Foo_get_bar(Foo* self) {
    // cast the opaque pointer to the certain cpp::Foo and call the method ::get_bar
    return reinterpret_cast<cpp::Foo*>(self)->get_bar();
}
Not all the methods of classes had to be processed this way. In BWAPI, there are classes that you can implement yourself using the fields of these structures, for example typedef struct Position { int x; int y; } Position; and methods like Position::get_distance.
There were classes that I had to treat in a special way. For example, AIModule should be a pointer to a C++ class with a specific set of virtual member functions. Nevertheless, here is header and implementation.
So, after several months of hard work, 554 methods and a dozen classes, the cross-platform library BWAPI-C was born, which allows you to create bots in C. A by-product was the possibility of cross-compilation and the ability to implement the API in any other language that supports FFI and the cdecl call convention.
If you are writing a library, please, write its API in C.
The most important feature of BWAPI-C is the broadest possible integration with other programming languages. Python,Ruby, Rust,PHP, Java and many many others are able to work with C, so if you iron out the kinks and implement own wrappers, you can also write a bot with their help.
Writing a bot in C
This part describes the general principles of the internal organization of Starcraft modules.
There are 2 types of bots: module and client. Let's look at an example of writing a module.
The module is a dynamic library. The general principle of loading dynamic libraries can be viewed here. The module should export 2 functions: newAIModule and gameInit.
gameInit is easy. This function is called to pass a pointer to a current game. This pointer is very important, because there is global static variable in the wilds of BWAPI, which is used in some sections of the code. Let's describe gameInit:
DLLEXPORT void gameInit(void* game) {
    BWAPIC_setGame(game);
}
newAIModule is a bit more complicated. It should return the pointer to a C++ class, which has a virtual method table with names like onXXXXX which are called on certain game events. Let's declare the structure of the module:
typedef struct ExampleAIModule
{
    const AIModule_vtable* vtable_;

    const char* name;
} ExampleAIModule;
The first field should be a pointer to the method table (it’s a kind of magic). Here is newAIModule function:
DLLEXPORT void* newAIModule() {
    ExampleAIModule* const module = (ExampleAIModule*) malloc( sizeof(ExampleAIModule) );
    module->name = "ExampleAIModule";
    module->vtable_ = &module_vtable;

    return createAIModuleWrapper( (AIModule*) module );
}
createAIModuleWrapper is another magic trick that turns the C pointer into the pointer to C++ class with virtual methods member functions.
module_vtable is a static variable on the method table, method values are filled with pointers to global functions:
static AIModule_vtable module_vtable = {
    onStart,
    onEnd,
    onFrame,
    onSendText,
    onReceiveText,
    onPlayerLeft,
    onNukeDetect,
    onUnitDiscover,
    onUnitEvade,
    onUnitShow,
    onUnitHide,
    onUnitCreate,
    onUnitDestroy,
    onUnitMorph,
    onUnitRenegade,
    onSaveGame,
    onUnitComplete
};

void onEnd(AIModule* module, bool isWinner) { }
void onFrame(AIModule* module) {}
void onSendText(AIModule* module, const char* text) {}
void onReceiveText(AIModule* module, Player* player, const char* text) {}
void onPlayerLeft(AIModule* module, Player* player) {}
void onNukeDetect(AIModule* module, Position target) {}
void onUnitDiscover(AIModule* module, Unit* unit) {}
void onUnitEvade(AIModule* module, Unit* unit) {}
void onUnitShow(AIModule* module, Unit* unit) {}
void onUnitHide(AIModule* module, Unit* unit) {}
void onUnitCreate(AIModule* module, Unit* unit) {}
void onUnitDestroy(AIModule* module, Unit* unit) {}
void onUnitMorph(AIModule* module, Unit* unit) {}
void onUnitRenegade(AIModule* module, Unit* unit) {}
void onSaveGame(AIModule* module, const char* gameName) {}
void onUnitComplete(AIModule* module, Unit* unit) {}
If you look at the name of the functions and their signatures, it is clear under what conditions and with what arguments they need to be called. For an example I made all the functions empty, except
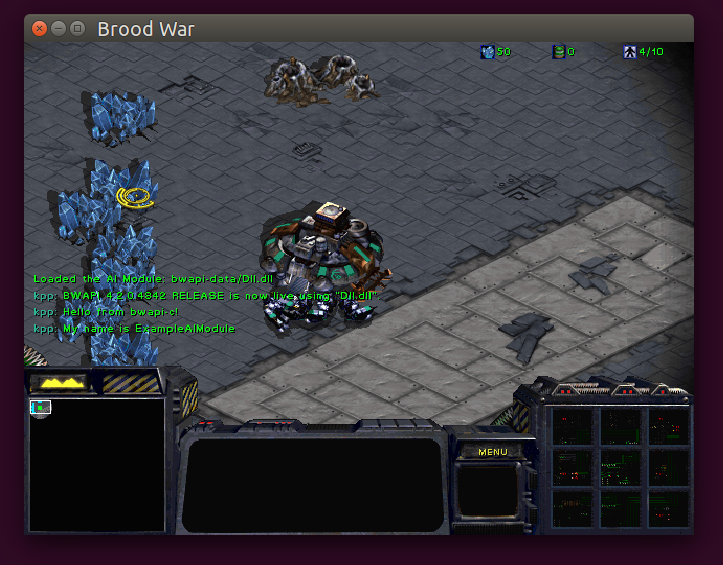
void onStart(AIModule* module) {
    ExampleAIModule* self = (ExampleAIModule*) module;
    Game* game = BWAPIC_getGame();
    Game_sendText(game, "Hello from bwapi-c!");
    Game_sendText(game, "My name is %s", self->name);
}
This function is called when the game runs. The argument is a pointer to the current module. BWAPIC_getGame returns a global pointer to the game, which we set using a call to BWAPIC_setGame. So, let's show a working example of cross-compiling a module:
bwapi-c/example$ tree
.
├── BWAPIC.dll
└── Dll.c

0 directories, 2 files

bwapi-c/example$ i686-w64-mingw32-gcc -mabi=ms -shared -o Dll.dll Dll.c -I../include -L. -lBWAPIC
bwapi-c/example$ cp Dll.dll ~/Starcraft/bwapi-data/
bwapi-c/example$ cd ~/Starcraft/bwapi-data/
Starcraft$ wine bwheadless.exe -e StarCraft.exe -l bwapi-data/BWAPI.dll --headful
...
...
...
Push the buttons and run the game. More information about compilation and execution can be found on the BWAPI website and in BWAPI-C.
The result of the module:
You can find a bit more complicated example of a module that shows how to work with iterators, unit management, mineral search, and statistics output in bwapi-c/example/Dll.c.
bwapi-sys
In the Rust ecosystem there is a certain way of naming packages that link to native libraries. Any package foo-sys executes two important functions:
- links with the native library libfoo;
- provides declarations to the functions from the libfoo library. But declarations only! High-level abstractions are not provided in *-sys crates.
In order for the *-sys package to be able to link successfully, you have to tell cargo to search for the native library and/or to build the library from the sources.
In order for the *-sys package to provide declarations, you need to either write them by yourself or generate them using bindgen. Again bindgen. Attempt number two =)
The generation of bindings is super easy:
bindgen BWAPI.h -o lib.rs \
  --opaque-type ".+_" \
  --blacklist-type "std.*|__.+|.+_$|Game_v(Send|Print|Draw).*|va_list|.+_t$" \
  --no-layout-tests \
  --no-derive-debug \
  --raw-line "#![allow(improper_ctypes, non_snake_case)]" \
  -- -I../submodules/bwapi-c/include

sed -i -r -- 's/.+\s+(.+)_;/pub struct \1;/' lib.rs
BWAPI.h is a file with of all the C headers from BWAPI-C.
For example, bindgen has already generated such declarations for the functions above:
extern "C" {
    /// BWAPIC_setGame must be called from gameInit to initialize BWAPI::BroodwarPtr
    pub fn BWAPIC_setGame(game: *mut Game);
}
extern "C" {
    pub fn BWAPIC_getGame() -> *mut Game;
}
There are two strategies: storing the generated code in the repository, and generating the code on the fly during the build. Both approaches have their advantages and disadvantages.
Glad to meet you bwapi-sys; one more little step to our goal.
Do you remember that earlier I was talking about cross-platform? nlinker joined the project and implemented a cunning strategy. If the target host is Windows, then download the already assembled BWAPIC from GitHub. And for the remaining targets we collect BWAPI-C from the sources for OpenBW (I'll tell you about it a bit later).
bwapi-rs
Now we have the bindings and we can define high-level abstractions. We have two types to work with: pure values and opaque pointers.
Everything is simple with pure values. Let's take colors as an example. We need to make it easy to use from Rust code in order to use colors in a convenient and natural way:
game.draw_line(CoordinateType::Screen, (10, 20), (30, 40), Color::Red);
                                                                  ^^^
So, for convenient use it would be necessary to define the enumeration with C++ constants but also idiomatic for Rust, and define methods of converting it in bwapi_sys::Color using std::convert::From:
// FFI version
#[repr(C)]
#[derive(Copy, Clone)]
pub struct Color {
    pub color: ::std::os::raw::c_int,
}

// Idiomatic version
#[derive(PartialEq, PartialOrd, Copy, Clone)]
pub enum Color {
    Black = 0,
    Brown = 19,
...
For your convenience you can use the enum-primitive-derive crate.
It is also easy to use opaque pointers. Let’s use Newtype pattern:
pub struct Player(*mut sys::Player);
It means that Player is a kind of structure with a private field — a raw opaque pointer from C. And here's the way you can define the Player::color:
impl Player {

    // so the method is declared Player::getColor in bwapi-sys
    //extern "C" {
    //    pub fn Player_getColor(self_: *mut Player) -> Color;
    //}

    pub fn color(&self) -> Color {
        // bwapi_sys::Player_getColor - wrapper function from BWAPI-C
        // self.0 - opaque pointer
        let color = unsafe { bwapi_sys::Player_getColor(self.0) };
        color.into() // cast bwapi_sys::Color -> Color
    }
}
Now we can write our first bot in Rust!
Creating a bot in Rust
As a proof of concept the bot will be similar to a well-known countru: the whole task is to hire workers and collect minerals.


Let's start with the required functions gameInit and newAIModule:
#[no_mangle]
pub unsafe extern "C" fn gameInit(game: *mut void) {
    bwapi_sys::BWAPIC_setGame(game as *mut bwapi_sys::Game);
}

#[no_mangle]
pub unsafe extern "C" fn newAIModule() -> *mut void {
    let module = ExampleAIModule { name: String::from("ExampleAIModule") };
    let result = wrap_handler(Box::new(module));

    result
}
#[no_mangle] performs the same function as extern "C" in C++. Inside wrap_handler all the magic occurs, with the substitution of the virtual function table and "masking" C++ class.
The definitions of the module structure is even simpler and fancier than in C:
struct ExampleAIModule {
    name: String,
}
Let's add a couple of methods for rendering the statistics and giving orders:
impl ExampleAIModule {
    fn draw_stat(&mut self) {
        let game = Game::get();
        let message = format!("Frame {}", game.frame_count());
        game.draw_text(CoordinateType::Screen, (10, 10), &message);
    }
    fn give_orders(&mut self) {
        let player = Game::get().self_player();

        for unit in player.units() {

            match unit.get_type() {
                UnitType::Terran_SCV |
                UnitType::Zerg_Drone |
                UnitType::Protoss_Probe => {
                    if !unit.is_idle() {
                        continue;
                    }

                    if unit.is_carrying_gas() || unit.is_carrying_minerals() {
                        unit.return_cargo(false);
                        continue;
                    }

                    if let Some(mineral) = Game::get()
                        .minerals()
                        .min_by_key(|m| unit.distance_to(m))
                    {
                        // WE REQUIRE MORE MINERALS
                        unit.right_click(&mineral, false);
                    }
                }

                UnitType::Terran_Command_Center => {
                    unit.train(UnitType::Terran_SCV);
                }

                UnitType::Protoss_Nexus => {
                    unit.train(UnitType::Protoss_Probe);
                }

                UnitType::Zerg_Hatchery |
                UnitType::Zerg_Lair |
                UnitType::Zerg_Hive => {
                    unit.train(UnitType::Zerg_Drone);
                }

                _ => {}
            };
        }
    }
}
To turn the ExampleAIModule type into a real module you need to make it respond to onXXXX events. To do so you need to implement the EventHandler type, which is an analog of the AIModule_vtable virtual table from C:
impl EventHandler for ExampleAIModule {
    fn on_start(&mut self) {
        Game::get().send_text(&format!("Hello from Rust! My name is {}", self.name));
    }
    fn on_end(&mut self, _is_winner: bool) {}
    fn on_frame(&mut self) {
        self.draw_stat();
        self.give_orders();
    }
    fn on_send_text(&mut self, _text: &str) {}
    fn on_receive_text(&mut self, _player: &mut Player, _text: &str) {}
    fn on_player_left(&mut self, _player: &mut Player) {}
    fn on_nuke_detect(&mut self, _target: Position) {}
    fn on_unit_discover(&mut self, _unit: &mut Unit) {}
    fn on_unit_evade(&mut self, _unit: &mut Unit) {}
    fn on_unit_show(&mut self, _unit: &mut Unit) {}
    fn on_unit_hide(&mut self, _unit: &mut Unit) {}
    fn on_unit_create(&mut self, _unit: &mut Unit) {}
    fn on_unit_destroy(&mut self, _unit: &mut Unit) {}
    fn on_unit_morph(&mut self, _unit: &mut Unit) {}
    fn on_unit_renegade(&mut self, _unit: &mut Unit) {}
    fn on_save_game(&mut self, _game_name: &str) {}
    fn on_unit_complete(&mut self, _unit: &mut Unit) {}
}
Building and running the module are as simple as for C:
bwapi-rs$ cargo build --example dll --target=i686-pc-windows-gnu
bwapi-rs$ cp ./target/i686-pc-windows-gnu/debug/examples/dll.dll ~/Starcraft/bwapi-data/Dll.dll
bwapi-rs$ cd ~/Starcraft/bwapi-data/
Starcraft$ wine bwheadless.exe -e StarCraft.exe -l bwapi-data/BWAPI.dll --headful
...
...
...
And the video of the work:
OpenBW
These guys went even further. They decided to write an open-source version of SC:BW! And they are good at it. One of their goals was to implement HD images, but SC:Remastered was ahead of them =( At this moment, you can use their API to write bots (yes, also in C++), but the most amazing feature is the ability to view replays directly in your browser.
Conclusion
There was an unsolved problem with the implementation: we do not control the references to be unique, so the existence of &mut and & to the same region will result in undefined behavior when the object is modified. Kind of a trouble. Halt tried to implement idiomatic bindings, but he did not manage to find a solution. Also if you want to complete this task, you have to carefully "shovel up" the C++ API and put the const qualifiers correctly.
I really enjoyed working on this project, I watched the replays 하루 종일 and deeply immersed in the atmosphere. This game made a 놀라운 dent in a universe. No game can be 비교할 수 없다 by popularity with SC: BW, and its impact on 대한민국 정치 에게 was unthinkable. Pro-gamers in Korea 아마도 are as popular as well as 드라마 주연 배우 들 Korean dorams broadcasting in prime time. 또한, 한국 에서 프로 게이머 라면 군대의 특별한 육군에 입대 할 수 수.
Long live StarCraft!
Links
Many thanks to Steve Klabnik for helping me with reviewing the article.
